Авто-макеты были введены в iOS 6.0. Когда мы используем автоматические макеты, наша цель развертывания должна быть 6.0 и выше. Авто-макеты помогают нам создавать интерфейсы, которые можно использовать для нескольких ориентаций и нескольких устройств.
Цель нашего примера
Мы добавим две кнопки, которые будут расположены на определенном расстоянии от центра экрана. Мы также попытаемся добавить текстовое поле с изменяемым размером, которое будет размещено на определенном расстоянии над кнопками.
Наш подход
Мы добавим текстовое поле и две кнопки в коде вместе с их ограничениями. Ограничения каждого элемента пользовательского интерфейса будут созданы и добавлены в суперпредставление. Нам придется отключить автоматическое изменение размеров для каждого из добавляемых элементов пользовательского интерфейса, чтобы получить желаемый результат.
Вовлеченные шаги
Шаг 1 — Создайте простое приложение на основе представления.
Шаг 2 — Мы будем редактировать только ViewController.m и это выглядит следующим образом —
#import "ViewController.h"

@interface ViewController ()
@property (nonatomic, strong) UIButton *leftButton;
@property (nonatomic, strong) UIButton *rightButton;
@property (nonatomic, strong) UITextField *textfield;

@end
@implementation ViewController

- (void)viewDidLoad {
   [super viewDidLoad];
   UIView *superview = self.view;

   /*1. Create leftButton and add to our view*/
   self.leftButton = [UIButton buttonWithType:UIButtonTypeRoundedRect];
   self.leftButton.translatesAutoresizingMaskIntoConstraints = NO;
   [self.leftButton setTitle:@"LeftButton" forState:UIControlStateNormal];
   [self.view addSubview:self.leftButton];

   /* 2. Constraint to position LeftButton's X*/
   NSLayoutConstraint *leftButtonXConstraint = [NSLayoutConstraint
   constraintWithItem:self.leftButton attribute:NSLayoutAttributeCenterX
   relatedBy:NSLayoutRelationGreaterThanOrEqual toItem:superview attribute:
   NSLayoutAttributeCenterX multiplier:1.0 constant:-60.0f];

   /* 3. Constraint to position LeftButton's Y*/
   NSLayoutConstraint *leftButtonYConstraint = [NSLayoutConstraint
   constraintWithItem:self.leftButton attribute:NSLayoutAttributeCenterY
   relatedBy:NSLayoutRelationEqual toItem:superview attribute:
   NSLayoutAttributeCenterY multiplier:1.0f constant:0.0f];

   /* 4. Add the constraints to button's superview*/
   [superview addConstraints:@[ leftButtonXConstraint,
   leftButtonYConstraint]];

   /*5. Create rightButton and add to our view*/
   self.rightButton = [UIButton buttonWithType:UIButtonTypeRoundedRect];
   self.rightButton.translatesAutoresizingMaskIntoConstraints = NO;
   [self.rightButton setTitle:@"RightButton" forState:UIControlStateNormal];
   [self.view addSubview:self.rightButton];

   /*6. Constraint to position RightButton's X*/
   NSLayoutConstraint *rightButtonXConstraint = [NSLayoutConstraint
   constraintWithItem:self.rightButton attribute:NSLayoutAttributeCenterX
   relatedBy:NSLayoutRelationGreaterThanOrEqual toItem:superview attribute:
   NSLayoutAttributeCenterX multiplier:1.0 constant:60.0f];

   /*7. Constraint to position RightButton's Y*/
   rightButtonXConstraint.priority = UILayoutPriorityDefaultHigh;
   NSLayoutConstraint *centerYMyConstraint = [NSLayoutConstraint
   constraintWithItem:self.rightButton attribute:NSLayoutAttributeCenterY
   relatedBy:NSLayoutRelationGreaterThanOrEqual toItem:superview attribute:
   NSLayoutAttributeCenterY multiplier:1.0f constant:0.0f];
   [superview addConstraints:@[centerYMyConstraint,
   rightButtonXConstraint]];

   //8. Add Text field
   self.textfield = [[UITextField alloc]initWithFrame:
   CGRectMake(0, 100, 100, 30)];
   self.textfield.borderStyle = UITextBorderStyleRoundedRect;
   self.textfield.translatesAutoresizingMaskIntoConstraints = NO;
   [self.view addSubview:self.textfield];

   //9. Text field Constraints
   NSLayoutConstraint *textFieldTopConstraint = [NSLayoutConstraint
   constraintWithItem:self.textfield attribute:NSLayoutAttributeTop
   relatedBy:NSLayoutRelationGreaterThanOrEqual toItem:superview
   attribute:NSLayoutAttributeTop multiplier:1.0 constant:60.0f];
   NSLayoutConstraint *textFieldBottomConstraint = [NSLayoutConstraint
   constraintWithItem:self.textfield attribute:NSLayoutAttributeTop
   relatedBy:NSLayoutRelationGreaterThanOrEqual toItem:self.rightButton
   attribute:NSLayoutAttributeTop multiplier:0.8 constant:-60.0f];
   NSLayoutConstraint *textFieldLeftConstraint = [NSLayoutConstraint
   constraintWithItem:self.textfield attribute:NSLayoutAttributeLeft
   relatedBy:NSLayoutRelationEqual toItem:superview attribute:
   NSLayoutAttributeLeft multiplier:1.0 constant:30.0f];
   NSLayoutConstraint *textFieldRightConstraint = [NSLayoutConstraint
   constraintWithItem:self.textfield attribute:NSLayoutAttributeRight
   relatedBy:NSLayoutRelationEqual toItem:superview attribute:
   NSLayoutAttributeRight multiplier:1.0 constant:-30.0f];
   [superview addConstraints:@[textFieldBottomConstraint ,
   textFieldLeftConstraint, textFieldRightConstraint,
   textFieldTopConstraint]];
}

- (void)didReceiveMemoryWarning {
   [super didReceiveMemoryWarning];
   // Dispose of any resources that can be recreated.
}
@end
Указывает на заметку
В шагах с отметками 1, 5 и 8 мы просто программно добавили две кнопки и текстовое поле соответственно.
В оставшихся шагах мы создали ограничения и добавили эти ограничения к соответствующим супер-представлениям, которые на самом деле являются само-представлениями. Ограничения одной из левых кнопок, как показано ниже —
NSLayoutConstraint *leftButtonXConstraint = [NSLayoutConstraint
constraintWithItem:self.leftButton attribute:NSLayoutAttributeCenterX
relatedBy:NSLayoutRelationGreaterThanOrEqual toItem:superview attribute:
NSLayoutAttributeCenterX multiplier:1.0 constant:-60.0f];
У нас есть constraintWithItem и toItem, которые определяют, между какими элементами пользовательского интерфейса мы создаем ограничение. Атрибут определяет, на каком основании эти два элемента связаны между собой. «relatedBy» определяет степень влияния атрибутов на элементы. Multiplier — это коэффициент умножения, а константа будет добавлена в множитель.
В приведенном выше примере X leftButton всегда больше или равен -60 пикселей по отношению к центру суперпредставления. Точно так же определены другие ограничения.
Выход
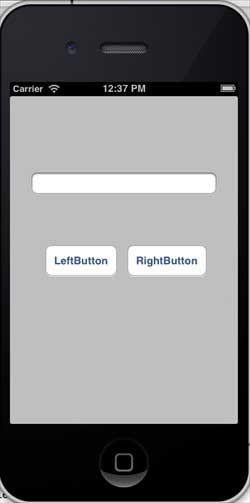
Когда мы запустим приложение, мы получим следующий вывод на симуляторе iPhone —
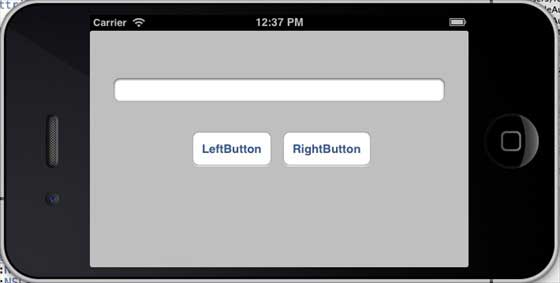
Когда мы изменим ориентацию симулятора на ландшафт, мы получим следующий результат:
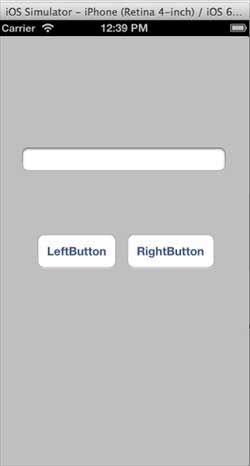
Когда мы запустим то же самое приложение на симуляторе iPhone 5, мы получим следующий результат:
Когда мы изменим ориентацию симулятора на ландшафт, мы получим следующий результат: