Меню
навигации по холстам в HTML5 с помощью Fire Задумывались ли вы о создании интерактивного меню навигации в HTML5 непосредственно в элементе canvas? Да, это странная идея, но это возможно. Я подготовил наше первое чистое html5 меню холста (в основном — это набор кнопок). Мы создадим эти кнопки с эффектом огня внизу. Вы сможете установить пользовательские действия щелчка для элементов меню.
Live Demo
предварительный просмотр
Шаг 1. HTML-разметка
По сути, наша HTML-разметка сегодня очень проста:
<!DOCTYPE html>
<html lang="en" >
    <head>
        <meta charset="utf-8" />
        <title>HTML5 Canvas Navigation menu with Fire | Script Tutorials</title>
        <link rel="stylesheet" href="css/main.css" type="text/css" />
        <script src="js/vector2d.js"></script>
        <script src="js/fire_menu.js"></script>
    </head>
    <body>
        <canvas id="panel" width="1000px" height="100px">HTML5 compliant browser required</canvas>
        <img id="image" src="images/bg.jpg"  />
    </body>
</html>
Существует только один элемент canvas. Плюс — одно изображение сразу после этого холста.
Шаг 2. JS
Теперь мы должны создать новый пустой файл ‘js / fire_menu.js’ и поместить следующий код внутрь:
// Button object
function Button(x, y, w, h, state, image, text) {
    this.x = x;
    this.y = y;
    this.w = w;
    this.h = h;
    this.state = state;
    this.imageShift = 0;
    this.image = image;
    this.text = text;
}

// Draw Button function
function drawButton(ctx, button) {
    // draw button image
    ctx.drawImage(button.image, 0, button.imageShift, button.w, button.h, button.x, button.y, button.w, button.h);

    // and text
    ctx.fillText(button.text, button.x + button.w / 2, 5 + button.y + button.h / 2);
}

// Get mouse position function
function getMousePosition(e){
    if (!e){
        var e = window.event;
    }
    if (e.pageX || e.pageY){
        return new vector2d(e.pageX, e.pageY);
    } else if (e.clientX || e.clientY){
        return new vector2d(e.clientX, e.clientY);
    }
}

// Inner variables
var canvas, ctx;
var data_width;
var data_height;
var colors = [];
var out_data = [];
var buttons = [];

// Fill new array with certain value
function fill_new_array(len, val) {
    var rv = new Array(len);
    while (--len >= 0) {
        rv[len] = val;
    }
    return rv;
}

// Prepare palette function
function prepare_palette() {
    for (var i = 0; i < 64; ++i) {
        colors[i + 0] = {r: 0, g: 0, b: i << 1, a: i};
        colors[i + 64] = {r: i << 3, g: 0, b: 128 - (i << 2), a: i+64};
        colors[i + 128] = {r: 255, g: i << 1, b: 0, a: i+128};
        colors[i + 192] = {r: 255, g: 255, b: i << 2, a: i+192};
    }
}

// Draw Main scene
function drawScene() {
    ctx.clearRect(0, 0, ctx.canvas.width, ctx.canvas.height); // clear canvas

    // Draw fire
    var data_cnt = data_width * (data_height - 1);
    for (var i = 0; i < data_width; i++) {
        out_data[data_cnt + i] = (0.6 > Math.random()) ? 255 : 20;
    }
    for (var y = 0; y < 100; y++){
        for (var x = 10; x < data_width - 10; x++){
            var s = data_cnt + x;

            var temp_data = out_data[s] + out_data[s + 1] + out_data[s - 1] + out_data[s - data_width];
            temp_data >>= 2;
            if (temp_data > 1){
                temp_data -= 1;
            }
            temp_data <<= 0;

            out_data[s - data_width] = temp_data;

            var id = s << 2;
            img_data.data[id + 0] = colors[temp_data].r;
            img_data.data[id + 1] = colors[temp_data].g;
            img_data.data[id + 2] = colors[temp_data].b;
            img_data.data[id + 3] = colors[temp_data].a;
        }
        data_cnt -= data_width;
    }
    ctx.putImageData(img_data, 0, 0);

    // Prepare font
    ctx.font = '26px DS-Digital';
    ctx.fillStyle = '#000000';
    ctx.textAlign = "center";

    // Draw all the buttons
    for (var ib = 0; ib < buttons.length; ib++) { //
        drawButton(ctx, buttons[ib]);
    }
}

// Window Onload event handler
if (window.attachEvent) {
    window.attachEvent('onload', main_init);
} else {
    if(window.onload) {
        var curronload = window.onload;
        var newonload = function() {
            curronload();
            main_init();
        };
        window.onload = newonload;
    } else {
        window.onload = main_init;
    }
}

// Main initialization
function main_init() {

    // Create canvas and context objects
    canvas = document.getElementById('panel');
    ctx = canvas.getContext('2d');

    // Prepare data for our fire object and prepare palette
    img_data = ctx.createImageData(canvas.width, canvas.height);
    data_width = img_data.width,
    data_height = img_data.height,
    prepare_palette();

    // Fill new array with 0
    out_data = fill_new_array(data_width * data_height, 0)

    // Prepare image to buttons
    var buttonImage = new Image();
    buttonImage.src="images/button.png";
    buttonImage.onload = function() {};

    // Prepare 3 different buttons
    buttons.push(new Button(0, 10, 245, 62, 'normal', buttonImage, 'button #1'));
    buttons.push(new Button(250, 10, 245, 62, 'normal', buttonImage, 'button #2'));
    buttons.push(new Button(500, 10, 245, 62, 'normal', buttonImage, 'button #3'));
    buttons.push(new Button(750, 10, 245, 62, 'normal', buttonImage, 'button #4'));

    // Loop main scene
    setInterval(drawScene, 40);

    // Onmousemove event handler
    canvas.onmousemove = function(e) {
        var mouse = getMousePosition(e).sub(new vector2d(canvas.offsetLeft, canvas.offsetTop));

        for (var i = 0; i < buttons.length; i++) { // Apply 'hover' state for buttons
            if (buttons[i].state != 'pressed') {
                buttons[i].state = 'normal';
                buttons[i].imageShift = 0;
                if (mouse.x > buttons[i].x && mouse.x < buttons[i].x+buttons[i].w && mouse.y > buttons[i].y && mouse.y < buttons[i].y+buttons[i].h) {
                    buttons[i].state = 'hover';
                    buttons[i].imageShift = 136;
                }
            }
        }
    }

    // Onmousedown event handler
    canvas.onmousedown = function(e) {
        var mouse = getMousePosition(e).sub(new vector2d(canvas.offsetLeft, canvas.offsetTop));

        for (var i = 0; i < buttons.length; i++) { // Apply 'pressed' state for buttons
            if (mouse.x > buttons[i].x && mouse.x < buttons[i].x+buttons[i].w && mouse.y > buttons[i].y && mouse.y < buttons[i].y+buttons[i].h) {
                buttons[i].state = 'pressed';
                buttons[i].imageShift = 68;
            }
        }
    }

    // Onmouseup event handler
    canvas.onmouseup = function(e) {
        var mouse = getMousePosition(e).sub(new vector2d(canvas.offsetLeft, canvas.offsetTop));

        for (var i = 0; i < buttons.length; i++) { // Reset states for buttons
            if (mouse.x > buttons[i].x && mouse.x < buttons[i].x+buttons[i].w && mouse.y > buttons[i].y && mouse.y < buttons[i].y+buttons[i].h) {
                alert(buttons[i].text + ' is pushed');
            }

            buttons[i].state = 'normal';
            buttons[i].imageShift = 0;
        }
    }
}
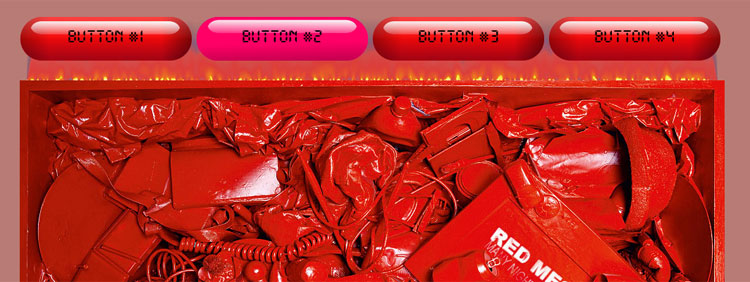
Основная идея нашего меню — поместить несколько кнопок в элемент canvas, а затем — добавить обработчики событий. Также в качестве дополнительной функции — анимированный огонь на заднем плане. Эта демонстрация может принести вам новые идеи для ваших проектов.
Шаг 3. Дополнительные файлы
Возможно, вы заметили, что я использую файлы дополнений в нашем проекте: main.css, Ds-digib.ttf, bg.jpg, button.png и vector2d.js. Все эти файлы доступны в нашем пакете загрузки.
Live Demo
Вывод
Я надеюсь, что вам понравятся наши эксперименты html5. Добро пожаловать.