При создании одностраничных приложений многие разработчики Vue забывают о UX для навигации по браузеру. Они ошибочно полагают, что этот вид навигации совпадает с навигацией по гиперссылкам, хотя на самом деле она может быть совершенно другой.
В отличие от навигации по гиперссылкам, если пользователь переходит вперед и назад между страницами, он ожидает, что страница все равно будет выглядеть так, как он вернулся, или он будет считать UX «странным» или «раздражающим».
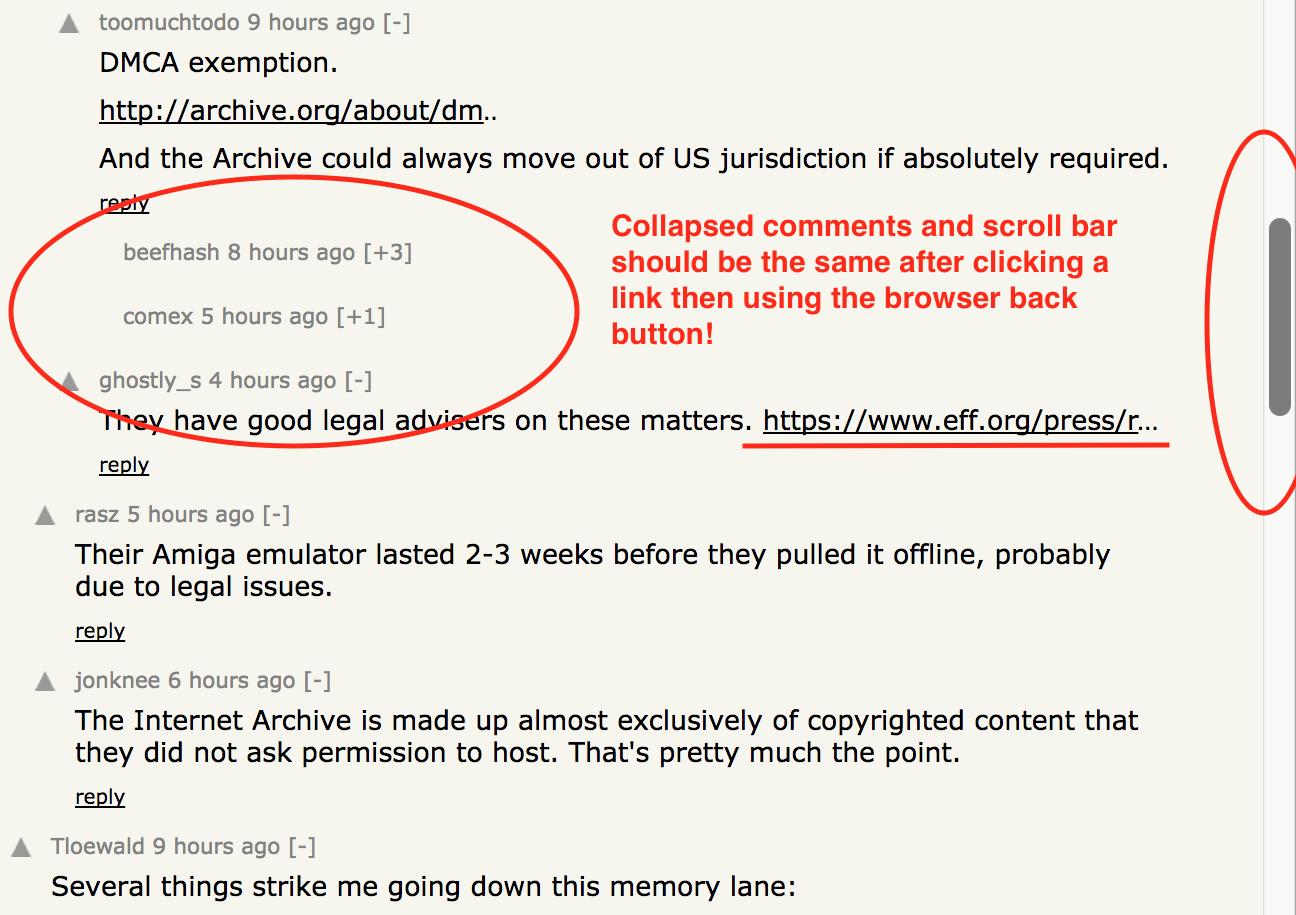
Например, если я просматривал ветку в Hacker News и прокручивал до комментария и сворачивал его, то переходил на другую страницу, затем нажимал «назад», и я ожидал, что все еще будет прокручиваться до комментария. и чтобы это все еще было рухнуло!
Однако в приложении Vue.js это не стандартное поведение; положение прокрутки и данные приложения не сохраняются по умолчанию. Нам нужно сознательно настроить наше приложение, чтобы обеспечить плавный и предсказуемый UX для кнопок навигации браузера.
Настройка Vue Router
Роль Vue Router в оптимальном UX вперед и назад заключается в управлении поведением прокрутки . Ожидания пользователя с этим будут:
- При перемещении назад и вперед вернитесь к предыдущей позиции прокрутки.
- При навигации по ссылкам прокручивайте вверх.
We can achieve this by adding a scrollBehavior callback to our router configuration. Note that savedPosition is made available when using the browser back and forward buttons and not when using hyperlinks.
const scrollBehavior = (to, from, savedPosition) => {
  if (savedPosition) {
    return savedPosition
  } else {
      position.x = 0
      position.y = 0
    }
    return position
  }
}

const router = new VueRouter({
  mode: 'history',
  scrollBehavior,
  routes: []
})
More comprehensive scroll behavior settings can be found in this example.
State Persistence
Even more critical than scroll behavior is persisting the state of the app. For example, if a user makes a selection on page 1, then navigates to page 2, then back to page 1, they expect the selection to be persisted.
In the naive implementation below, Foo‘s checked state will not persist between route transitions. When the route changes, Vue destroys Foo and replaces it with Home, or vice versa. As we know with components, the state is created freshly on each mount.
const Foo = Vue.component('foo', {
  template: '<div @click="checked = !checked">{{ message }}</div>',
  data () {
    return { checked: false };
  }
  computed: {
    message() {
      return this.checked ? 'Checked' : 'Not checked';
    }
  }
});

const router = new VueRouter({
  mode: 'history',
  scrollBehavior,
  routes: [
    { path: '/', component: Home },
    { path: '/bar', component: Foo }
  ]
});
This would be equivalent to uncollapsing all the comments you collapsed in Hacker News when you navigate back to an article’s comments, i.e. very annoying!
keep-alive
The special keep-alive component can be used to alleviate this problem. It tells Vue not to destroy any child components when they’re no longer in the DOM, but instead, keep them in memory. This is useful not just for a route transition, but even when v-if takes a component in and out of a page.
<div id="app">
  <keep-alive>
    <router-view></router-view>
  </keep-alive>
</div>
The advantage of using keep-alive is that’s it’s very easy to setup; it can be simply wrapped around a component and it works as expected.
Vuex
There’s a scenario where keep-alive will not be sufficient: what if the user refreshes the page or clicks back and forward to another website? The data would be wiped and we’re back to square one. A more robust solution than keep-alive is to use the browser’s local storage to persist component state.
Since HTML5, we’ve been able to use the browser to store a small amount of arbitrary data. The easiest way to do this is to first set up a Vuex store. Any data that needs to be cached between route transitions or site visits go in the store. Later we will persist it to local storage.
Let’s now modify our example above to use Vuex to store Foo‘s checked state:
const store = new Vuex.Store({
  state: {
    checked: false
  },
  mutations: {
    updateChecked(state, payload) {
      state.checked = payload;
    }
  }
});

const Foo = Vue.component('foo', {
  template: '<div @click="checked">{{ message }}</div>',
  methods: {
    checked() {
      this.$store.commit('updateChecked', !this.$store.state.checked);
    }
  },
  computed: {
    message() {
      return this.$store.state.checked ? 'Checked' : 'Not checked';
    }
  }
});
We can now get rid of the keep-alive as changing the page will no longer destroy the state information about our component as Vuex persists across routes.
Local Storage
Now, every time the Vuex store is updated, we want to store a snapshot of it in local storage. Then when the app is first loaded we can check if there’s any local storage and use it to seed our Vuex store. This means that even if we navigate to another URL we can persist our state.
Fortunately, there’s a tool for this already: vuex-localstorage. It’s really easy to setup and integrate into Vuex. Below is everything you need to get it to do what was just described:
import createPersist from 'vuex-localstorage';

const store = new Vuex.Store({
  plugins: [ createPersist({
    namespace: 'test-app',
    initialState: {},
    expires: 7 * 24 * 60 * 60 * 1000
  }) ],
  state: {
    checked: false
  },
  mutations: {
    updateChecked(state, payload) {
      state.checked = payload;
    }
  }
});
Back and Forward UX vs. Hyperlink UX
You may want to differentiate behavior between the back and forward navigation and hyperlink navigation. We expect data in the back and forward navigation to persist, while in hyperlink navigation it should not.
For example, returning to Hacker News, a user would expect comment collapse to be reset if you navigate with hyperlinks back to the front page and then back into a thread. Try it for yourself and you’ll notice this subtle difference in your expectation.
In a Vue app, we can simply add a navigation guard to our home route where we can reset any state variables:
const router = new VueRouter({
  mode: 'history',
  scrollBehavior,
  routes: [
    { path: '/', component: Home, beforeEnter(to, from, next) {
      store.state.checked = false;
      next();
    } },
    { path: '/bar', component: Foo }
  ]
});