В прошлом месяце я экспериментировал с API Web Audio. В настоящее время я смотрю, как вы можете использовать этот API для создания звуков роботов, и искал хороший способ представить это. В качестве быстрого побочного проекта я решил создать анимированный HAL 9000 с использованием HTML5 Canvas. В этой статье я быстро расскажу вам, как я это сделал. Если вы нажмете на изображение ниже, вы найдете простую созданную мной звуковую панель, которая анимирует светящийся свет HAL каждый раз, когда вы выбираете звуковой фрагмент. Звуковые фрагменты воспроизводятся с использованием элемента HTML5 Audio, поэтому должны работать в большинстве современных браузеров. Вы можете сразу увидеть пример , перейдя по этой ссылке или нажав на изображение:
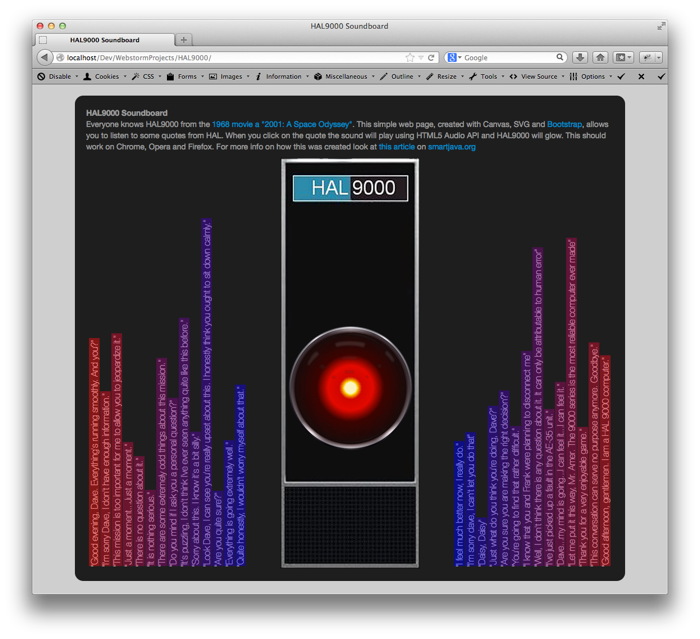
Nothing to special happens in this demo, but there are a couple of interesting things here. In this article we’ll look at the following subjects:
- Recreating HAL9000 animation using Canvas
- Rotating and printing text
- Playing sound using the HTML5 Audio element
Lets start with the Canvas based HAL9000 implementation.
Recreating HAL9000 animation using Canvas
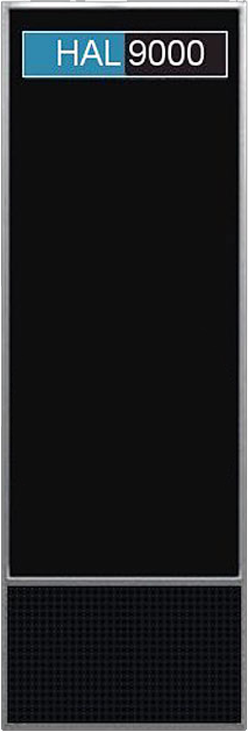
The HAL9000 animation was created using a couple of static images and a radial context. First lets look at the static images. Based on a standard background that showed HAL, I used photoshop to extract the static parts. Basically this consisted of the HAL9000 border:
And a transparent image showing the ring:
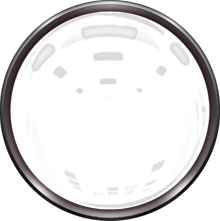
These two elements are added to the canvas by using the context.drawImage function. So what we do is the following:
- First we draw the background
- Next we draw the ‘eye’ as a radialGradient
- Finally we overlay the ring
In code this looks something like this:
 var canvas = document.getElementById('myCanvas');
    var context = canvas.getContext('2d');
    var img = new Image();

    var width = 220;
    var height = 220;

    var bck = new Image();
    bck.src= "background.png";
    bck.onload = function() {

        img.onload = function(){
            // create radial gradient
            var grd = context.createRadialGradient(15+width/2, 300+height/2, 10, 15+width/2, 300+height/2, height/2);
            grd.addColorStop(0, '#faf4c3');
            grd.addColorStop(0.025, '#fecf00');
            grd.addColorStop(0.1, '#d00600');
            grd.addColorStop(0.3, '#e30900');
            grd.addColorStop(0.5, '#3c0300');
            grd.addColorStop(1, '#0e0e0e');

            context.drawImage(bck,0,0);
            context.fillStyle = grd;
            context.fillRect(10,300,width,height);
            context.drawImage(img,15,300);
        };
        img.src = 'hal-ring-2.png';
    };
As you can see we first draw the background, next we draw the gradient, and finally we overlay the ring. Now, by playing with the «colorstops» we can animate the eye.
 $(change).animate({
            pos1: 0,
            pos2: 0.025,
            pos3: 0.1,
            pos4: 0.4,
            pos5: 0.87
        },{ duration: duration/2, step:function(now, fx) {

            context.clearRect ( 0 , 0 , 578 , 600 );
            context.drawImage(bck,0,0);
            grd = context.createRadialGradient(15+width/2, 300+height/2, 10, 15+width/2, 300+height/2, height/2);
            grd.addColorStop(change.pos1, '#faf4c3');
            grd.addColorStop(change.pos2, '#fecf00');
            grd.addColorStop(change.pos3, '#d00600');
            grd.addColorStop(change.pos4, '#e30900');
            grd.addColorStop(change.pos5, '#3c0300');
            grd.addColorStop(1, '#0e0e0e');

            context.fillStyle = grd;
            context.fillRect(10,300,width,height);
            context.drawImage(img,15,300);

        }})
Rotating and printing text
I wanted to create something like a frequency analyzer for the quotes. You can see this in the image as the vertical bars to the left and to the right of HAL. I started out by rotating divs, but because CSS3 rotations are applied after layout, I had trouble getting the correct layout. So I did the same thing I always do when I can’t get the desired effect using divs, and turn to svg. More specifically to d3.js.
With d3.js it’s very easy to create SVG elements and manipulate them. To get the desired effect I had to take the following steps:
- First, render each elemetn as an svg:text with a specific font
- Use the boundingbox to determine how much we need to move it to align to the bottom
- Rotate and translate to correct position
- Use the boundingbox to draw an exact rectangle around the text
In code it looks like this, where this function takes the id of the div to add the text elements to. Texts contains a list of elements ({txt: «\»I feel much better now, I really do.\»»,file:»better.wav»}) that can be used to set the label and indicate the audio file to play. xOffset is used to position the text nicely in the divs and the scale is a colorscale used to determine the background color of the rectangles.
   function addTexts(addTo, texts, xOffset, scale) {

        // create the svg element
        var svg = d3.select(addTo).append("svg:svg")
                .attr("width", svgWidth)
                .attr("id",addTo+"svg")
                .attr("height", svgHeight);

        // for this element create text elements to hold the quotes
        svg.selectAll("text")
                 .data(texts)
                 .enter().append("svg:text")
                 .attr("x", 0)
                 .attr("y", 0)
                 .attr("dy", ".35em")
                 .attr("fill","white")
                 .attr("text-anchor", "middle")
                 .style("font", "100 16px Helvetica Neue")
                 .text(function(d) {return d.txt});


        // Now we can update all the texts based on their rendered size
        var bboxs = [];
        svg.selectAll("text")
                .attr("transform", function(d,i) {
                    bboxs[i]=this.getBBox();
                    return "rotate(-90) translate(" + -(svgHeight+this.getBBox().x) + "," + (xOffset + (i*20)) +")"}
        );

        svg.selectAll("rect")
                .data(texts)
                .enter().append("svg:rect")
                    .attr("x", 0)
                    .attr("y", 0)
                    .attr("width", function(d,i) {return bboxs[i].width})
                    .attr("height", function(d,i) {return bboxs[i].height})
                    .attr("transform",function(d,i) {return "rotate(-90) translate(" + -(svgHeight+bboxs[i].height-21) + "," + (xOffset-10 + (i*20)) +")" })
                    .on("click", function(d,i) { playSound(d.file) })
                    .style("fill", function(d,i) {return scale.getColor(i/texts.length).hex()})
                    .style("fill-opacity", ".5")
As you can see we also added an addClick event on the rectangle in this piece of code. When this is clicked the playSound function is called with the name of the audio file as it’s parameter.
Playing sound using the HTML5 Audio element
What happens when the rectangle is clicked is shown here:
 var snd = new Audio();
    snd.addEventListener("play",onPlay);
    snd.addEventListener("durationchange",onDurationChange);

    function playSound(file) {
        snd.setAttribute("src","sounds/" + file);
        snd.load();
        snd.play();
    }

    function onDurationChange(e) {
        console.log(snd.duration);
        if (snd.duration != undefined) {
              animate(snd.duration*1000);
        }
    }
The sound is loaded, and when the sound is loaded the animation starts. And we start the animation as soon as we know how long the sound will play. We do this so the animation plays as long as the sound is heard.
And that’s it. Nothing to complex, but it nicely shows how easy it is to create nice effects using Canvas, HTML5 Audio and SVG.