При написании модулей Zend Expressive я научился нескольким трюкам, которыми хочу поделиться с вами.
Пожалуйста, следуйте предыдущему посту, чтобы создать правильную рабочую среду. Я объяснил, как установить и настроить Zend Expressive с Doctrine, Gulp и фабрикой абстрактных отражений — это займет всего 10 минут.
В этом руководстве мы за считанные минуты создадим простой модуль блога, доступный только для чтения (страница, содержащая записи блога из базы данных), демонстрируя тот тип быстрого развития, на который способен Zend Expressive.
Настройка модуля
Запустите эту команду из вашего выразительного приложения, чтобы начать:
./vendor/bin/expressive module:create Blog
Это сгенерирует некоторый базовый код для модуля блога и автоматически зарегистрирует ваш модуль в вашем приложении. Он также зарегистрирует ваш модуль в автозагрузчике Composer.
Учение сущности и таблица базы данных
Давайте сделаем наш блог сущности и таблицы базы данных. Во-первых, мы должны сообщить нашему приложению, что этот модуль предоставляет сущности Doctrine.
Откройте src/Blog/src/ConfigProvider.php
 public function __invoke()
{
    return [
        'dependencies' => $this->getDependencies(),
        'doctrine'     => $this->getDoctrine(),
        'templates'    => $this->getTemplates(),
    ];
}

/**
 * @return array
 */
public function getDoctrine(): array
{
    return [
        'driver' => [
            'orm_default' => [
                'drivers' => [
                    'Blog\Entity' => 'blog_entity',
                ],
            ],
            'blog_entity' => [
                'class' => \Doctrine\ORM\Mapping\Driver\SimplifiedYamlDriver::class,
                'cache' => 'array',
                'paths' => [
                    dirname(__DIR__) . '/config/doctrine' => 'Blog\Entity',
                ],
            ],
        ],
    ];
}
Создайте конфигурацию сущности поста в блоге в src/Blog/config/doctrine/BlogPost.orm.yml
 ---
Blog\Entity\BlogPost:
  type: entity
  table: blog_post
  id:
    id:
      type: integer
      generator:
        strategy: AUTO
  fields:
    title:
      type: string
      length: 255
    content:
      type: string
      length: 16777215
Затем запустите ./vendor/bin/doctrine orm:generate-entities src
К сожалению, Doctrine не поддерживает и, вероятно , не будет поддерживать PSR-4, потому что стандарт не предусматривает структуру каталогов.
Чтобы обойти это, нам нужно переместить src/Blog/Entitysrc/Blog/src/Entity
Затем выполните эту команду, чтобы создать таблицу базы данных:
./vendor/bin/doctrine orm:schema-tool:create
Теперь вы можете заполнить таблицу базы данных, выполнив следующий SQL:
 INSERT INTO expressive.blog_post VALUES
(null, 'Post 1', 'Lorem ipsum dolor sit amet, consectetur adipiscing elit.'),
(null, 'Post 2', 'Mauris in libero laoreet, euismod lorem eget, tincidunt justo.'),
(null, 'Post 3', 'Donec sed diam congue, ultrices tellus at, venenatis felis.');
Маршрутизация
Модули в Expressive не регистрируют свои собственные маршруты. Мы можем сделать их
сделайте это, однако, с этим удобным трюком. Вам не нужно это понимать. Просто поместите файлы на место и знайте, что это работает.
Создайте src/Blog/src/Factory/RoutesDelegator.php
 <?php

namespace Blog\Factory;

use Blog\Action;
use Psr\Container\ContainerInterface;
use Zend\Expressive\Application;

class RoutesDelegator
{
    /**
     * @param ContainerInterface $container
     * @param string $serviceName Name of the service being created.
     * @param callable $callback Creates and returns the service.
     * @return Application
     */
    public function __invoke(ContainerInterface $container, $serviceName, callable $callback)
    {
        /** @var $app Application */
        $app = $callback();

        include __DIR__ . '/../../config/routes.php';

        return $app;
    }
}
В src/Blog/src/ConfigProvider.phpgetDependencies()
 'delegators' => [
    \Zend\Expressive\Application::class => [
        Factory\RoutesDelegator::class,
    ],
],
Теперь вы можете создать файл src/Blog/config/routes.php
 <?php
/**
 * Setup routes with a single request method:
 * @var \Zend\Expressive\Application $app
 *
 * $app->post('/album', App\Action\AlbumCreateAction::class, 'album.create');
 * $app->put('/album/:id', App\Action\AlbumUpdateAction::class, 'album.put');
 * $app->patch('/album/:id', App\Action\AlbumUpdateAction::class, 'album.patch');
 * $app->delete('/album/:id', App\Action\AlbumDeleteAction::class, 'album.delete');
 *
 * Or with multiple request methods:
 *
 * $app->route('/contact', App\Action\ContactAction::class, ['GET', 'POST', ...], 'contact');
 *
 * Or handling all request methods:
 *
 * $app->route('/contact', App\Action\ContactAction::class)->setName('contact');
 *
 * or:
 *
 * $app->route(
 *     '/contact',
 *     App\Action\ContactAction::class,
 *     Zend\Expressive\Router\Route::HTTP_METHOD_ANY,
 *     'contact'
 * );
 */

use Blog\Action;

// Setup routes:
$app->get('/blog', Action\BlogPostListAction::class, 'blog_post_list');
$app->get('/blog/view/:blog_post_id', Action\BlogPostViewAction::class, 'blog_post_view');
действия
Затем нам нужно создать действие для ответа на каждый маршрут.
Создайте src/Blog/src/Action/BlogPostListAction.php
 <?php

namespace Blog\Action;

use Blog\Entity\BlogPost;
use Doctrine\ORM\EntityManager;
use Interop\Http\ServerMiddleware\DelegateInterface;
use Interop\Http\ServerMiddleware\MiddlewareInterface as ServerMiddlewareInterface;
use Psr\Http\Message\ServerRequestInterface;
use Zend\Diactoros\Response\HtmlResponse;
use Zend\Expressive\Router;
use Zend\Expressive\Template;

class BlogPostListAction implements ServerMiddlewareInterface
{
    /**
     * @var Template\TemplateRendererInterface
     */
    private $templateRenderer;
    /**
     * @var EntityManager
     */
    private $entityManager;

    public function __construct(
        EntityManager $entityManager,
        Template\TemplateRendererInterface $templateRenderer = null
    ) {
        $this->templateRenderer = $templateRenderer;
        $this->entityManager = $entityManager;
    }

    public function process(ServerRequestInterface $request, DelegateInterface $delegate)
    {
        $posts = $this->entityManager->getRepository(BlogPost::class)
            ->findAll();
        $data = [
            'posts' => $posts,
        ];

        return new HtmlResponse($this->templateRenderer->render('blog::list', $data));
    }
}
Создайте src/Blog/src/Action/BlogPostViewAction.php
 <?php

namespace Blog\Action;

use Blog\Entity\BlogPost;
use Doctrine\ORM\EntityManager;
use Interop\Http\ServerMiddleware\DelegateInterface;
use Interop\Http\ServerMiddleware\MiddlewareInterface as ServerMiddlewareInterface;
use Psr\Http\Message\ServerRequestInterface;
use Zend\Diactoros\Response\HtmlResponse;
use Zend\Expressive\Router;
use Zend\Expressive\Router\RouteResult;
use Zend\Expressive\Template;

class BlogPostViewAction implements ServerMiddlewareInterface
{
    /**
     * @var Router\RouterInterface
     */
    private $router;
    /**
     * @var Template\TemplateRendererInterface
     */
    private $templateRenderer;
    /**
     * @var EntityManager
     */
    private $entityManager;

    public function __construct(
        EntityManager $entityManager,
        Router\RouterInterface $router,
        Template\TemplateRendererInterface $templateRenderer = null
    ) {

        $this->router = $router;
        $this->templateRenderer = $templateRenderer;
        $this->entityManager = $entityManager;
    }

    public function process(ServerRequestInterface $request, DelegateInterface $delegate)
    {
        /** @var RouteResult $routeResult */
        $routeResult = $request->getAttribute(RouteResult::class);
        $routeMatchedParams = $routeResult->getMatchedParams();
        if (empty($routeMatchedParams['blog_post_id'])) {
            throw new \RuntimeException('Invalid route: "blog_post_id" not set in matched route params.');
        }
        $blogId = $routeMatchedParams['blog_post_id'];

        /** @var BlogPost $blogPost */
        $blogPost = $this->entityManager->find(BlogPost::class, $blogId);
        if (!$blogPost) {
            return new HtmlResponse($this->templateRenderer->render('error::404'), 404);
        }

        $data = [
            'post' => $blogPost,
        ];

        return new HtmlResponse($this->templateRenderer->render('blog::view', $data));
    }
}
Шаблоны
Откройте src/Blog/src/ConfigProvider.php и обновите метод getTemplates()
 public function getTemplates()
{
    return [
        'paths' => [
            'blog'    => [__DIR__ . '/../templates/blog'],
        ],
    ];
}
Теперь мы можем сделать несколько быстрых шаблонов:
Создайте src/Blog/templates/blog/list.html.twig
 {% extends '@layout/default.html.twig' %}

{% block title %}Blog{% endblock %}

{% block content %}
    <div class="row">

    {% for post in posts %}

        <div class="col-md-4">
            <h2>
                <a href="/blog/view/{{ post.id }}">
                    <i class="fa fa-refresh"></i> {{ post.title }}
                </a>
            </h2>
            <p>
                {{ post.content }}
            </p>
        </div>
    {% endfor %}
    </div>

{% endblock %}
Создайте src/Blog/templates/blog/view.html.twig
 {% extends '@layout/default.html.twig' %}

{% block title %}{{ post.title }} | Blog {% endblock %}

{% block content %}
    <div class="row">
        <div class="col-xs-12">
            <h1>{{ post.title }}</h1>
            <p>
                {{ post.content }}
            </p>
        </div>
    </div>

{% endblock %}
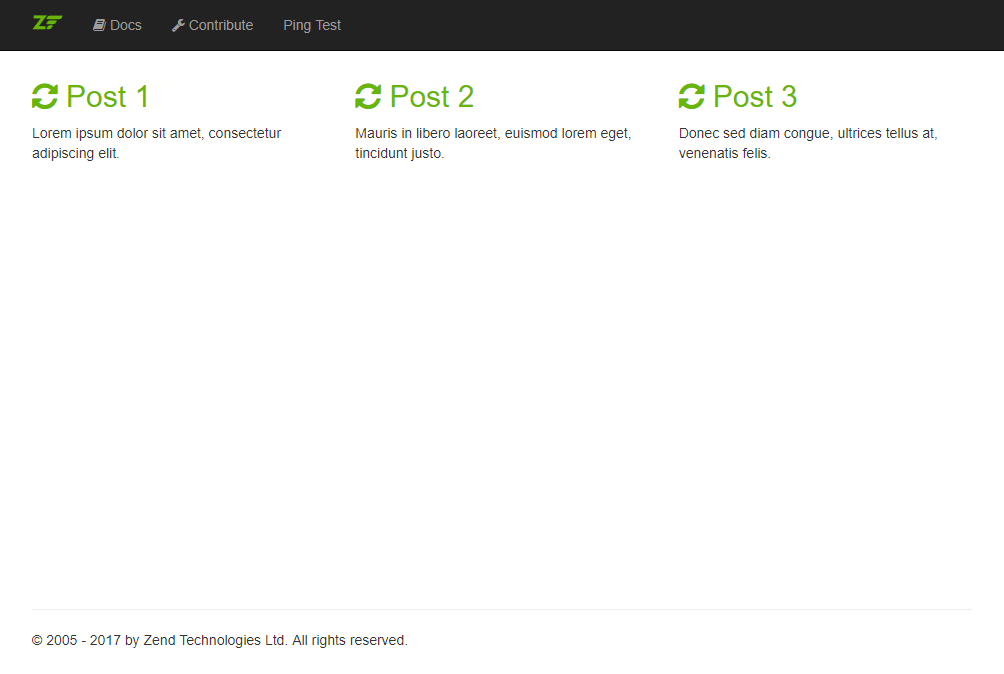
Если вы откроете URL /blog
Мы оставим реализацию функций создания, редактирования и удаления на ваше усмотрение.
Вывод
В этом коротком руководстве мы увидели, как просто реализовать модуль блога, доступный только для чтения, с помощью Zend Expressive. Всего за несколько файлов и 10 минут работы страница списка могла отображать наши сообщения из базы данных и была готова для дополнительных маршрутов, таких как /edit/delete
Используете ли вы Zend Expressive в своих проектах? Что вам нравится / не нравится в этом? Дайте нам знать, как вы поживаете!

