Вкратце, мы можем сказать, что Dashboard — это страница, содержащая большие и четкие символы основных функций и, возможно, область для соответствующей новой информации.
Просмотрите эти статьи:
1. UI Design Pattern — приборная панель (от Юхани Лехтимаки)
2. Шаблоны дизайна пользовательского интерфейса Android
Основная задача этой статьи — реализовать шаблон проектирования Dashboard, как показано ниже:

Шаг 1: Создать макет строки заголовка
Да, мы определяем макет строки заголовка (заголовка) только один раз, но это требуется на каждом экране. Мы будем просто показывать / скрывать домашнюю кнопку и другие кнопки, когда это необходимо. Как только вы закончили с определением макета строки заголовка, мы можем использовать тот же макет в других макетах, используя ViewStub.
Вот пример макета заголовка (заголовка) xml:
header.xml
|
01
02
03
04
05
06
07
08
09
10
11
12
13
14
15
16
17
18
19
20
21
22
23
24
25
26
27
28
29
30
31
32
33
34
35
36
37
38
39
40
41
42
43
44
45
46
47
48
49
50
51
52
53
54
55
56
57
58
|
<?xml version="1.0" encoding="utf-8"?> android:layout_width="fill_parent" android:layout_height="wrap_content" android:background="@color/title_background" > <LinearLayout android:id="@+id/panelIconLeft" android:layout_width="wrap_content" android:layout_height="wrap_content" android:layout_alignParentLeft="true" android:layout_centerVertical="true" android:layout_margin="5dp" > <Button android:id="@+id/btnHome" android:layout_width="wrap_content" android:layout_height="wrap_content" android:background="@drawable/ic_home" android:onClick="btnHomeClick" /> </LinearLayout> <TextView android:id="@+id/txtHeading" style="@style/heading_text" android:layout_width="fill_parent" android:layout_height="wrap_content" android:layout_centerInParent="true" android:layout_marginLeft="5dp" android:layout_marginRight="5dp" android:layout_toLeftOf="@+id/panelIconRight" android:layout_toRightOf="@id/panelIconLeft" android:ellipsize="marquee" android:focusable="true" android:focusableInTouchMode="true" android:gravity="center" android:marqueeRepeatLimit="marquee_forever" android:singleLine="true" android:text="" android:textColor="@android:color/white" /> <LinearLayout android:id="@+id/panelIconRight" android:layout_width="wrap_content" android:layout_height="wrap_content" android:layout_alignParentRight="true" android:layout_centerVertical="true" android:layout_margin="5dp" > <Button android:id="@+id/btnFeedback" android:layout_width="wrap_content" android:layout_height="wrap_content" android:background="@drawable/ic_feedback" android:onClick="btnFeedbackClick" /> </LinearLayout></RelativeLayout> |
В приведенном выше коде компоновки я ссылался на стиль из styles.xml и измерения из dimension.xml:
styles.xml
|
01
02
03
04
05
06
07
08
09
10
11
12
13
14
15
16
17
18
19
20
21
|
<?xml version="1.0" encoding="utf-8"?><resources><style name="heading_text"> <item name="android:textColor">#ff000000</item> <item name="android:textStyle">bold</item> <item name="android:textSize">16sp</item> <item name="android:padding">5dp</item> </style><style name="HomeButton"> <item name="android:layout_gravity">center_vertical</item> <item name="android:layout_width">fill_parent</item> <item name="android:layout_height">wrap_content</item> <item name="android:layout_weight">1</item> <item name="android:gravity">center_horizontal</item> <item name="android:textSize">@dimen/text_size_medium</item> <item name="android:textStyle">normal</item> <item name="android:textColor">@color/foreground1</item> <item name="android:background">@null</item> </style></resources> |
dimen.xml
|
1
2
3
4
5
6
7
|
<?xml version="1.0" encoding="utf-8"?><resources> <dimen name="title_height">45dip</dimen> <dimen name="text_size_small">14sp</dimen> <dimen name="text_size_medium">18sp</dimen> <dimen name="text_size_large">22sp</dimen></resources> |
Шаг 2: Создать супер (абстрактный) класс
На самом деле, в этом абстрактном суперклассе мы определим:
1) обработчики событий для обеих кнопок: Домой и Обратная связь
2) другие методы
Кнопки «Домой» и «Обратная связь», которые будут видны почти во всех действиях и требуют выполнения одних и тех же действий (т. Е. Приведения пользователя к домашнему действию), поэтому вместо того, чтобы писать один и тот же код в каждом действии, мы пишем обработчик событий только один раз в абстрактный класс, который будет суперклассом для каждого вида деятельности.
Возможно, вы заметили в макете header.xml: android: onClick = ”btnHomeClick” (кнопка Home) и android: onClick = ”btnFeedbackClick” (кнопка Feedback), поэтому мы определим этот метод только один раз в суперклассе (аннотация).
Пожалуйста, обратитесь к примеру ViewStub, если вы не знаете об этом.
Теперь вот код для абстрактного (супер) класса, я называю его DashboardActivity.java
|
01
02
03
04
05
06
07
08
09
10
11
12
13
14
15
16
17
18
19
20
21
22
23
24
25
26
27
28
29
30
31
32
33
34
35
36
37
38
39
40
41
42
43
44
45
46
47
48
49
50
51
52
53
54
55
56
57
|
package com.technotalkative.viewstubdemo;import android.app.Activity;import android.content.Intent;import android.os.Bundle;import android.view.View;import android.view.ViewStub;import android.widget.Button;import android.widget.TextView;public abstract class DashBoardActivity extends Activity { /** Called when the activity is first created. */ @Override public void onCreate(Bundle savedInstanceState) { super.onCreate(savedInstanceState); } public void setHeader(String title, boolean btnHomeVisible, boolean btnFeedbackVisible) { ViewStub stub = (ViewStub) findViewById(R.id.vsHeader); View inflated = stub.inflate(); TextView txtTitle = (TextView) inflated.findViewById(R.id.txtHeading); txtTitle.setText(title); Button btnHome = (Button) inflated.findViewById(R.id.btnHome); if(!btnHomeVisible) btnHome.setVisibility(View.INVISIBLE); Button btnFeedback = (Button) inflated.findViewById(R.id.btnFeedback); if(!btnFeedbackVisible) btnFeedback.setVisibility(View.INVISIBLE); } /** * Home button click handler * @param v */ public void btnHomeClick(View v) { Intent intent = new Intent(getApplicationContext(), HomeActivity.class); intent.setFlags (Intent.FLAG_ACTIVITY_CLEAR_TOP); startActivity(intent); } /** * Feedback button click handler * @param v */ public void btnFeedbackClick(View v) { Intent intent = new Intent(getApplicationContext(), FeedbackActivity.class); startActivity(intent); }} |
Шаг 3. Определение макета панели мониторинга
|
01
02
03
04
05
06
07
08
09
10
11
12
13
14
15
16
17
18
19
20
21
22
23
24
25
26
27
28
29
30
31
32
33
34
35
36
37
38
39
40
41
42
43
44
45
46
47
48
49
50
51
52
53
54
55
56
57
58
59
60
61
62
63
64
65
66
67
68
69
70
71
72
73
74
75
76
77
78
79
80
81
82
83
84
85
86
87
|
<?xml version="1.0" encoding="utf-8"?> android:layout_width="fill_parent" android:layout_height="fill_parent" android:orientation="vertical" > <ViewStub android:id="@+id/vsHeader" android:layout_width="fill_parent" android:layout_height="wrap_content" android:inflatedId="@+id/header" android:layout="@layout/header" /> <LinearLayout android:layout_width="fill_parent" android:layout_height="wrap_content" android:layout_weight="1" android:orientation="vertical" android:padding="6dip" > <LinearLayout android:layout_width="fill_parent" android:layout_height="wrap_content" android:layout_weight="1" android:orientation="horizontal" > <Button android:id="@+id/main_btn_eclair" style="@style/HomeButton" android:drawableTop="@drawable/android_eclair_logo" android:onClick="onButtonClicker" android:text="@string/EclairActivityTitle" /> <Button android:id="@+id/main_btn_froyo" style="@style/HomeButton" android:drawableTop="@drawable/android__logo_froyo" android:onClick="onButtonClicker" android:text="@string/FroyoActivityTitle" /> </LinearLayout> <LinearLayout android:layout_width="fill_parent" android:layout_height="wrap_content" android:layout_weight="1" android:orientation="horizontal" > <Button android:id="@+id/main_btn_gingerbread" style="@style/HomeButton" android:drawableTop="@drawable/android_gingerbread_logo" android:onClick="onButtonClicker" android:text="@string/GingerbreadActivityTitle" /> <Button android:id="@+id/main_btn_honeycomb" style="@style/HomeButton" android:drawableTop="@drawable/android_honeycomb_logo" android:onClick="onButtonClicker" android:text="@string/HoneycombActivityTitle" /> </LinearLayout> <LinearLayout android:layout_width="fill_parent" android:layout_height="wrap_content" android:layout_weight="1" android:orientation="horizontal" > <Button android:id="@+id/main_btn_ics" style="@style/HomeButton" android:drawableTop="@drawable/android_ics_logo" android:onClick="onButtonClicker" android:text="@string/ICSActivityTitle" /> <Button android:id="@+id/main_btn_jellybean" style="@style/HomeButton" android:drawableTop="@drawable/android_jellybean_logo" android:onClick="onButtonClicker" android:text="@string/JellyBeanActivityTitle" /> </LinearLayout> </LinearLayout></LinearLayout> |
Шаг 4: Определите действия для обработки событий нажатия кнопок на макете этой панели.
В этом упражнении вы найдете использование метода setHeader () для установки заголовка для домашнего действия, да, в этом методе я передал «false» для кнопки «Домой», потому что это уже домашнее действие, но я передал «true» для Кнопка обратной связи, потому что обратная связь нужна, чтобы быть видимой. Другой процесс аналогичен определению обработчиков нажатий кнопок.
|
01
02
03
04
05
06
07
08
09
10
11
12
13
14
15
16
17
18
19
20
21
22
23
24
25
26
27
28
29
30
31
32
33
34
35
36
37
38
39
40
41
42
43
44
45
46
47
48
49
50
51
52
53
54
55
56
57
58
|
package com.technotalkative.viewstubdemo;import android.content.Intent;import android.os.Bundle;import android.view.View;public class HomeActivity extends DashBoardActivity { /** Called when the activity is first created. */ @Override public void onCreate(Bundle savedInstanceState) { super.onCreate(savedInstanceState); setContentView(R.layout.main); setHeader(getString(R.string.HomeActivityTitle), false, true); } /** * Button click handler on Main activity * @param v */ public void onButtonClicker(View v) { Intent intent; switch (v.getId()) { case R.id.main_btn_eclair: intent = new Intent(this, Activity_Eclair.class); startActivity(intent); break; case R.id.main_btn_froyo: intent = new Intent(this, Activity_Froyo.class); startActivity(intent); break; case R.id.main_btn_gingerbread: intent = new Intent(this, Activity_Gingerbread.class); startActivity(intent); break; case R.id.main_btn_honeycomb: intent = new Intent(this, Activity_Honeycomb.class); startActivity(intent); break; case R.id.main_btn_ics: intent = new Intent(this, Activity_ICS.class); startActivity(intent); break; case R.id.main_btn_jellybean: intent = new Intent(this, Activity_JellyBean.class); startActivity(intent); break; default: break; } }} |
Шаг 5: Определите другие действия и их макеты пользовательского интерфейса
Теперь пришло время определить действия, которые мы хотим отображать, основываясь на конкретном нажатии кнопки на панели инструментов. Так что определите все виды деятельности и их макеты. Не забывайте вызывать метод setHeader () везде, где это необходимо.
Вот один из примеров такой деятельности — Activity_Eclair.java
|
01
02
03
04
05
06
07
08
09
10
11
12
13
|
package com.technotalkative.viewstubdemo;import android.os.Bundle;public class Activity_Eclair extends DashBoardActivity { /** Called when the activity is first created. */ @Override public void onCreate(Bundle savedInstanceState) { super.onCreate(savedInstanceState); setContentView(R.layout.activity_eclair); setHeader(getString(R.string.EclairActivityTitle), true, true); }} |
activity_eclair.xml
|
01
02
03
04
05
06
07
08
09
10
11
12
13
14
15
16
17
18
19
20
21
22
23
24
|
<?xml version="1.0" encoding="utf-8"?> android:layout_width="fill_parent" android:layout_height="fill_parent" android:orientation="vertical" > <ViewStub android:id="@+id/vsHeader" android:layout_width="fill_parent" android:layout_height="wrap_content" android:inflatedId="@+id/header" android:layout="@layout/header" /> <TextView android:id="@+id/textView1" android:layout_width="match_parent" android:layout_height="match_parent" android:gravity="center" android:text="@string/EclairActivityTitle" /></LinearLayout> |
Шаг 6: Объявите действия внутри файла AnroidManifest.xml
Теперь вы СДЕЛАНЫ ![]()
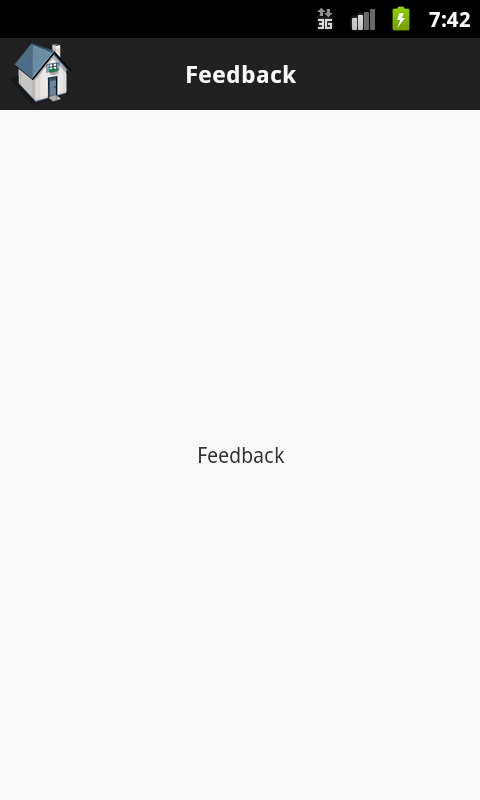
Выход:
.png)
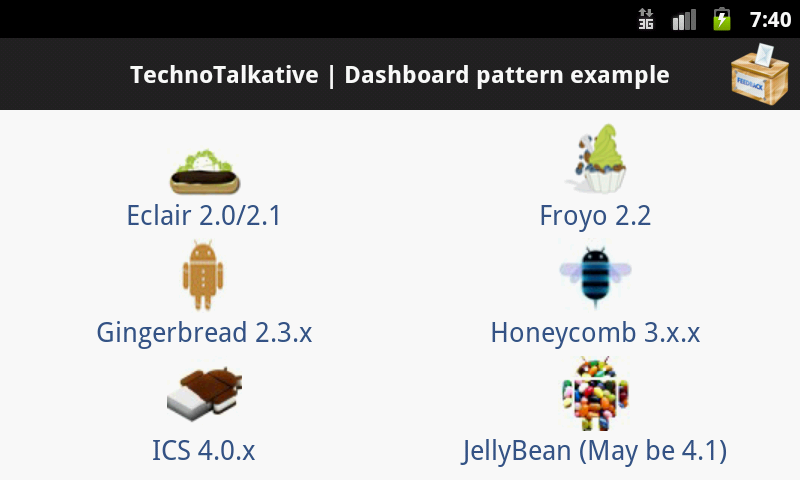 |
| Главный экран _ Пейзаж |
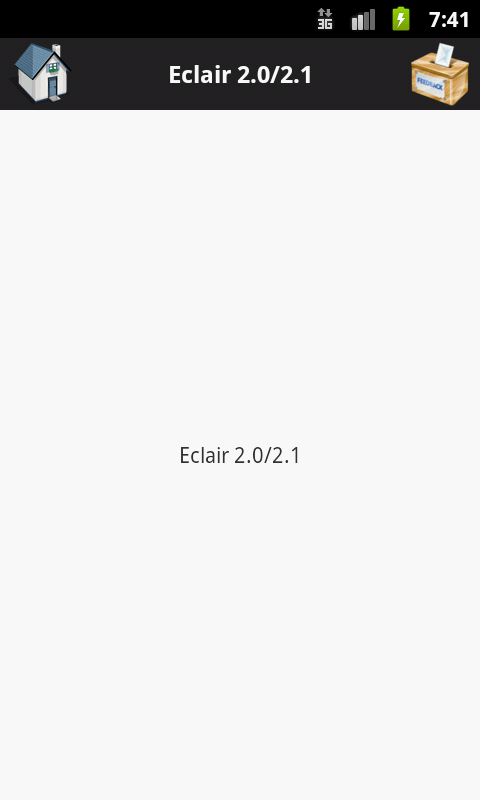 |
| внутренний экран |
 |
|
|
Вы можете скачать исходный код здесь: Android — Реализация шаблонов Dashboard
Обратная связь / отзыв всегда приветствуются ![]()
Справка: Android — реализация шаблона проектирования панели мониторинга от нашего партнера JCG Пареша Н. Майани из блога TechnoTalkative .