Мы собираемся создать простой промо-тикер для сайта. Это замечательно, если вам не хватает места на главной странице, или если вы просто хотите, чтобы последние новости или продукты привлекали внимание зрителей. Давайте идти!
Шаг 1: Загрузите Tweener
Первым шагом будет получение необходимых файлов. Во-первых, загрузите Tweener с http://code.google.com/p/tweener/ . Ищите последнюю стабильную сборку в разделе загрузок. Я использую 1_33_74.
Шаг 2: Исходные фотографии
Я также получил несколько бесплатных фотографий с sxc.hu. Фотографии, которые вы выберете, будут во многом зависеть от ваших категорий, но вот те, которые я использую:
- http://www.sxc.hu/photo/756577
- http://www.sxc.hu/photo/1111567
- http://www.sxc.hu/photo/1123775
- http://www.sxc.hu/photo/1187878
Я отредактировал изображения и масштабировал их до размеров 136 х 95 пикселей.
Шаг 3: Каталоги
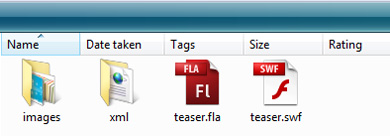
Структура каталогов довольно проста. Папка с изображениями для предварительно подготовленных изображений, папка XML для документа XML и флэш-памяти находится в корневом каталоге.
Шаг 4: Установите Tweener
Распакуйте класс Tweener в папку вашего класса. Если вы уже давно используете AS3, у вас должна быть папка класса. В противном случае, посмотрите на документацию и прочитайте, как ее настроить. Нажмите на ссылку для загрузки и установки на левой стороне.
Шаг 5: Создайте свой XML
Обычно я делаю это в первую очередь, но настраиваю его при сборке флеш-файла. Я либо делаю это, потому что хочу добавить больше функциональности, либо я думаю, что структура файла XML могла бы быть немного лучше. В любом случае, окончательный XML-файл выглядит так:
|
01
02
03
04
05
06
07
08
09
10
11
12
13
14
|
<teaser>
<item heading=»Awesome new videos.»
<![CDATA[We love videos.
</item>
<item heading=»Audio loops your grandma would love.»
<![CDATA[Our audio loops are banging.]]>
</item>
<item heading=»Great graphics make the world go round.»
<![CDATA[Live without graphics, nah, that thought is just too horrible.]]>
</item>
<item heading=»Dont stop learning.»
<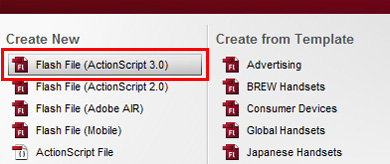
Перейдите в «Модификация»> «Документ» (Ctrl + J), установите ширину фильма в 600 пикселей и высоту в 200 пикселей. Измените цвет фона на # 999999 .

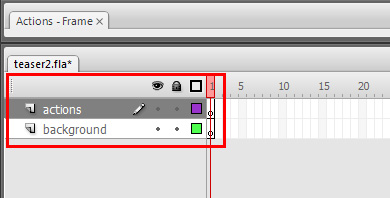
Шаг 7: настройте слои
Создайте два слоя. Назовите нижний «фон», а верхний «действия». Заблокируйте слой действий.
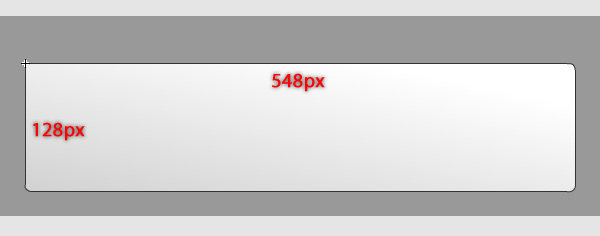
Шаг 8: создайте фон
Теперь мы создадим фон нашего промо-тикера . Убедитесь, что вы находитесь на фоновом слое, затем с помощью инструмента «Прямоугольник» создайте новый прямоугольник размером 548px * 128px и радиусом угла 8.
Задайте ему линейный вертикальный градиент со следующими значениями: #CCCCCC и #FFFFFF . Значение хода также установлено на # 333333 и высоту 0,2 . Отцентрируйте этот объект по сцене, нажав Ctrl + K, убедившись, что выбран «Центр по сцене». Нажмите «Выровнять горизонтальный центр» и «Выровнять вертикальный центр».
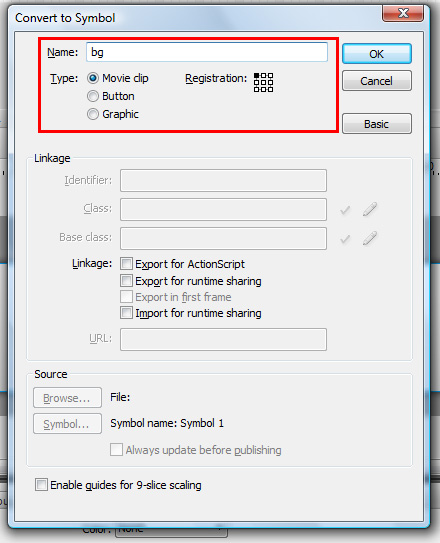
Шаг 9: Создайте видеоролик.
Выберите только что созданный фон и нажмите F8 на клавиатуре. Убедитесь, что выбран «Видеоклип» и присвойте ему имя «bg».
Шаг 10: Кнопки Moveiclip
Теперь мы создадим верхние кнопки мувиклипа. Перейдите на «Вставка»> «Новый символ» (Ctrl + F8). Дайте ему имя «кнопка» и убедитесь, что тип символа установлен на Movieclip.

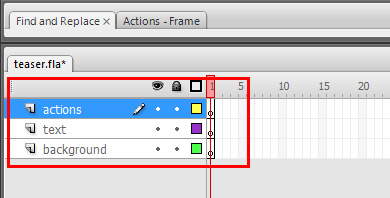
Шаг 11: Редактируй кнопки
Перейдите в «Окно»> «Библиотека» (Ctrl + L). Найдите символ «кнопка» в библиотеке и дважды щелкните по нему. Это приведет вас к временной шкале символа. Добавьте два новых слоя. Назовите три слоя «фон», «текст» и «действия» снизу вверх.
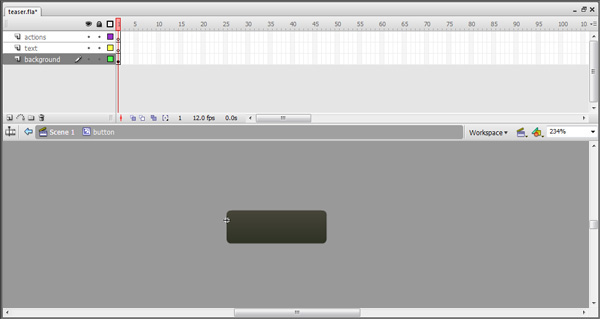
Шаг 12: Up State
Давайте добавим состояние вверх. На фоновом слое создайте прямоугольник со следующими свойствами:
- Без удара
- Угловой радиус 5
- Линейный градиент от # 2E3224 и # 48463A
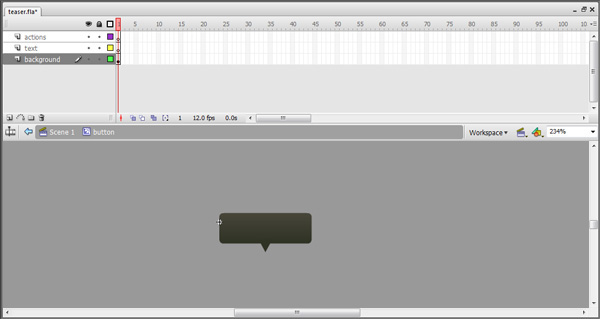
Установите размер этой формы 95px * 31px .
Используйте Polystar Tool, чтобы создать трехсторонний многоугольник (треугольник). Поместите это прямо под прямоугольником. Центрируйте треугольник и прямоугольник.
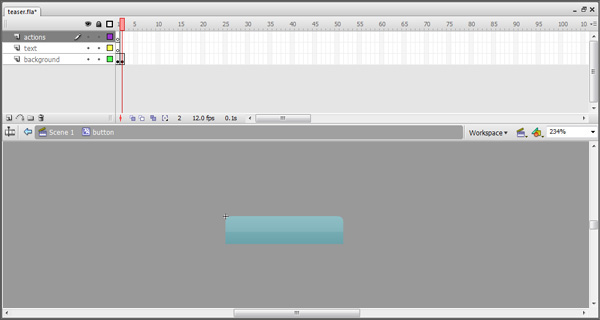
Шаг 13: Плохое состояние
Добавьте ключевой кадр на фоновом слое в кадре 2 мувиклипа «кнопка» и создайте еще один скругленный прямоугольник, на этот раз используйте линейный градиент со следующими значениями:
- # 6BA2AA и # 82B8C0
Дублируйте прямоугольник, разрежьте его пополам и присвойте ему следующие значения:
- #FFFFFF
- Альфа: 10
Выровняйте вершины этих двух прямоугольников, и вы получите простую глянцевую кнопку!
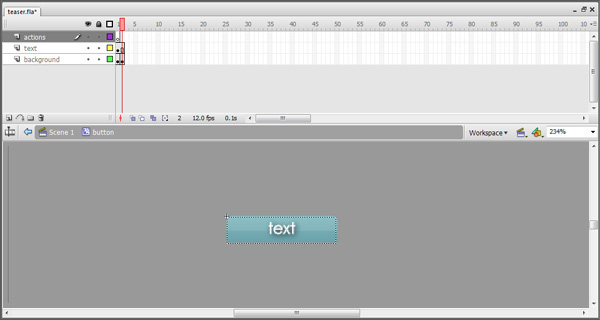
Шаг 14: закончить кнопку
На текстовом слое добавить динамическое текстовое поле. Дайте ему имя экземпляра «butLabelTxt». Я использовал Century Gothic 13pt в качестве шрифта. Я также добавил тень к текстовому полю со следующими настройками:
- Сила: 80
- Качество: высокое
- Расстояние: 2
Остальные настройки остаются по умолчанию.
На слое действий добавьте действие остановки в обоих кадрах 1 и 2. По завершении вернитесь к основной временной шкале.
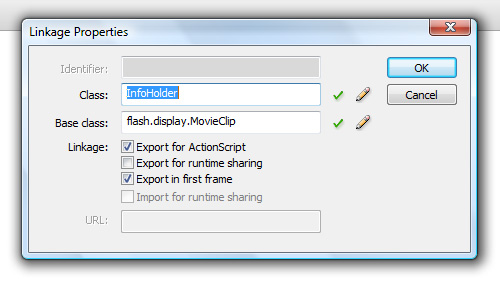
Шаг 15: Связь
Теперь мы дадим кнопке идентификатор связи. Откройте библиотеку, перейдя в Window> Library или воспользуйтесь сочетанием клавиш Ctrl + L. У вас должен быть только один элемент в вашей библиотеке. Нажмите правой кнопкой мыши на кнопку «Movieclip» и выберите «Linkage». В поле Class введите имя «Button» (обратите внимание на заглавную B). Нажмите ОК.

Шаг 16: запустите информационный клип
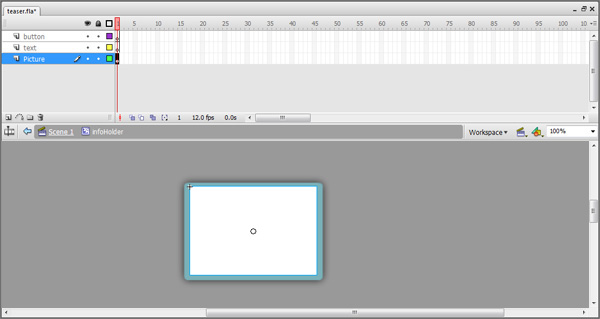
Нажмите Ctrl + F8, чтобы создать еще один видеоклип. Дайте ему имя «infoHolder». Создайте три слоя. Назовите их «изображение», «текст» и «кнопка». На слое рисунка создайте скругленный прямоугольник со следующими свойствами:
- 148px * 104px
- # 7AB1B9
Нажмите CTRL + F8, чтобы открыть диалоговое окно «Создать новый символ». Дайте ему имя «picBG» и добавьте тень к этому прямоугольнику.
Шаг 17: Держатель картинки Клип
Оставаясь в слое «picture», создайте прямоугольник со следующими свойствами:
- 136 пикселей * 95 пикселей
- #FFFFFF
Преобразуйте этот прямоугольник в видеоклип, нажав F8 на клавиатуре. Назовите его «holderClip» и дайте ему имя экземпляра «holderClip_mc». Нажмите CTRL + K, чтобы открыть панель выравнивания, и центр выровнять эти два прямоугольника.
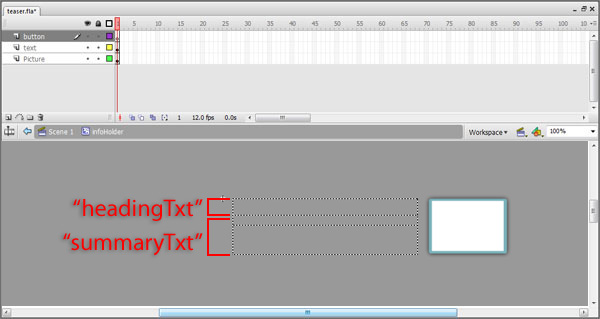
На слое «текст» создайте два динамических текстовых поля. Дайте им следующие свойства:
Верхнее текстовое поле:
- 350px * 50px
Нижнее текстовое поле:
- 350px * 71px
Дайте им имена экземпляров «headingTxt» и «summaryTxt» соответственно.
Шаг 18: добавь кнопку
Наконец, на слое кнопки создайте новый мувиклип (Ctrl + F8) и назовите его «moreBut». Создайте скругленный прямоугольник со следующими свойствами:
- 100px * 25px
- Свойства градиента лайнера: от #CCCCCC до #FFFFFF
- Угловой радиус: 8
Добавьте статическое текстовое поле и введите слово «больше» внутри него. Вы также можете добавить простой прямоугольник, который будет действовать как разделитель, и знак плюса, чтобы немного больше деталей.
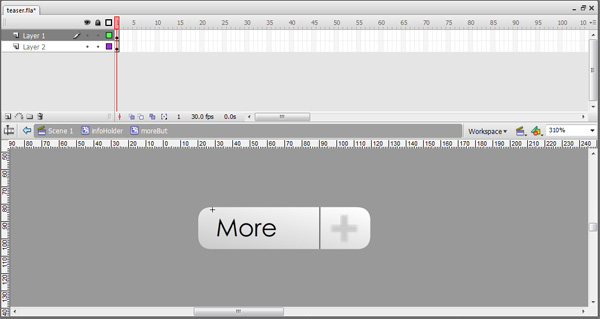
Дайте этому мувиклипу имя экземпляра «moreBut_mc». Вернитесь к основной временной шкале.
Шаг 19: Связь
Давайте дадим мувиклипу идентификатор привязки. Откройте библиотеку и дайте клипу «infoHolder» идентификатор связи «InfoHolder».
Шаг 20: Переменные.
Давайте добавим немного кода в микс. Перейдите к слою действий и нажмите F9 на клавиатуре, чтобы открыть панель действий. Сначала мы импортируем Tweener и создадим несколько переменных. Скопируйте и вставьте следующий код в панель действий. Это может выглядеть много, но я постарался прокомментировать каждую строку кода.
|
01
02
03
04
05
06
07
08
09
10
11
12
13
14
15
16
17
18
19
20
21
22
23
24
25
26
27
28
29
30
31
32
33
34
35
|
//import the Tweener class
import caurina.transitions.*;
//create a vriable to store an instance of the URLLoader class
var xmlLoader:URLLoader = new URLLoader();
//add an event listener to listen for when the loader has finished loading.
xmlLoader.addEventListener(Event.COMPLETE, doComplete);
//load the xml file
xmlLoader.load(new URLRequest(«xml/teaser.xml»));
//these two variables store numbers which we will assign values to later.
var catNum:Number;
var newNum:Number;
//these two arrays will store button names.
var butClipMain:Array = [];
var butClip:Array = [];
//assigns the current button number
var currBut:Number = 0;
//this array will store the link values from the xml
var linksArray:Array = [];
//we assign a variable name to a sprite instance.
var holderSprite:Sprite = new Sprite();
//we add it to the stage.
addChild(holderSprite);
//we create a variable to store the instance of the timer class.
var timer:Timer = new Timer(5000);
//add an event listener
timer.addEventListener(TimerEvent.TIMER, doTimer);
//start the timer
timer.start();
|
Шаг 21: Функции
Теперь мы добавим функции. Под последней строкой кода дважды нажмите Enter и вставьте следующее:
|
001
002
003
004
005
006
007
008
009
010
011
012
013
014
015
016
017
018
019
020
021
022
023
024
025
026
027
028
029
030
031
032
033
034
035
036
037
038
039
040
041
042
043
044
045
046
047
048
049
050
051
052
053
054
055
056
057
058
059
060
061
062
063
064
065
066
067
068
069
070
071
072
073
074
075
076
077
078
079
080
081
082
083
084
085
086
087
088
089
090
091
092
093
094
095
096
097
098
099
100
101
102
103
104
105
106
107
108
109
110
111
112
113
114
115
116
117
118
119
120
121
122
123
124
125
126
127
128
129
130
131
132
133
134
135
136
137
138
139
140
141
142
143
144
145
146
147
148
149
150
151
152
153
154
155
156
157
158
159
160
161
162
163
164
165
166
167
168
169
170
171
172
173
174
175
176
177
178
179
180
181
182
183
184
185
186
187
188
189
190
191
192
193
194
195
196
197
198
199
200
201
202
203
204
205
206
207
208
209
210
211
212
213
214
215
216
217
218
219
220
221
222
223
224
225
226
227
228
|
//create a function called doComplete
function doComplete(e:Event):void
{
//create a new variable to store an instance of the XML class.
var xml:XML = new XML(e.target.data);
//we create a new XMLList.
var catList:XMLList = xml.item;
//we create another XMLList.
//So it will store the location of the image.
var images:XMLList = xml.item.@image;
//we assign a value to the variable created earlier.
//Depending on how many items are in the XML, this number will differ.
//for this example catNum = 3.
catNum = catList.length();
//we start a loop
for(var i:Number = 0; i < catNum; i++)
{
//here we create instances of the movieclips in the library and add them to stage.
//create a variable to store the instances of the classes created.
var but:Button = new Button();
//set the x position of the button instances
//the expression adds spacing between the buttons
but.x += (95.8*i) + 3*i;
//set the y position of the button instances
but.y = 18;
//we tell the instances to go to their second frame and stop.
//This will be their «down» position
but.gotoAndStop(2);
//we give the dynamic text box inside the button some text.
//the text will be the label attribute of each node in the XML.
but.butLabelTxt.text = catList[i].@label;
//we assign a name to the button instances.
//names will be but1,but2,but3
but.name = «but» + i;
//we add the instances to the stage
addChild(but);
//we add the button names to the array created earlier
butClip.push(but.name);
//we add the button names to the array created earlier
butClipMain.push(but.name);
//we add the link values to the array created earlier
linksArray.push(catList[i].@link);
//here we create instances of the movieclips in the library and add them to stage.
//create a variable to store the instances of the classes created.
var info:InfoHolder = new InfoHolder();
//set the x position of the infoHolder instances
//the expression adds spacing between the buttons
info.x += (560*i) + 5*i;
//set the y position of the infoHolder instances
info.y = 50;
//we give the dynamic text box inside the button some text.
//the text for the headingTxt textbox will be the heading attribute of each node in the XML.
info.headingTxt.text = catList[i].@heading;
//the text for the summaryTxt textbox will be the CDATA section of each node in the XML.
info.summaryTxt.text = catList[i];
//we assign a name to the infoHolder instances.
//names will be but1,but2,but3
info.name = «info» + i;
//we add an event listener to the more button inside infoHolder
info.moreBut_mc.addEventListener(MouseEvent.CLICK, doMore, false, 0, true);
//we set buttonMode to true, so that the movieclip will act like a button.
info.moreBut_mc.buttonMode = true;
//we add the infoHolder instances as children of the sprite we created earlier.
holderSprite.addChild(info);
//we create a new loader instance
var picLoader:Loader = new Loader();
//we request the images
var picURLReq:URLRequest = new URLRequest(images[i]);
//we load the images
picLoader.load(picURLReq);
//we add the images to the clip inside infoHolder
info.holderClip_mc.addChild(picLoader);
//we add an event listener to the button instances.
but.addEventListener(MouseEvent.CLICK, doClick, false, 0, true);
//this prevents the textbox from being mouse enabled
but.mouseChildren = false;
}
//this sets the first button instance on stage to an «up» position by sending it to its first frame.
MovieClip(getChildByName(«but» + 0)).gotoAndStop(1);
//we set the newNum variable to one less than the value of the variable catNum
newNum = catNum — 1;
}
//we create a new function called doTimer
//this function will be called every 5 seconds.
function doTimer(e:TimerEvent):void
{
//we start a conditional if statement
//it checks if the current button’s value is less than newNum’s variable value
if(currBut < newNum)
{
//we increment the value of the currBut variable
currBut++;
//we call the function prevBut and send through the currBut value as a parameter
prevBut(currBut);
//we call the function switchButtons and send through the currBut value as a parameter
switchButtons(currBut);
//we call the function tweenSwitch
tweenSwitch();
}
//the else of the conditional
//it checks currBut variable is equal to newNum variable
else if(currBut == newNum)
{
//we set the currBut variable value back to 0
currBut = 0;
//we call the prevBUt function.
prevBut(newNum+1);
//we call the switchButtons function.
switchButtons(currBut);
//we call the tweenStart function
tweenStart();
}
}
//we create a function called doCLick.
function doClick(e:MouseEvent):void
{
//we create a variable.
//if but1 is clicked the value of butString will be but1
var butString:String = String(e.target.name);
//we create another variable.
//if but1 is clicked the value of slicedString will be 1
var slicedString:String = butString.slice(3);
//we create a new variable and set its value slicedString which has been type cast to a number.
var butNumber:Number = Number(slicedString);
//if a button is clicked send that button to frame 1. its «down» state
e.target.gotoAndStop(1);
//we start another loop
for(var j = 0; j < butClip.length; j++)
{
//we loop through the buttons and set them to their «up» state
MovieClip(getChildByName(butClip[j])).gotoAndStop(2);
//we set the button that was clicked to its «down» state
e.target.gotoAndStop(1);
}
//we stop the timer if a button is clicked
timer.stop();
//we call the butTween function and send through a parameter
//if but1 is clicked the parameter will be 1
butTween(butNumber);
}
//we create a function called doMore
//this event handler takes care of the more button in infoHolder
function doMore(e:MouseEvent):void
{
//we create a variable.
var butString:String = String(e.target.parent.name);
//we slice the butString value to only the number
//so if info1 is pressed slicedString will be 1
var slicedString:String = butString.slice(4);
//if info1 is pressed it will go to the first URL in the linksArray
//the first element of this array will be equal the link attribute of the first child node in the XML.
navigateToURL(new URLRequest(linksArray[Number(slicedString)]));
}
//we create a function called prevBut which expects a parameter
//this function handles the previous button as the button moves from on to the next
function prevBut(butValue:Number):void
{
//sets the previous button to its «up» state
MovieClip(getChildByName(«but» + (butValue-1))).gotoAndStop(2);
}
//we create a function called switchButtons
function switchButtons(butValue:Number):void
{
//sets the current button to its «down» state
MovieClip(getChildByName(«but» + butValue)).gotoAndStop(1);
}
//we create a function called tweenSwitch
//this function handles the tweening of the sprite object
function tweenSwitch():void
{
//the holderSprite is moved -560px every 5 seconds.
Tweener.addTween(holderSprite,{x:holderSprite.x — 560, time:1, transition:»easeOutQuad»});
}
//we create a function called tweenStart
//this function handles the beginning of the animation
function tweenStart():void
{
//if the promo ticker starts at the beginning, we set the sprites position to 5.
Tweener.addTween(holderSprite,{x:5, time:1, transition:»easeOutQuad»});
}
//we create a function called butTween
//this function handles the button press.
//it expects a parameter.
function butTween(moveValue:Number):void
{
//we start an if conditional
//checks if the value of the parameter is 0
if(moveValue == 0)
{
//if the parameter is 0, move the sprite to its start position
Tweener.addTween(holderSprite,{x:5, time:0.5, transition:»easeOutQuad»});
//reset the currBut variable value
currBut = moveValue;
//start the timer again
timer.start();
}
//else of the conditional
else
{
//if one of the other buttons are pressed move the sprite to the correct location
Tweener.addTween(holderSprite,{x:moveValue*-560, time:0.5, transition:»easeOutQuad»});
//set the currBut variable value 0,1 etc. Corresponds to the button that was pressed
currBut = moveValue;
//start the timer.
timer.start();
}
}
|
Вывод
Это оно! Проверь свой фильм. У вас должен быть промо-тикер, который можно использовать для продвижения новостей, продуктов или чего-либо интересного на вашем сайте. Как упоминалось ранее, это также отличная экономия места. Надеюсь, вам понравился урок.