В этой статье мы рассмотрим чудо SWFAddress, обсудим, почему на вашем сайте должны быть глубокие ссылки, а также процессы, связанные с внедрением глубоких ссылок в ваших Flash-проектах.
Этот сайт основан на XML. Также мы рассмотрим встроенные функции SWFAddress и то, как они используются для создания конечного результата. Наслаждайтесь!
Посмотрите демонстрацию выше в новом окне. Обратите внимание, как изменяется URL вашего браузера при переходе по мини-сайту.
Шаг 1: Зачем использовать Deep Linking?
Глубокие ссылки — отличный способ структурировать сайт, а также отличный способ структурировать код.
Глубокие ссылки в основном дают пользователю возможность ссылаться на определенную область фильма Flash через простой URL.
Например, если вы хотели показать клиенту портфолио и дали ему ссылку на сайт Flash без глубоких ссылок. Ну, их догадки так же хороши, как и у вас, где найти этот контент в SWF. Но с помощью глубоких ссылок вы можете ссылаться на любой контент в фильме Flash, например: website.com/#/portfolio/section_3. Это может показаться сложной задачей, но это не связано с глубокими связями SWFAddress.
Глубокие ссылки имеют и другие преимущества (например, SEO ) и превращают скучный Flash-фильм в расширяемое приложение.
Шаг 2: Готовимся
Для этого вам понадобятся: Caurina Tweener, SWFAddress для AS3, SWFObject.
- Caurina Tweener — http://code.google.com/p/tweener/ — убедитесь, что вы загружаете версию AS3, а не AS2 🙂
- SWFAddress — http://www.asual.com/swfaddress/
- SWFObject входит в пакет swfaddress.
Вам также понадобится main.html из исходной загрузки.
Шаг 3: Импортировать, # включить, что ??
Если у вас есть опыт работы с swfaddress, возможно, вы столкнулись с этой проблемой. Вы попытались использовать директиву import для использования swfaddress или, если это не удалось, вы попытались #include 'SWFAddress.as' . Ну правда в том, что тебе вообще ничего не нужно делать.
Все, что вам нужно сделать, это поместить файл SWFAddress.as туда, где находится ваш swf, и swfaddress автоматически доступен для actioncript.
Шаг 4: Файловая структура
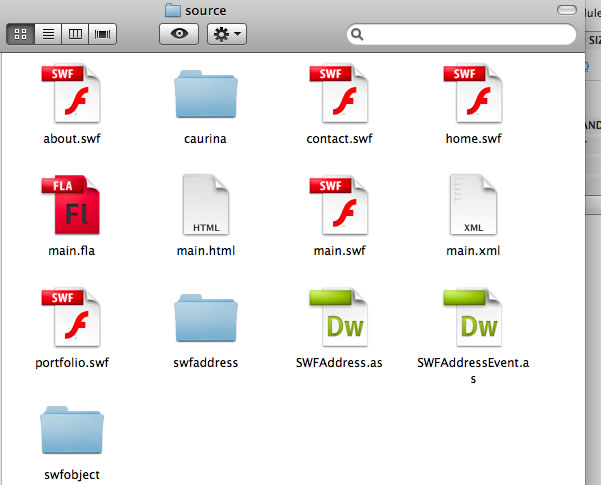
Создайте пустой main.fla. (Я бы обычно писал код во внешних файлах, но я думаю, что весь код в одном месте лучше понятен).
Из загрузки SWFaddress получите папки swfobject и swfaddress и поместите их в основную папку. Если у вас возникли проблемы с их поиском, просто загрузите их из источника в верхней части страницы.
И, конечно же, получите SWFAddress.as и SWFAddressEvent.as и поместите их в основную папку. Они также находятся в исходной загрузке, если у вас возникают проблемы с их поиском.
Загрузите исходный код и скопируйте файл main.html в основную папку.
Шаг 5: Создайте четыре SWF
Создайте 4 фиктивных SWF; например, SWF с произвольным текстом, каждый из которых имеет свой заголовок и цвет шрифта. Есть четыре случайных, включенных в загрузку источника.
Шаг 6: Создайте файл XML
|
1
2
3
4
5
6
7
8
9
|
<?xml version=»1.0″ encoding=»UTF-8″?>
<xml>
<menu>
<item item_name = «Home» item_module = «home.swf» />
<item item_name = «About» item_module = «about.swf» />
<item item_name = «Portfolio» item_module = «portfolio.swf» />
<item item_name = «Contact» item_module = «contact.swf» />
</menu>
</xml>
|
Назовите это main.xml. Мы будем использовать XML для хранения наших данных. Теперь мы создали XML-файл, мы начнем хорошие вещи, кодирование …
Шаг 7: создайте массив меню
Ниже приведен код, необходимый для загрузки меню XML во Flash. Комментарии в коде проведут вас через весь процесс.
Перейдите к кадру 1, слой 1 в основном файле .fla, который вы создали ранее.
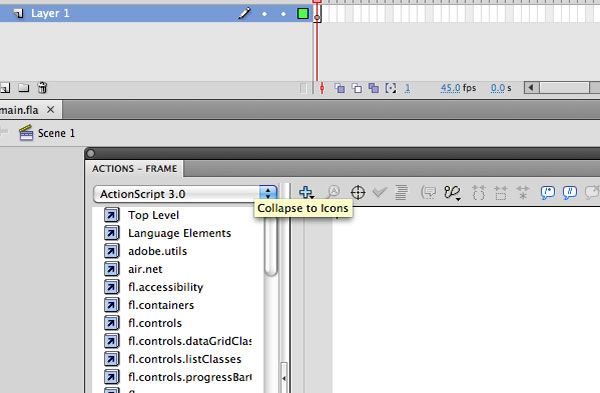
Добавьте этот код. Это хорошо прокомментировано, чтобы помочь вам понять, что он делает.
|
01
02
03
04
05
06
07
08
09
10
11
12
13
14
15
16
17
18
19
20
21
22
23
24
25
26
27
28
29
30
31
32
33
34
35
36
37
38
39
40
41
42
43
44
45
46
47
48
49
50
51
52
53
54
55
56
57
58
59
60
61
62
63
64
65
66
67
68
69
70
71
72
73
74
75
76
77
78
79
80
81
82
83
84
85
86
87
88
89
|
// set stage settings
var fileStage:Stage = this.stage;
fileStage.scaleMode = StageScaleMode.NO_SCALE;
fileStage.align = StageAlign.TOP_LEFT;
// import caurina tweener
import caurina.transitions.Tweener;
// main timeline object
var index:Object = this;
// New Xml Object
var fileXml:XML;
// check how many menu items we have.
var totalMenuItems:Number;
// New URL Request — Add a COMPLETE event listener to load the site once the XML load has been completed.
var xmlLoader:URLLoader = new URLLoader(new URLRequest («main.xml»));
xmlLoader.addEventListener(Event.COMPLETE, createSite);
function createSite (e:Event):void {
// store the xml file in our xml variable
fileXml = new XML(e.target.data);
// use a constructor function to use the xml
index.createMainMenu(fileXml.menu);
}
function createMainMenu(xmlData:XMLList):void {
// create the length of our menu
index.totalMenuItems = xmlData.*.length();
// create a movie clip with the instance name menu_clip and add it to the stage.
// then use a <code>for</code> loop to create our menu
for (var i:uint = 0; i < index.totalMenuItems; i++) {
/*
create a movieclip and export for actionscript with the class name: menuItem
it should contain one dynamic textbox with the instance name of menu_item_text.
*/
// create our new menu item
var menu_item:menuItem = new menuItem();
// set the identification
menu_item.id = i;
menu_item.name = «id» + i;
// position our menu items dynamically
menu_item.x = (i * menu_item.width);
// add the xml values to the text box inside the new item.
menu_item.menu_item_text.text = xmlData.item.@item_name[i];
// add the module address to the menu variable / It will come in useful later.
menu_item.item_module = xmlData.item.@item_module[i];
/*
create a new layer and place the menu_clip movieclip onto that layer.
Give it an instance name of menu_clip
*/
// add each menu item to the menu_clip movieclip using addChild()
index.menu_clip.addChild(menu_item);
}
}
|
Шаг 8: Создать действия кнопок
Вот как должен выглядеть наш сайт:

Итак, давайте продолжим, дав события кнопки. Приведенный ниже код должен быть помещен в строку 78 на слое действий кадра 1 чуть выше метода addchild, который мы использовали.
|
1
2
3
4
5
6
7
|
// assign events to menu buttons.
// rollover & rollout effects
menu_item.addEventListener(MouseEvent.MOUSE_OVER, menuRollOver);
menu_item.addEventListener(MouseEvent.MOUSE_OUT, menuRollOut);
menu_item.addEventListener(MouseEvent.MOUSE_DOWN, menuPress);
|
Добавьте нижеприведенные функции для обработки этих событий ниже функции createMainMenu:
|
01
02
03
04
05
06
07
08
09
10
11
12
13
14
15
16
17
18
19
20
21
22
23
24
25
26
27
28
29
30
31
32
33
34
35
|
function menuRollOver (e:MouseEvent) {
// menu button variable — We use getChildByName to aim at the correct menu item
// e.target.id is referring to the menu_item.id we defined earlier.
var button:MovieClip = index.menu_clip.getChildByName(«id» + e.target.id) as MovieClip;
// set the animation usign caurina tweener
Tweener.addTween( button, {alpha: 0.5, time: 2, transition:»easeOutExpo»});
}
function menuRollOut (e:MouseEvent) {
// menu button variable — We use getChildByName to aim at the correct menu item
// e.target.id is referring to the menu_item.id we defined earlier.
var button:MovieClip = index.menu_clip.getChildByName(«id» + e.target.id) as MovieClip;
// set the animation using caurina tweener
Tweener.addTween( button, {alpha: 1, time: 2, transition:»easeOutExpo»});
}
function menuPress (e:MouseEvent) {
// SWFAddress set value function
SWFAddress.setValue(e.target.deep_link);
}
|
Шаг 9: SWFA-адрес при изменении функции
Это главное событие, которое обрабатывает все изменения swfaddress. Именно здесь мы будем применять логику нашего приложения, чтобы наш сайт работал. Давайте посмотрим на основную функцию в деталях.
|
01
02
03
04
05
06
07
08
09
10
11
12
13
14
15
16
17
18
19
20
21
22
23
24
25
26
27
28
29
|
function handleSWFAddress(e:SWFAddressEvent) {
/*
set html title names
*/
var htmlTitle:String= «XML Deep linking Tutorial»;
for (var i:Number = 0; i < e.pathNames.length; i++) {
htmlTitle+=’ / ‘+String(e.pathNames[i].substr(0,1).toUpperCase()+e.pathNames[i].substr(1)).split(«_»).join(» «);
}
/*
To format the HTML title we use the split and join techniques.
These replace _ with a space.
String(e.pathNames[i].substr(0,1).toUpperCase()+e.pathNames[i].substr(1)).split(«_»).join(» «);
*/
// this function does all the work and assigns the HTML title
SWFAddress.setTitle(htmlTitle);
}
// when the SWFAddress.setValue() is fired this event listens for it and inits the function above.
SWFAddress.addEventListener(SWFAddressEvent.CHANGE, handleSWFAddress);
|
Шаг 10: setValue () Объяснение
SWFAddress.setValue ( «SomeValue»);
Когда это событие вызывается, например, когда кто-то нажимает кнопку, значение swfaddress устанавливается и запускает прослушиватель onChange (). Поэтому, чтобы создать наши модули для загрузки, нам нужно создать некоторый код внутри слушателя swfAddress onChange ().
Шаг 11: Функция событий
Теперь мы возвращаемся к нашему меню for цикла. Нам нужно добавить дополнительную переменную, которая содержит функцию:
|
01
02
03
04
05
06
07
08
09
10
11
12
13
14
15
16
17
18
19
20
21
22
23
24
25
26
27
28
29
30
31
32
33
34
35
36
|
// Place this code in our <code>for</code> loop below the addEventListeners
/*
this variable contains a function that will contain the events when the swfaddress in changed.
*/
menu_item.init = function () {
/*
create a new movieclip and call it module_clip, then place it on a new layer then give it
the instance name of module_clip
*/
// new variable that has contains the path of the swf we are loading in.
var module:String = this.item_module;
// fade out our current module if any, then commence the load of our new module using the tweener’s onComplete function
Tweener.addTween( index.module_clip, {alpha: 0, time: 2, transition:»easeOutExpo», onComplete:function ()
{
index.createModule(module);
// remove the previous module only if it isn’t the first load
if (index.firstLoad == false) {
index.module_clip.removeChildAt(0);
}
}
});
}
|
Шаг 12: Создание функции модуля
Прежде чем мы рассмотрим события swfaddress, мы создадим модуль для загрузки модуля. Он завершен обработкой ошибок ввода-вывода. Хорошей практикой является обработка ошибок, когда вы можете.
|
1
2
3
|
// At the top of the actionscript place this:
var firstLoad:Boolean = true;
|
Это функция модуля. Комментарии проведут вас через весь процесс.
|
01
02
03
04
05
06
07
08
09
10
11
12
13
14
15
16
17
18
19
20
21
22
23
24
25
26
27
28
29
30
31
32
33
34
35
36
37
38
39
40
41
42
43
44
45
46
47
48
|
function createModule (url:String) {
// we create a new loader
var loader:Loader = new Loader();
// we create a new url request for our loader
var moduleURL:URLRequest = new URLRequest(url);
// we add event listeners to the loader.
loader.contentLoaderInfo.addEventListener(ProgressEvent.PROGRESS, loadProgress);
// when the module has loaded we trigger loadComplete() with a event listener.
loader.contentLoaderInfo.addEventListener(Event.COMPLETE, loadComplete);
loader.contentLoaderInfo.addEventListener(IOErrorEvent.IO_ERROR, loadError);
loader.load(moduleURL);
function loadProgress (e:ProgressEvent) {
}
// triggered when module has loaded
function loadComplete (e:Event) {
// fade in the module
Tweener.addTween( index.module_clip, {alpha: 1, time: 2, transition:»easeOutExpo»});
// add the current module to the module_clip movieclip by using addChild
index.module_clip.addChild(e.currentTarget.content);
// now we have the first load we set firstLoad to false.
index.firstLoad = false;
}
function loadError (e:Event) {
trace(«error»);
}
}
|
Шаг 13: Резюме
Напомним: мы создали меню, создали функцию, которая будет срабатывать при срабатывании SWFAddress.setValue (), но нам все еще нужно создать логику приложения. Под логикой приложения я подразумеваю, как мы будем использовать swfAddress для загрузки определенных частей нашего приложения.
Шаг 14: Создание Deep Link
Вернемся к нашему меню for цикла и определим там глубокую ссылку. Ниже, где мы устанавливаем menu_item.name разместим этот код. Этот код создает значение глубокой ссылки:
|
1
2
|
// set the menu item deep link plus formatting with split and join.
menu_item.deep_link = xmlData.item.@item_name[i].split(» «).join(«_»).split(«/»).join(«_»).toLowerCase();
|
Его использование станет ясно очень скоро.
Шаг 15: Логика приложения
Теперь давайте вернемся к нашей функции, которая обрабатывает события swfaddress: handleSWFAddress
Теперь нам нужна определенная часть кода, которая будет загружать правильный модуль. Приведенный ниже код показывает, как применить правильную логику, чтобы приложение загрузило правильный модуль. Комментарии проведут вас через весь процесс. Новая часть этой функции начинается с создания цикла for .
|
01
02
03
04
05
06
07
08
09
10
11
12
13
14
15
16
17
18
19
20
21
22
23
24
25
26
27
28
29
30
31
32
33
34
35
36
37
38
39
40
41
42
43
44
45
46
47
48
49
50
51
52
53
54
55
56
57
58
|
// function to handle swfaddress events.
function handleSWFAddress(e:SWFAddressEvent) {
/*
set html title names
*/
var htmlTitle:String= «XML Deep linking Tutorial»;
for (var i:Number = 0; i < e.pathNames.length; i++) {
htmlTitle+=’ / ‘+String(e.pathNames[i].substr(0,1).toUpperCase()+e.pathNames[i].substr(1)).split(«_»).join(» «);
}
/*
To format the HTML title we use the split() and join() techniques.
These replace _ with a space.
String(e.pathNames[i].substr(0,1).toUpperCase()+e.pathNames[i].substr(1)).split(«_»).join(» «);
*/
// this function does all the work and assigns the HTML title
SWFAddress.setTitle(htmlTitle);
// create a <code>for</code> loop to iterate through the total number of menu items.
/*
You may be wondering why I am using n instead of i in the <code>for</code> loop.
and both loops are iterating through the variable i it throws an error.
*/
for (var n:uint = 0; n < index.totalMenuItems; n++) {
// this var is used to iterate through all our menu items
var button:MovieClip = index.menu_clip.getChildByName(«id»+ n) as MovieClip;
// the if statement below is the most important part of our code.
// SWFAddress.getValue() is explained in the next step
// we need to get rid of the «/» on the front in order for it to equal the button’s deep link
if (button.deep_link == SWFAddress.getValue().split(«/»)[1]) {
// if any of button deep links equal the URL set then it initiates the menu_item.init function we set earlier
button.init();
// to stop the code we use return.
return;
}
}
}
SWFAddress.addEventListener(SWFAddressEvent.CHANGE, handleSWFAddress);
|
Шаг 16: SWFAddress.getValue ()
SWFAddress.getValue () — отличный способ проверить ваш сайт с глубокими ссылками без веб-сервера. Лучший способ проверить ваши глубокие ссылки с помощью SWFAddress.getValue () — это использовать функцию трассировки. Например:
|
1
|
trace(SWFAddress.getValue());
|
Это отследит текущее значение swfAddress в выходных данных.
Шаг 17: загрузка первого пункта меню
С какой стати вы не хотите загрузить первый пункт меню? Нет веской причины, поэтому я покажу вам, как это сделать. Перейдите к функции handleSWFAddress () и перетащите ее в функцию createMainMenu () под всем предыдущим кодом. Добавьте этот код ниже второго цикла for (тот, который мы только что создали):
|
1
2
3
4
5
6
|
// this var is referenced to the first menu item
var firstButton:MovieClip = index.menu_clip.getChildByName(«id» + 0) as MovieClip;
// use the dispatch event to fire the press event on the first button.
// Therefore the <code>for</code> loop above will load the first module.
firstButton.dispatchEvent( new MouseEvent(MouseEvent.MOUSE_DOWN));
|
Шаг 18: Дополнительные улучшения
Теперь мы собираемся применить проверку к меню в качестве подарка для чтения этого документа. 🙂
Подойдите к функции menu_item.init в меню for цикла.
|
01
02
03
04
05
06
07
08
09
10
11
12
13
14
15
16
17
18
|
for (var i:uint = 0; i < index.totalMenuItems; i++) {
var button:MovieClip = index.menu_clip.getChildByName(«id» + i) as MovieClip;
if( button != this ) {
button.enabled = true;
button.addEventListener(MouseEvent.MOUSE_OUT, menuRollOut);
button.dispatchEvent(new MouseEvent(MouseEvent.MOUSE_OUT));
} else {
button.enabled = false;
button.dispatchEvent(new MouseEvent(MouseEvent.MOUSE_OVER));
button.removeEventListener(MouseEvent.MOUSE_OUT, menuRollOut);
}
}
|
Шаг 19: Устранение неисправностей
OK! Теперь у нас должен быть рабочий проект. Но пока не устраивай вечеринку. Проверьте следующие вещи:
- Вы завершили каждый шаг.
- НЕ Публиковать SWF, просто экспортируйте фильм, в противном случае вы переопределите документ main.html, полученный при загрузке исходного кода.
- Убедитесь, что вы импортировали весь необходимый импорт. Ну, весь импорт необходим без единого целого, который не будет функционировать должным образом.
- Убедитесь, что функция handleSWFAddress () находится в функции createMainMenu ().
Шаг 20: Что делает main.html?
Давайте посмотрим на main.html:
|
01
02
03
04
05
06
07
08
09
10
11
12
13
14
15
16
17
18
19
20
21
22
23
24
25
26
27
28
29
30
31
32
33
34
35
36
37
|
<html xmlns=»http://www.w3.org/1999/xhtml» xml:lang=»en» lang=»en»>
<head>
<title></title>
<meta http-equiv=»Content-Type» content=»text/html; charset=utf-8″ />
<style type=»text/css»>
/*<![CDATA[*/
html, body, #website {
height: 100%;
overflow: hidden;
}
body {
background: #f7f7f7;
font: 86% Arial, «Helvetica Neue», sans-serif;
margin: 0;
}
/*]]>*/
</style>
<script type=»text/javascript» src=»swfobject/swfobject.js»></script>
<script type=»text/javascript» src=»swfaddress/swfaddress.js»></script>
<script type=»text/javascript»>
/*<![CDATA[*/
swfobject.embedSWF(‘main.swf’, ‘website’, ‘100%’, ‘100%’, ‘9’,
‘swfobject/expressinstall.swf’, {domain: ‘*’}, {allowscriptaccess: ‘always’, allowfullscreen: ‘true’, bgcolor: ‘#f7f7f7’, menu: ‘false’, wmode: ‘opaque’}, {id: ‘website’});
/*]]>*/
</script>
</head>
<body>
<div id=»website»>
<p>In order to view this page you need Flash Player 9+ support!</p>
<p>
<a href=»http://www.adobe.com/go/getflashplayer»>
<img src=»http://www.adobe.com/images/shared/download_buttons/get_flash_player.gif» alt=»Get Adobe Flash player» />
</a>
</p>
</div>
</body>
</html>
|
Многое из этого — просто стилизация файла, изменение цвета фона, позиционирование SWF и тому подобное. Вот ключевые строки:
|
01
02
03
04
05
06
07
08
09
10
11
12
13
14
15
16
|
<html xmlns=»http://www.w3.org/1999/xhtml» xml:lang=»en» lang=»en»>
<head>
<script type=»text/javascript» src=»swfobject/swfobject.js»></script>
<script type=»text/javascript» src=»swfaddress/swfaddress.js»></script>
<script type=»text/javascript»>
/*<![CDATA[*/
swfobject.embedSWF(‘main.swf’, ‘website’, ‘100%’, ‘100%’, ‘9’,
‘swfobject/expressinstall.swf’, {domain: ‘*’}, {allowscriptaccess: ‘always’, allowfullscreen: ‘true’, bgcolor: ‘#f7f7f7’, menu: ‘false’, wmode: ‘opaque’}, {id: ‘website’});
/*]]>*/
</script>
</head>
<body>
<div id=»website»>
</div>
</body>
</html>
|
Это включает файлы JavaScript SWFObject и SWFAddress и использует SWFObject для загрузки main.swf в элемент div, называемый «веб-сайт». Это все, что нужно сделать! Проверьте эту заставку для введения в SWFObject.
Шаг 20: Весь код прокомментирован
Ниже весь код прокомментирован и работает.
|
001
002
003
004
005
006
007
008
009
010
011
012
013
014
015
016
017
018
019
020
021
022
023
024
025
026
027
028
029
030
031
032
033
034
035
036
037
038
039
040
041
042
043
044
045
046
047
048
049
050
051
052
053
054
055
056
057
058
059
060
061
062
063
064
065
066
067
068
069
070
071
072
073
074
075
076
077
078
079
080
081
082
083
084
085
086
087
088
089
090
091
092
093
094
095
096
097
098
099
100
101
102
103
104
105
106
107
108
109
110
111
112
113
114
115
116
117
118
119
120
121
122
123
124
125
126
127
128
129
130
131
132
133
134
135
136
137
138
139
140
141
142
143
144
145
146
147
148
149
150
151
152
153
154
155
156
157
158
159
160
161
162
163
164
165
166
167
168
169
170
171
172
173
174
175
176
177
178
179
180
181
182
183
184
185
186
187
188
189
190
191
192
193
194
195
196
197
198
199
200
201
202
203
204
205
206
207
208
209
210
211
212
213
214
215
216
217
218
219
220
221
222
223
224
225
226
227
228
229
230
231
232
233
234
235
236
237
238
239
240
241
242
243
244
245
246
247
248
249
250
251
252
253
254
255
256
257
258
259
260
261
262
263
264
265
266
267
268
269
270
271
272
273
274
275
276
277
278
279
280
281
282
283
284
285
286
287
288
289
290
291
292
293
294
295
296
297
298
299
300
301
302
303
304
305
306
307
308
309
310
311
312
313
314
315
316
317
318
319
320
321
322
|
// set stage settings
var fileStage:Stage=this.stage;
fileStage.scaleMode=StageScaleMode.NO_SCALE;
fileStage.align=StageAlign.TOP_LEFT;
// import caurina tweener
import caurina.transitions.Tweener;
// main timeline object
var index:Object=this;
// New Xml Object
var fileXml:XML;
// check how many menu items we have.
var totalMenuItems:Number;
// prevents null errors
var firstLoad:Boolean = true;
// New URL Request — Add a complete event listener to load the site once the load has been completed.
var xmlLoader:URLLoader = new URLLoader();
xmlLoader.load (new URLRequest(«main.xml»));
xmlLoader.addEventListener( Event.COMPLETE, createSite);
function createSite(e:Event) {
// store the xml file in our xml variable
fileXml=new XML(e.target.data);
// use a constructor function to use the xml
index.createMainMenu(fileXml.menu);
}
function createMainMenu(xmlData:XMLList) {
// create the length of our menu
index.totalMenuItems=xmlData.*.length();
// create a movie clip with the instance name menu_clip and add it to the stage.
// then use a <code>for</code> loop to create our menu
for (var i:uint = 0; i < index.totalMenuItems; i++) {
/*
create a movieclip and export for actionscript with the class name: menuItem
it should contain one dynamic textbox with the instance name of menu_item_text.
*/
// create our new menu item
var menu_item:menuItem = new menuItem();
// set the identification
menu_item.name=»id»+i;
menu_item.id=i;
// set the menu item deep link plus formatting with split and join.
menu_item.deep_link = xmlData.item.@item_name[i].split(» «).join(«_»).split(«/»).join(«_»).toLowerCase();
// give it a button cursor & make the target the button and not its children
menu_item.buttonMode=true;
menu_item.mouseChildren=false;
// position our menu items dynamically
menu_item.x = (i * menu_item.width);
// add the xml values to the text box inside the new item.
menu_item.menu_item_text.text=xmlData.item.@item_name[i];
// add the module address to the menu variable / It will come in useful later.
menu_item.item_module=xmlData.item.@item_module[i];
/*
create a new layer and place the menu_clip movieclip onto that layer.
Give it an instance name of menu_clip
*/
// assign events to menu buttons.
// rollover & rollout effects
menu_item.addEventListener(MouseEvent.MOUSE_OVER, menuRollOver);
menu_item.addEventListener(MouseEvent.MOUSE_OUT, menuRollOut);
menu_item.addEventListener(MouseEvent.MOUSE_DOWN, menuPress);
/*
this variable contains a function that will contain the events when the swfaddress in changed.
*/
menu_item.init = function () {
/*
create a new movieclip and call it module_clip, then place it on a new layer then give it
the instance name of module_clip
*/
// new variable that has contains the path of the swf we are loading in.
var module:String = this.item_module;
// fade out our current module if any, then commence the load of our new module using the tweener’s onComplete function
Tweener.addTween( index.module_clip, {alpha: 0, time: 2, transition:»easeOutExpo», onComplete:function () {
index.createModule(module);
if (index.firstLoad == false) {
index.module_clip.removeChildAt(0);
}
}});
for (var i:uint = 0; i < index.totalMenuItems; i++) {
var button:MovieClip = index.menu_clip.getChildByName(«id» + i) as MovieClip;
if( button != this ) {
button.enabled = true;
button.addEventListener(MouseEvent.MOUSE_OUT, menuRollOut);
button.dispatchEvent(new MouseEvent(MouseEvent.MOUSE_OUT));
} else {
button.enabled = false;
button.dispatchEvent(new MouseEvent(MouseEvent.MOUSE_OVER));
button.removeEventListener(MouseEvent.MOUSE_OUT, menuRollOut);
}
}
}
// add each menu item to the menu_clip movieclip using addChild()
index.menu_clip.addChild(menu_item);
}
// function to handle swfaddress events.
function handleSWFAddress(e:SWFAddressEvent) {
/*
set html title names
*/
var htmlTitle:String= «XML Deep linking Tutorial»;
for (var i:Number = 0; i < e.pathNames.length; i++) {
htmlTitle+=’ / ‘+String(e.pathNames[i].substr(0,1).toUpperCase()+e.pathNames[i].substr(1)).split(«_»).join(» «);
}
/*
to format the html title we use the split and join technique.
String(e.pathNames[i].substr(0,1).toUpperCase()+e.pathNames[i].substr(1)).split(«_»).join(» «);
*/
// this function does all the work and assigns the html title
SWFAddress.setTitle(htmlTitle);
// create a <code>for</code> loop to iterate through the total number fo menu items.
/*
You may be wondering why I am using n instead of i in the <code>for</code> loop.
and both loops are iterating through the variable i it throws an error.
*/
for (var n:uint = 0; n < index.totalMenuItems; n++) {
// this var is used to iterate through all our menu items
// this var is referenced to the first menu item
var button:MovieClip = index.menu_clip.getChildByName(«id»+ n) as MovieClip;
// the if statement below is the most important part of our code.
// SWFAddress.getValue() is explained in the next step
// we need to get rid of the «/» on the front in order for it to equal the button’s deep link
if (button.deep_link == SWFAddress.getValue().split(«/»)[1]) {
// if any of button deep links equal the URL set then it initiates the menu_item.init function we set earlier
button.init();
// to stop the code we use return.
return;
}
}
var firstButton:MovieClip = index.menu_clip.getChildByName(«id» + 0) as MovieClip;
// use the dispatch event to fire the press event on the first button.
// Therefore the <code>for</code> loop above will load the first module.
firstButton.dispatchEvent( new MouseEvent(MouseEvent.MOUSE_DOWN));
}
SWFAddress.addEventListener(SWFAddressEvent.CHANGE, handleSWFAddress);
}
function menuRollOver(e:MouseEvent) {
// menu button variable — We use getChildByName to aim at the correct menu item
// e.target.id is referring to the menu_item.id we defined earlier.
var button:MovieClip=index.menu_clip.getChildByName(«id»+e.target.id) as MovieClip;
// set the animation using caurina tweener
Tweener.addTween( button, {alpha: 0.5, time: 2, transition:»easeOutExpo»});
}
function menuRollOut(e:MouseEvent) {
// menu button variable — We use getChildByName to aim at the correct menu item
// e.target.id is referring to the menu_item.id we defined earlier.
var button:MovieClip=index.menu_clip.getChildByName(«id»+e.target.id) as MovieClip;
// set the animation using caurina tweener
Tweener.addTween( button, {alpha: 1, time: 2, transition:»easeOutExpo»});
}
function menuPress(e:MouseEvent) {
// SWFAddress set value function
SWFAddress.setValue(e.target.deep_link);
}
/*
this is the function that loads the selected module
*/
function createModule (url:String) {
// we create a new loader
var loader:Loader = new Loader();
// we create a new url request for our loader
var moduleURL:URLRequest = new URLRequest(url);
// we add event listeners to the loader.
loader.contentLoaderInfo.addEventListener(ProgressEvent.PROGRESS, loadProgress);
// when the module has loaded we trigger the complete with a event listener.
loader.contentLoaderInfo.addEventListener(Event.COMPLETE, loadComplete);
loader.contentLoaderInfo.addEventListener(IOErrorEvent.IO_ERROR, loadError);
loader.load(moduleURL);
function loadProgress (e:ProgressEvent) {
}
// triggered when module has loaded
function loadComplete (e:Event) {
// fade in the module
Tweener.addTween( index.module_clip, {alpha: 1, time: 2, transition:»easeOutExpo»});
// add the current module to the module_clip movieclip by using addChild
index.module_clip.addChild(e.currentTarget.content);
// now we have the first load we set firstLoad to false
index.firstLoad = false;
}
function loadError (e:Event) {
trace(«error»);
}
}
|
Вывод
Спасибо за чтение этой статьи. Если у вас есть какие-либо вопросы или проблемы, оставьте их ниже. К настоящему времени вы должны понимать, как создать сайт с глубокими ссылками, без необходимости понимать, как должен кодироваться динамический сайт.