MP3-плеер с HTML5
Если вы новичок в HTML5 и ищете новые знания — наш новый учебник для вас. Мы собираемся рассказать вам, как создать свой собственный mp3-плеер html5. В первом уроке мы расскажем вам об HTML5 Audio Element. Аудиоэлемент HTML5 лежит в основе нового медиа-API. Сам элемент позволяет воспроизводить несколько разных типов аудиофайлов и имеет удобный встроенный контроллер, который позволяет пользователю контролировать воспроизведение аудио. Давайте начнем с создания очень простого HTML-документа, который воспроизводит аудиофайл.
Прежде чем мы начнем, давайте соберем инструменты, необходимые для создания и тестирования реального файла. Вот что вам нужно:
- Текстовый редактор
- Веб-браузер или два
- Музыкальный файл MP3 (желательно тот, который вам нравится!)
Если вы никогда раньше не занимались этим типом кодирования, давайте быстро рассмотрим каждый элемент в списке выше.
Текстовый редактор : текстовый редактор похож на текстовый процессор — с одним важным отличием. Текстовый процессор будет встраивать управляющие коды в текст, который текстовый процессор будет использовать для визуализации документа. Текстовый редактор хранит текст как «чистый текст». Нам нужен чистый текст, так как браузер, который будет отображать ваш конечный рабочий продукт, требует, чтобы текст был свободен от контрольных кодов. Вы можете использовать любой текстовый редактор, который вам нравится. Для ПК вы можете использовать Notepad ++ и EditPad + (оба рекомендуются). Блокнот по умолчанию, который поставляется с операционной системой Windows, тоже в порядке, но мы не рекомендуем его использовать (из-за лишних пустых строк, которые вы можете получить в результате). Для Mac или ПК вы можете использовать бесплатную версию Komodo edit, которая доступна на веб-сайте Komodo: http://www.activestate.com/komodo-edit. В этом уроке я буду использовать Sublime — популярный и довольно новый редактор для ПК.
В конце концов, не имеет значения, какой текстовый редактор вы используете, так что найдите тот, который вам удобен, и сделайте это!
Веб-браузер (два или более) : я уверен, что если вы читаете это, у вас уже есть хотя бы один веб-браузер на вашем компьютере. Я рекомендую иметь как минимум два или три веб-браузера. На момент написания этой статьи браузеры реализовывали HTML5 с различными уровнями соответствия стандарту. Это означает, что вы можете увидеть небольшие различия между тем, как что-то работает в IE, Safari, Firefox, Chrome и других браузерах.
Музыкальный файл MP3: Очевидно, что если вы собираетесь воспроизводить звук, вам нужен звук для воспроизведения. Выберите понравившуюся песню, потому что, пройдя эту первую часть урока, вы, вероятно, услышите ее снова и снова. Лично мне нравится путешествие.
Как только вы собрали необходимые предметы, пришло время начать писать код. Вот шаги для создания первой версии вашего MP3-плеера:
1. Откройте ваш текстовый редактор.
2. Введите код ниже. Я называю это «Базовая структура документа». Я начинаю почти все мои примеры HTML с этой структурой. Вы можете думать об этом как о скелете HTML-файла. Мы будем использовать HTML5-версию этой структуры. Вы можете увидеть небольшие вариации этого в других курсах и текстах — но все они служат одной и той же цели.
<!DOCTYPE html>
<html>
<head>
	<title>Audio Player</title>
</head>
<body>

</body>
</html>
3. Save the file somewhere easy to find. When you save the file you must append the extension .html or .htm. This extension tells the browser that the file you have created is an HTML file and is readable by the browser itself. I am saving mine as audioPlayer1.html.
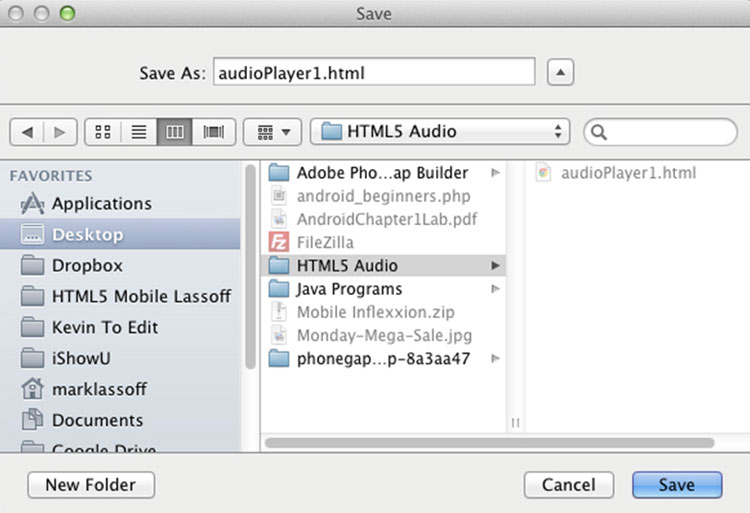
4. The basic document structure, by itself, doesn’t really do anything except give us a place to put our content. Now we’re ready to insert our audio tag and test the music player. Go ahead and copy your MP3 file into the same folder as the HTML document you saved in the previous step.
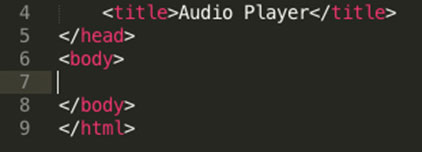
5. Now put your cursor between the open and closing body tags. The opening body tag looks like this: <body>. The closing body tag is preceded with a forward slash like this: </body>. This is what it looks like in my text editor:
6. Type the following code where you just placed your cursor. Please note that where it says music.mp3 you should type the file name of the MP3 music file you moved in step four.
<audio controls="controls">
	<source src="music.mp3" type="audio/mpeg">
</audio>
7. Save your file one more time. Now we’re ready to test our very simple MP3 player. To open the file in your primary browser, you may simply navigate to the file itself and then double-click it. You also may open the file from any browser by using the open command and navigating to the HTML file you just created.
If your MP3 player appears not to work – don’t worry! There’s a reason.
While HTML5 has given the browsers a way to play audio (and video) files in a non-proprietary way, not every browser plays every audio format. You may be familiar with some common audio players such as MP3 (which we’ve been using in this example), Aiff, and WAV. You are likely not familiar with another format – Ogg Vorbis.
Examine the chart below to determine which audio formats are familiar with which common browser:
|
Browser |
Ogg Vorbis |
MP3 |
WAV |
|
Firefox |
X |
X |
|
|
Safari |
X |
X |
|
|
Chrome |
X |
X |
|
|
Internet Explorer |
X |
X |
Based on the chart provided above, if you have an MP3 but attempted to play it using Firefox, you would not have had a good result. Usually, I use a combination of MP3 and Ogg Vorbis to cover most of the major browser platforms. You can easily convert your audio file(s) to Ogg using one of the free and convenient online converter programs. One easy-to-use converter is located at: http://audio.online-convert.com/convert-to-ogg
You can also use an audio production program such as Adobe’s Soundbooth, or the free and ubiquitous Audacity to complete the conversion. Once you convert the file, you’ll have two separate audio files – one in MP3 format and one in OGG. (I’m not really a big fan of WAV files due to their size; however, you can use a combination of WAV and Ogg Vorbis and be covered in all of the major browsers as well)
The next step is to add the source for the Ogg Vorbis file to your code. Modify the audio element in your code so it looks like this:
<audio controls="controls">
	<source src="music.mp3" type="audio/mpeg">
	<source src="music.ogg" type="audio/ogg">
</audio>
Now, let’s run the code in the browser again. You should be able to just double-click the icon for the HTML file. If you have more than one browser installed on your machine, you might want to load it in each browser and note the differences. If you have both an MP3 file and an Ogg Vorbis file, the music should play successfully in every browser.
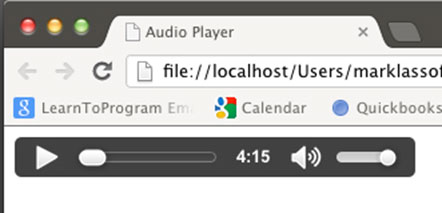
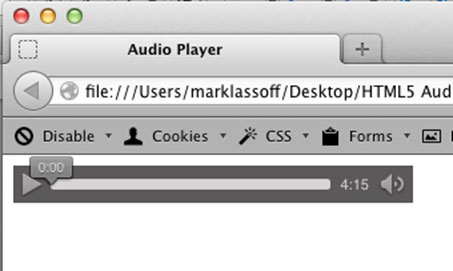
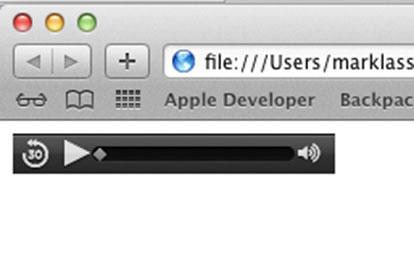
Here’s what the functional player looks like in Chrome, Firefox and Safari (Mac version):
Chrome Audio Player
Audio Player in Firefox
Audio Player in Safari
Most of the code we have written so far is fairly intuitive, and you can garner most of the meaning simply by reading the tags.
In the audio tag itself, the controls modifier tells the browser to use the Play, Volume and Song position controls shown in the images above. If the value were set to controls=»false» or left out altogether, no controls would appear. You might be wondering how the user plays the music if the controls aren’t visible. We’ll get to that in the next chapter. By the way, technically, modifiers placed in tags – in a fashion similar to the way controls are placed in the audio tag – are known as attributes.
Speaking of attributes, there are several other attributes that can be used with the audio tag in HTML5. These affect other aspects of the audio player. I don’t actually use these attributes very much and they’re not necessary for this project. For your reference, they are listed in the table below:
|
Attribute |
Purpose |
|
src |
As an alternative to use the <source> tags inside the <audio> element the src of the audio may be listed as an attribute of the audio tag. The value of the attribute should be the URI of the audio file. Example: <audio src=»music.mp3″ controls=»controls»> |
|
preload |
This attribute has three possible values: none, metadata and auto. Where supported by the browser, the attribute will influence how the media should be preloaded to provide the best user experience. |
|
Autoplay |
If set to autoplay = «autoplay» the media will start playing as soon as the media loads. Note that Apple has disabled this feature in iOS. Users generally find it annoying when media plays when a page loads and tend to prefer to start and stop media elements themselves. |
|
Loop |
When set to loop=»loop» this attribute will cause the media to play over and over until stopped by the user. |
