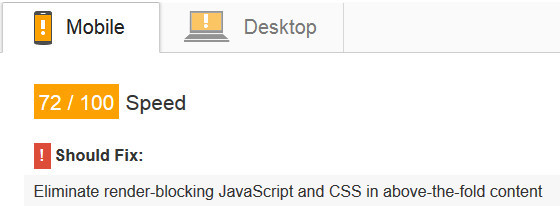
«Устранить блокировку рендеринга JavaScript и CSS». Это единственное предложение Google Page Speed Insights, с которым я всегда застреваю.
При доступе к веб-странице Google хочет, чтобы она загружала только то, что полезно для начального просмотра, и использовала простой для загрузки чего-либо еще. Таким образом, пользователь сможет увидеть страницу как можно раньше.
Есть много вещей, которые мы можем сделать, чтобы минимизировать блокировку рендеринга JavaScript, например, разбиение кода, расшатывание дерева, кэширование и так далее.
Но как насчет CSS? Для этого мы можем минимизировать блокировку рендеринга, изолировав CSS, необходимый для содержимого, превышающего сложность (или критический CSS ), и сначала загрузив его. После этого мы можем загрузить некритический CSS.
Изоляция критического CSS — это то, что может быть сделано программно, и в этой статье я покажу вам, как делегировать его в ваш конвейер Webpack.
Что означает блокировка рендера?
Если ресурс «блокирует рендеринг», это означает, что браузер не может отобразить страницу, пока ресурс не загружен или не обработан иным образом.
Как правило, мы загружаем наш CSS способом блокирования рендеринга, ссылаясь на нашу таблицу стилей в headдокументе, например так:
<head>
  <link rel="stylesheet" href="/style.css">
  ...
</head>
<body>
  <p>I can't be seen until style.css has been loaded!</p>
</body>
Когда эта страница загружается веб-браузером, она будет читать ее сверху вниз. Когда браузер linkперейдет к тегу, он сразу начнет загружать таблицу стилей и не будет отображать страницу до ее завершения.
Для большого сайта, в частности, такого, который имеет обширный каркас, такой как Bootstrap, таблица стилей может составлять несколько сотен килобайт, и пользователю придется терпеливо ждать, пока он полностью загрузится.
Итак, должны ли мы просто ссылаться на таблицу стилей в body, где рендеринг не блокируется? Вы могли бы, но дело в том, что блокировка рендера не совсем плохая, и мы на самом деле хотим ее использовать. Если бы страница отображалась без какого-либо загруженного CSS-кода, мы получили бы ужасную «вспышку нестандартного содержимого»:
Приятное место, которое мы хотим получить, это когда мы визуализируем-блокируем страницу с критическим CSS, который необходим для стилизации основного вида, но весь некритический CSS загружается после первоначального рендеринга.
Критический CSS
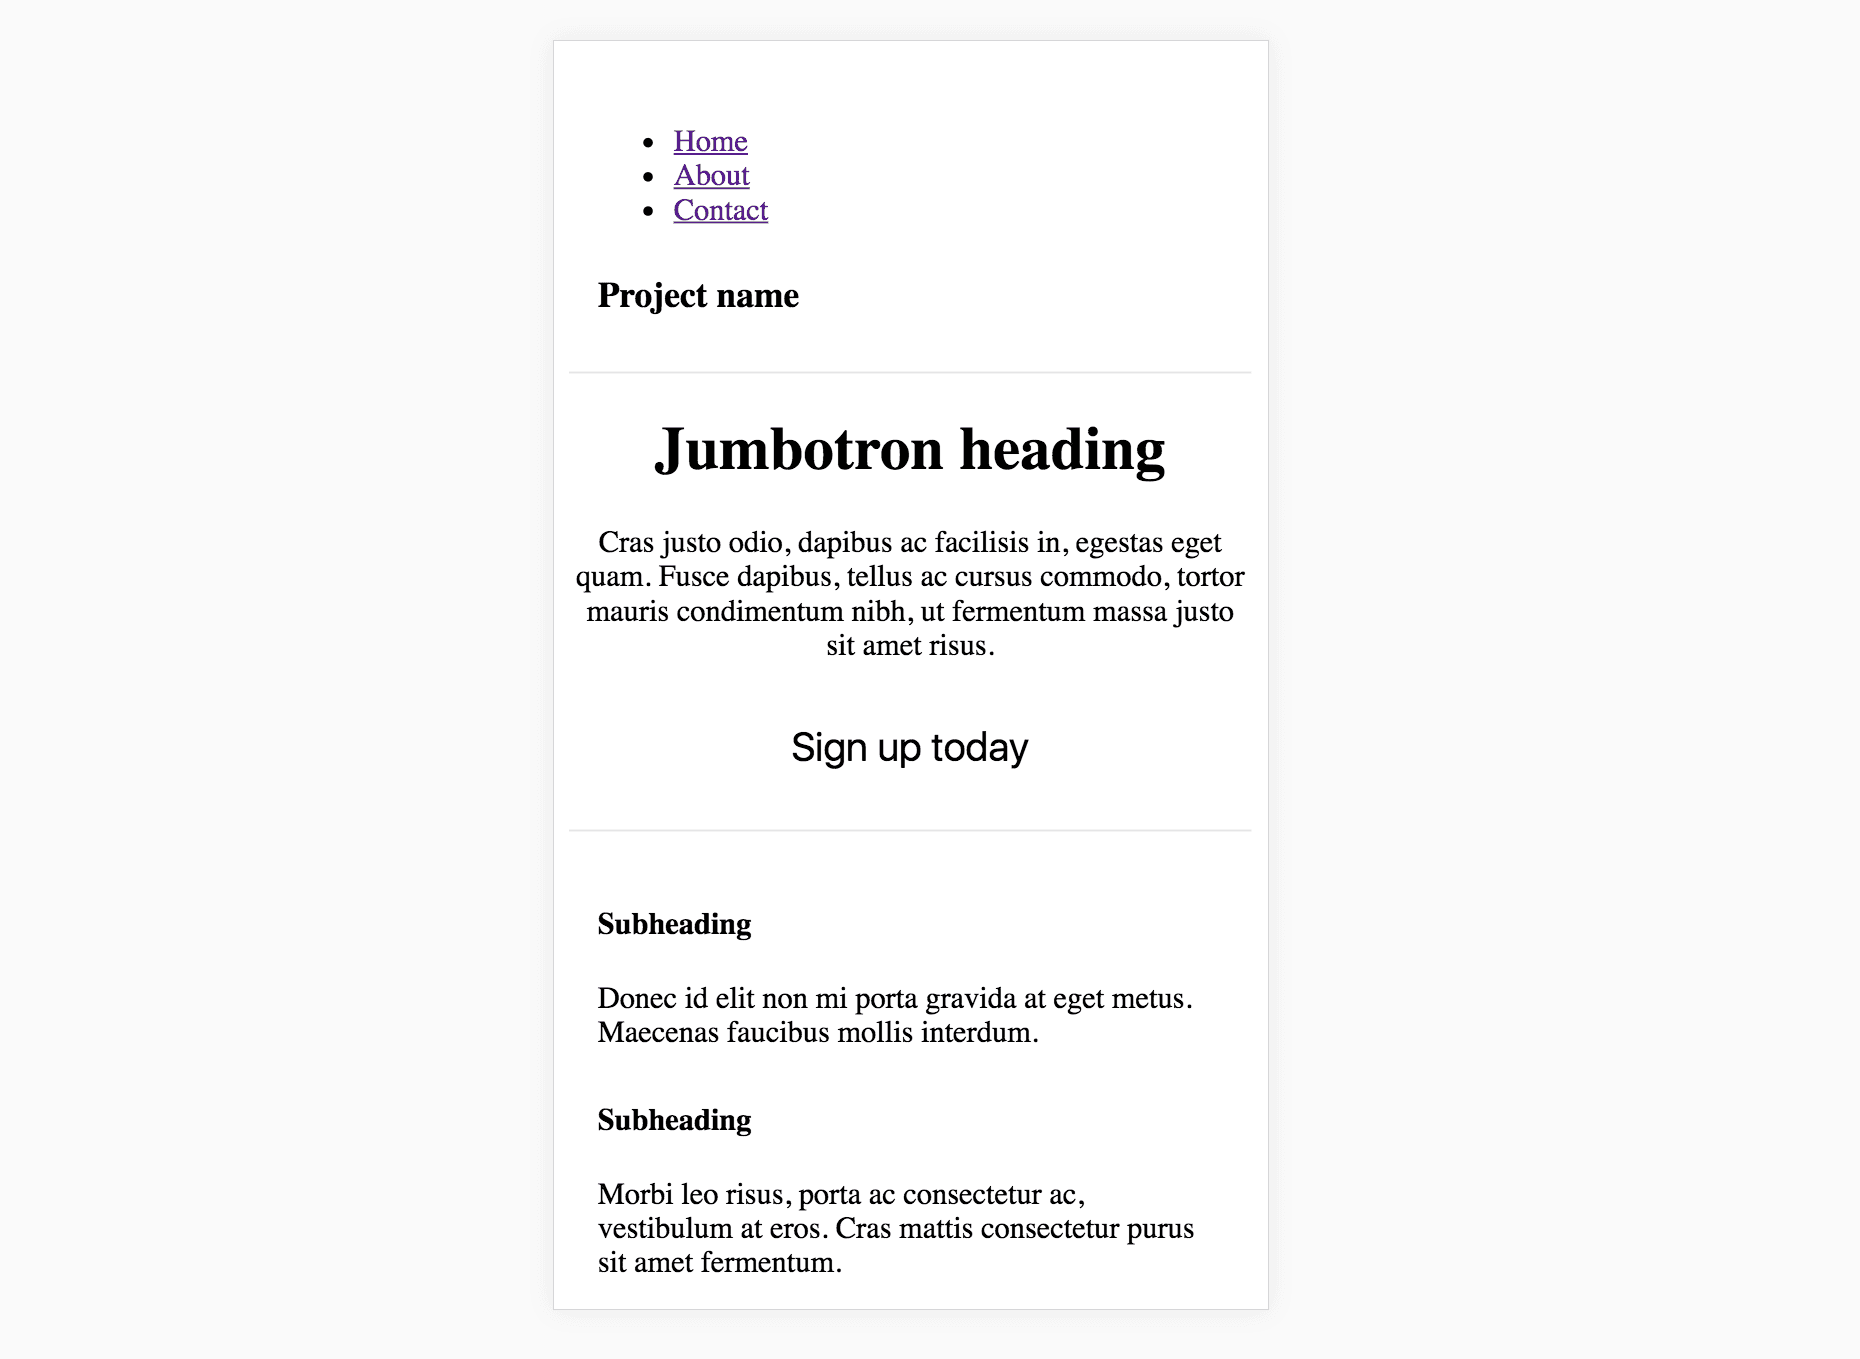
Посмотрите на эту простую страницу, которую я создал с помощью Bootstrap и Webpack. Вот как это выглядит после первого рендеринга:
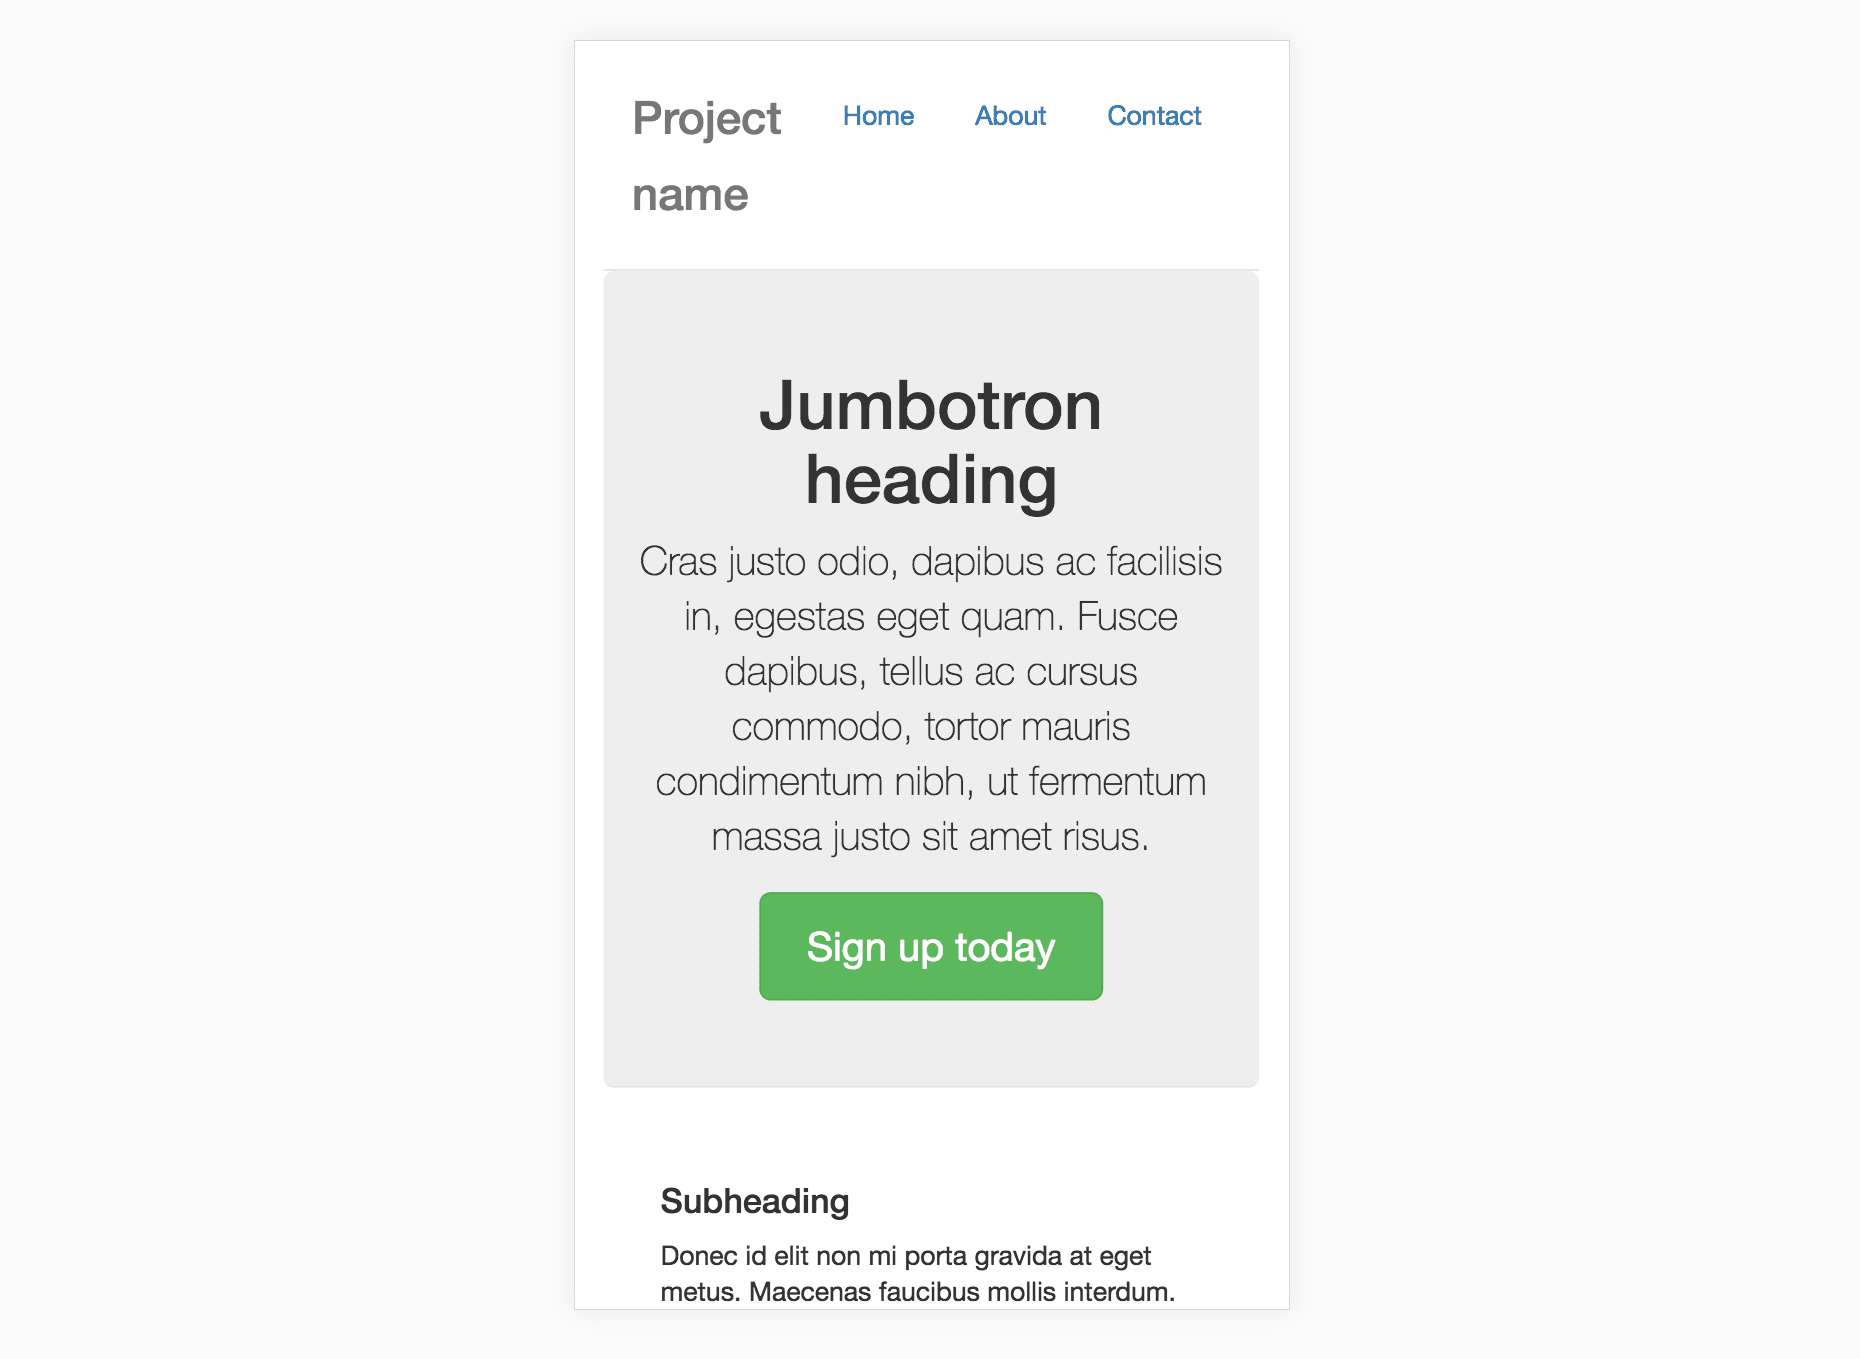
На странице также есть модальное окно, которое открывается кнопкой «Зарегистрироваться сегодня». При открытии это выглядит так:
Для первого рендеринга страницы нам понадобятся CSS-правила для навигационной панели, jumbotron, кнопки и несколько других общих правил для макета и шрифтов. Но нам не понадобятся правила для модальных, так как они не будут показаны сразу. Имея это в виду, вот как мы можем изолировать критический CSS от некритического CSS:
critical.css
.nav {
  ...
}

.jumbtron {
  ...
}

.btn {
  ...
}
non_critical.css
.modal {
  ...
}
If you’re on board with this concept, there are two questions that you might now find of interest:
- How can we discern our critical and non-critical CSS programmatically?
- How can we get our page to load the critical CSS before the first render and load the non-critical CSS after the first render?
Example Project
I’ll briefly introduce you to the basic setup of this project, so when we reach the solution it’ll be quick to digest.
Firstly, I’m loading Bootstrap SASS into my entry file.
main.js
require("bootstrap-sass/assets/stylesheets/_bootstrap.scss");I’m using sass-loader to handle this, and I’m using it in conjunction with the Extract Text Plugin so that the compiled CSS goes into its own file.
I’m also using the HTML Webpack Plugin to create an HTML file in the build. It’s necessary for the solution, as you’ll soon see.
webpack.config.js
module.exports = {
  module: {
    rules: [
      {
        test: /\.scss$/,
        use: ExtractTextPlugin.extract({
          fallback: 'style-loader',
          use: ['css-loader', 'sass-loader']
        })
      },
      ...
    ]
  },
  ...
  plugins: [
    new ExtractTextPlugin({ filename: 'style.css' }),
    new HtmlWebpackPlugin({
      filename: 'index.html',
      template: 'index.html',
      inject: true
    })
  ]
};
After I run a build, here’s what the HTML file looks like. Note that CSS is being loaded in the head and will, therefore, block rendering.
index.html
<!DOCTYPE html>
<html lang="en">
<head>
    <meta charset="utf-8">
    <meta name="viewport" content="width=device-width,initial-scale=1">
    <title>vuestrap-code-split</title>
    <link href="/style.css" rel="stylesheet">
</head>
<body>
  <!--App content goes here, omitted for brevity.-->
  <script type="text/javascript" src="/build_main.js"></script>
</body>
</html>
Programmatically Identifying Critical CSS
Manually identifying the critical CSS would be a pain to maintain. To do it programmatically, we can use Addy Osmani’s aptly named Critical. This is a Node.js module that will read in an HTML document, and identify the critical CSS. It does a bit more than that as well, as we’ll see shortly.
The way that Critical identifies the critical CSS is by loading the page with PhantomJS, with a screen dimension you specify, and by extracting any CSS rules used in the rendered page.
Here’s how we can set it up for this project:
const critical = require("critical");

critical.generate({

  /* The path of the Webpack bundle */
  base: path.join(path.resolve(__dirname), 'dist/'),
  src: 'index.html',
  dest: 'index.html',
  inline: true,
  extract: true,

  /* iPhone 6 dimensions, use whatever you like*/
  width: 375,
  height: 565,

  /* Ensure that bundled JS file is called */
  penthouse: {
    blockJSRequests: false,
  }
});
When executed, this will update the HTML file in the Webpack bundle output to:
index.html
<!DOCTYPE html>
<html lang="en">
<head>
  <meta charset="utf-8">
  <meta name="viewport" content="width=device-width,initial-scale=1">
  <title>Bootstrap Critical</title>
  <style type="text/css">
    /* Critical CSS is inlined into the document head, abbreviated here. */
    body {
      font-family: Helvetica Neue,Helvetica,Arial,sans-serif;
      font-size: 14px;
      line-height: 1.42857;
      color: #333;
      background-color: #fff;
    }
    ...
  </style>
  <link href="/style.96106fab.css" rel="preload" as="style" onload="this.rel='stylesheet'">
  <noscript>
      <link href="/style.96106fab.css" rel="stylesheet">
  </noscript>
  <script>
    /*A script for loading the non-critical CSS goes here, omitted for brevity.*/
  </script>
</head>
<body>
  <!--App content goes here, omitted for brevity.-->
  <script type="text/javascript" src="/build_main.js"></script>
</body>
</html>
It will also output a new CSS file, e.g. style.96106fab.css (a hash is automatically added to the file name). This CSS file is the same as the original stylesheet, only with critical CSS stripped out.
Inlining Critical CSS
You’ll notice that the critical CSS has been inlined into the head of the document. This is optimal as the page doesn’t have to load it from the server.
Preload Non-Critical CSS
You’ll also notice that the non-critical CSS is loaded with a sophisticated-looking link. The preload value tells the browser to start fetching the non-critical CSS for pending use. But crucially, preload is not render-blocking, so the browser will go ahead and paint the page whether the preload resource is completed or not.
The onload attribute in the link allows us to run a script when the non-critical CSS has eventually loaded. The Critical module automatically inlines a script into the document that provides a cross-browser compatible way of loading the non-critical stylesheet into the page.
<link href="/style.96106fab.css" rel="preload" as="style" onload="this.rel='stylesheet'">Putting Critical Into a Webpack Pipeline
I’ve made a Webpack plugin called HTML Critical Webpack Plugin that is merely a wrapper for the Critical module. It will run after your files have been emitted from the HTML Webpack Plugin.
Here’s how you can include it in a Webpack project:
const HtmlCriticalPlugin = require("html-critical-webpack-plugin");

module.export = {
  ...
  plugins: [
    new HtmlWebpackPlugin({ ... }),
    new ExtractTextPlugin({ ... }),
    new HtmlCriticalPlugin({
      base: path.join(path.resolve(__dirname), 'dist/'),
      src: 'index.html',
      dest: 'index.html',
      inline: true,
      minify: true,
      extract: true,
      width: 375,
      height: 565,
      penthouse: {
        blockJSRequests: false,
      }
    })
  ]
};
Note: you should probably only use this in a production build, not development, as it will make your build really slow!
Performance Results
Now that I’ve isolated critical CSS, and I’m loading the non-critical CSS in idle time, what do I get in the way of performance improvements?
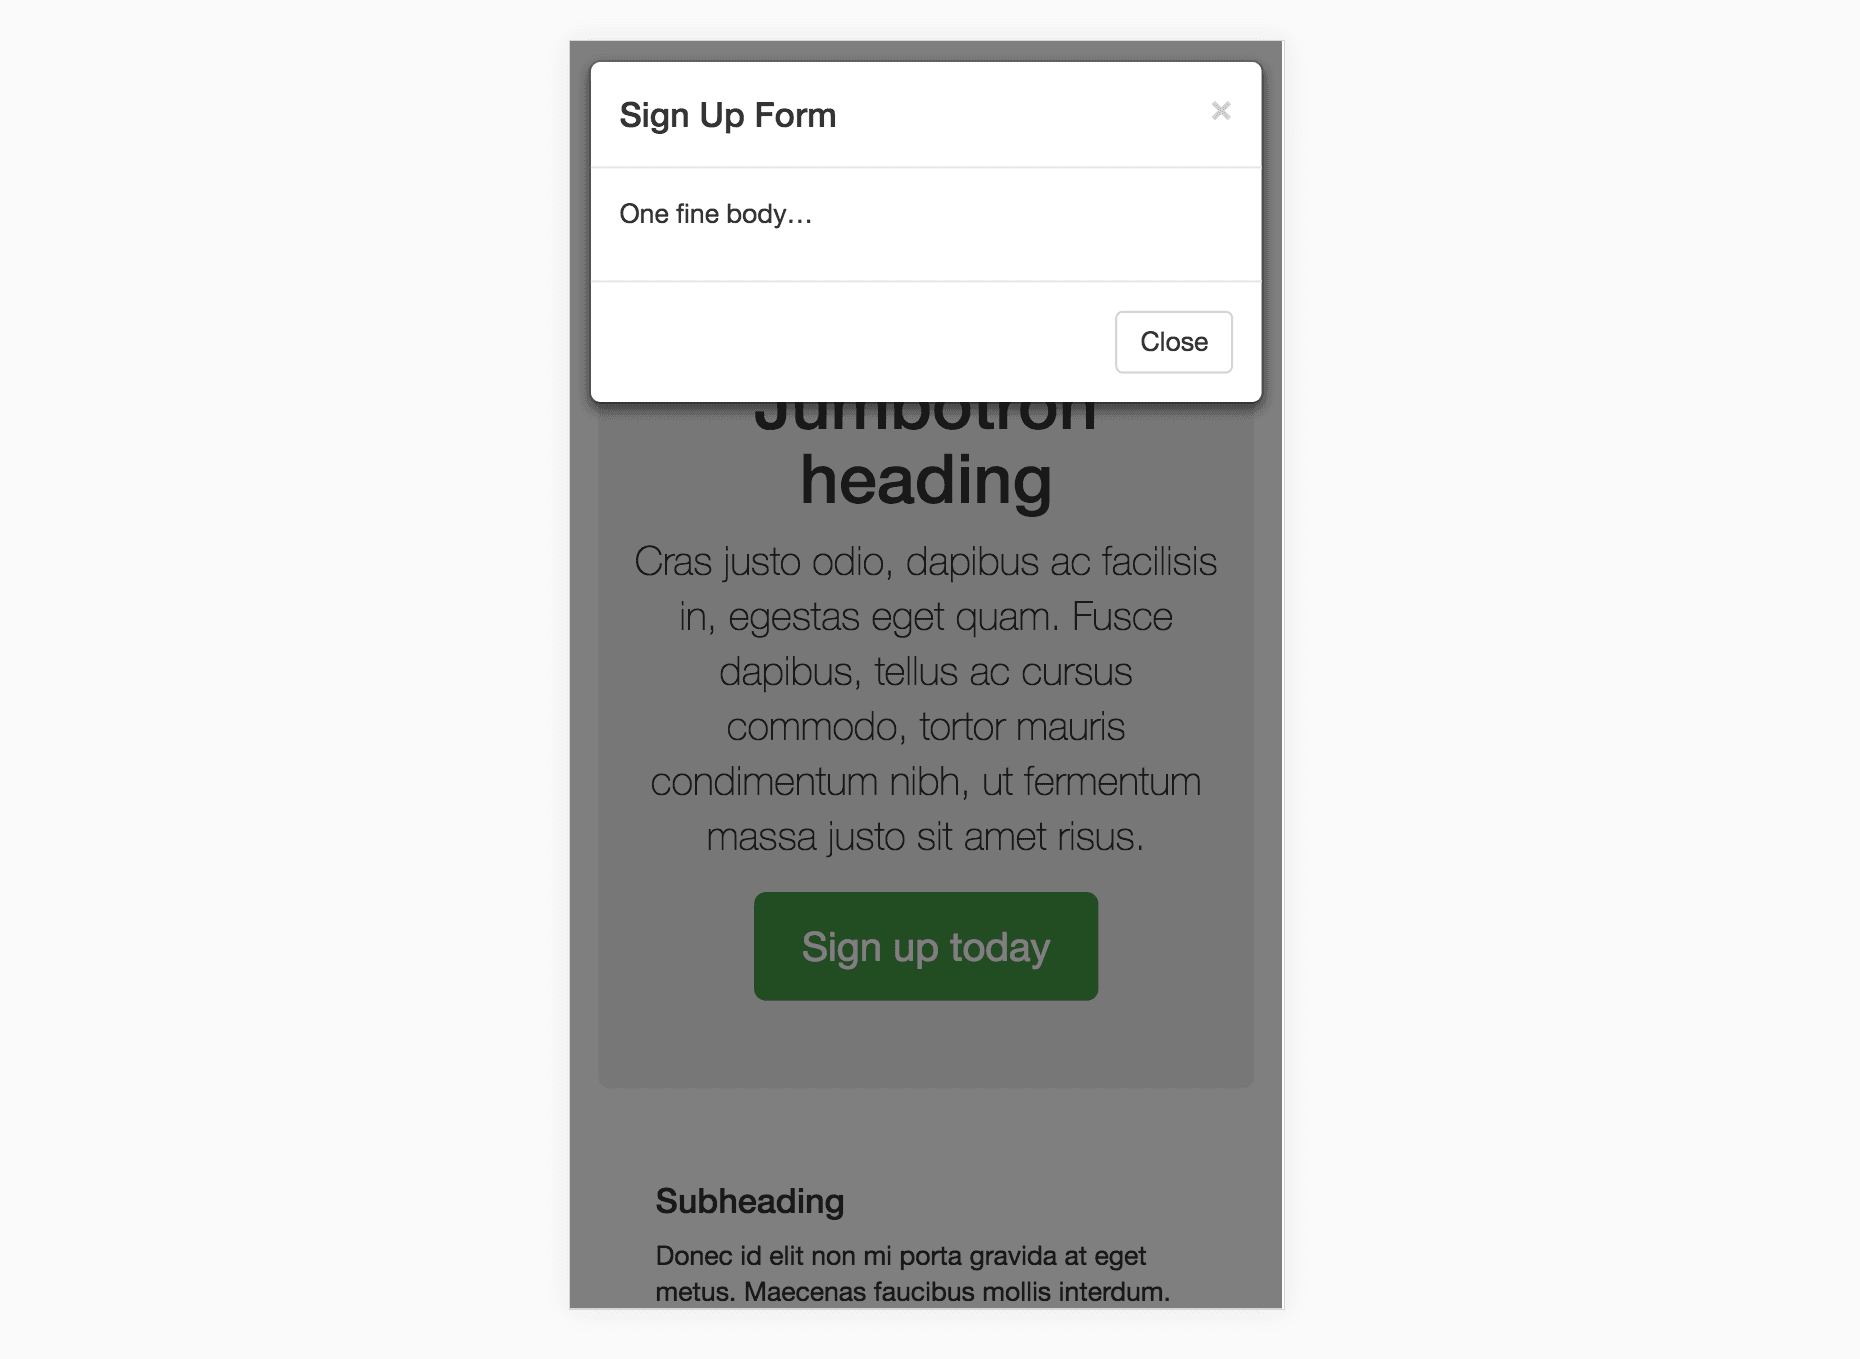
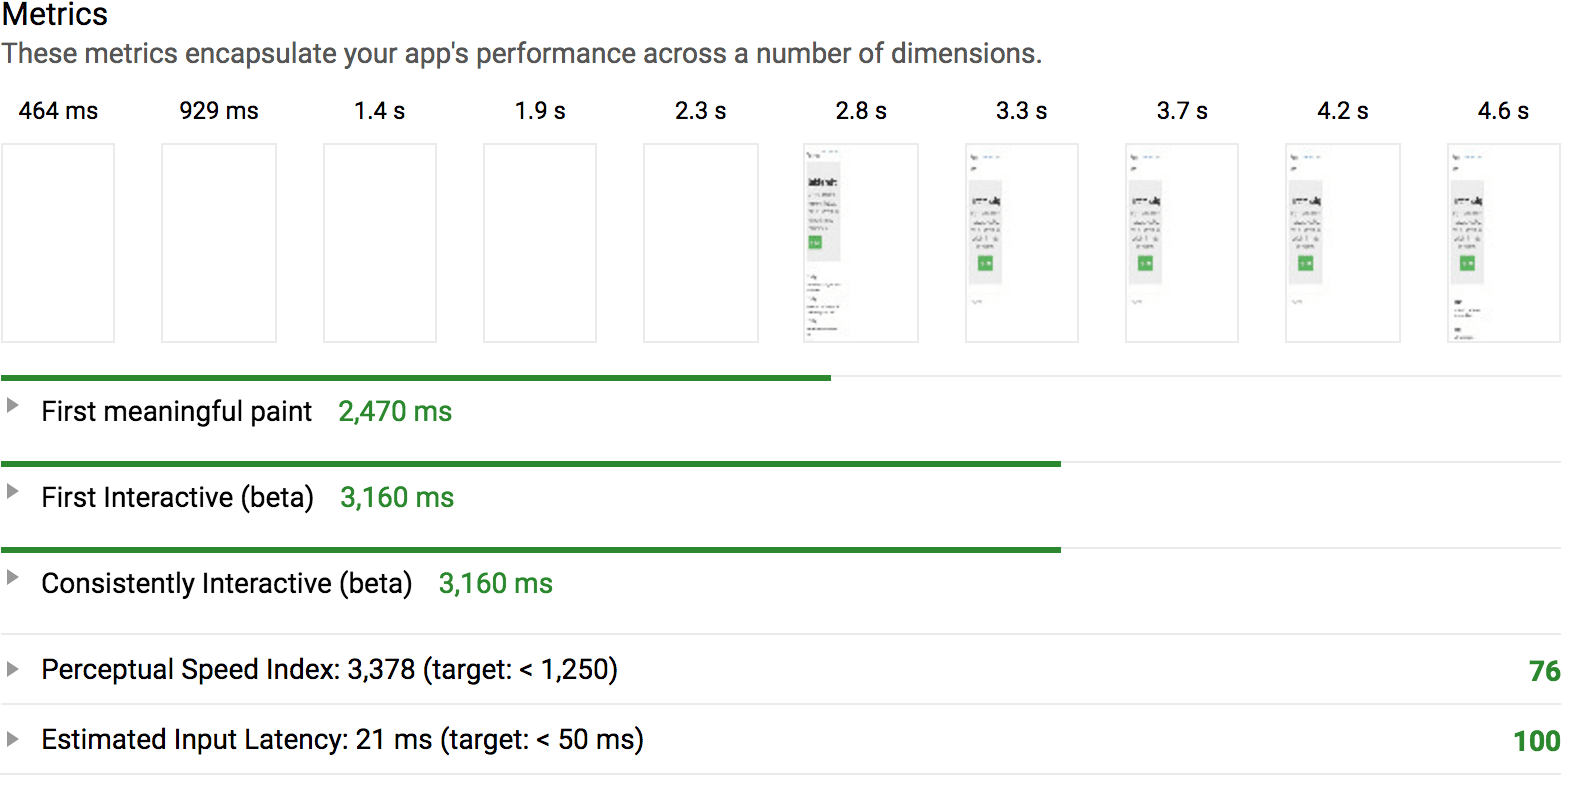
I used the Chrome Lighthouse extension to find out. Keep in mind the metric we’re trying to optimize is Time To First Meaningful Paint, which basically tells us how long it is until the user can see something.
Before implementing critical CSS:
After implementing critical CSS:
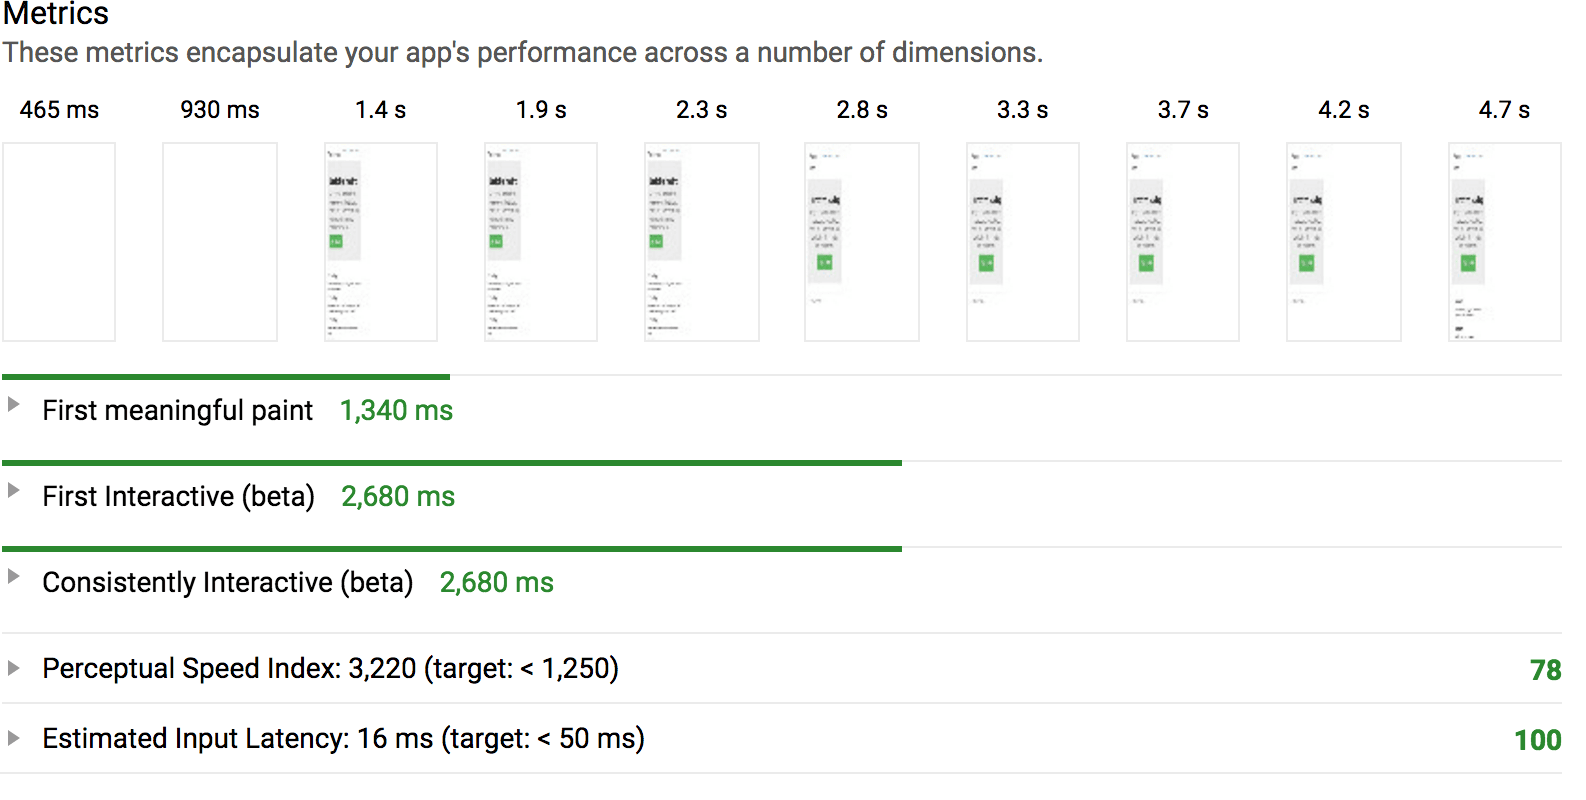
As you can see, my app got a meaningful paint a full second earlier and is interactive half a second earlier. In practice, you may not get such a dramatic improvement in your app, since my CSS was thoroughly bloated (I included the entire Bootstrap library), and in such a simple app I didn’t have many critical CSS rules.
Become a senior Vue developer in 2020.
Learn and master what professionals know about building, testing, and deploying, full-stack Vue apps in our latest course.