Для моих наружных датчиков я использовал RaspberryPi с BMP180 + TSL2561, подключенным через I 2 C, передавая данные датчика в виде сообщений MQTT.
Во время IoT Meetup Session в офисе Codecentric во Франкфурте мы обсудили использование esp8266, и я был очень рад получить его и поиграть с ним.
Очень быстро выясняется, что esp8266 является действительно отличным аппаратным обеспечением, и я планировал заменить мой Raspberry Pis, выступающий в качестве хоста датчика в моей сети. Благодаря возможностям Wi-Fi esp8266 позволяет мне по-прежнему использовать датчики I 2 C с моим подходом MQTT.
Например текущая Raspberry Pi, установленная на улице, посылает значения в эти темы
- sweethome / датчики / наружный / температура
- sweethome / датчики / наружный / давление
- sweethome / датчики / открытый / люкс
и если esp8266 будет публиковаться в этих темах, остальная часть моей сети не узнает, что произошли изменения…
План: Оставьте датчики I 2 C, но замените «мозг».
 |
 |
|
|---|---|---|
| Raspberry Pi | HUZAAH ESP8266 прорыв | |
| SD Card: | 40 € | 10 € |
| WLAN-Stick | 8 € | — |
| Общее: | 52 € | 10 € |
| Потребляемая мощность: | 3W | 1W |
аппаратные средства
- Adafruit HUZZAH ESP8266 прорыв
- Adafruit BMP180 (температура + давление)
- Adafruit TSL2561 (Светимость)
- Adafruit FTDI Friend (USB-разъем)
IDE
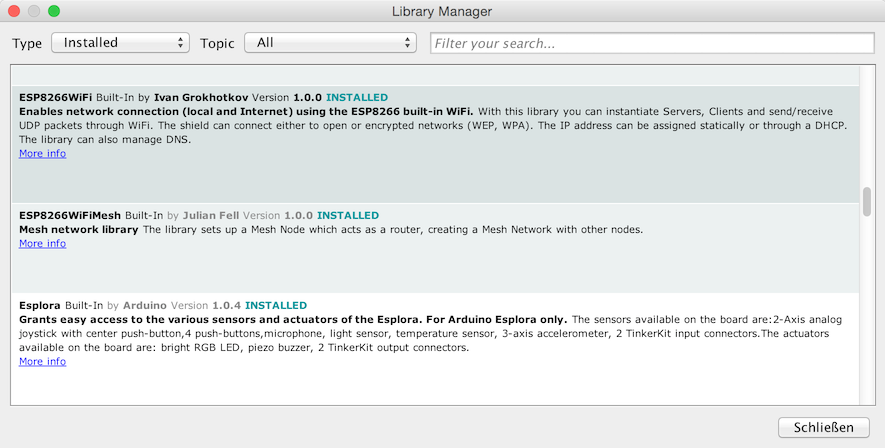
Библиотеки
Библиотеки почти все там, могут быть легко установлены через Arduino IDE Library Manager. За исключением поддержки esp8266, необходимо установить дополнительный URL-адрес Board Manager: http://arduino.esp8266.com/stable/package_esp8266com_index.json

- ESP8266WiFi
- Adafruit BMP085 Unified
- Adafruit TSL2561 Unified
- Библиотека Adafruit MQTT
Программного обеспечения
Прорыв esp8266 имеет встроенную поддержку LUA, но я решил прошить его, чтобы он был готов к использованию с Arduino IDE и C ++ (в основном потому, что все драйверы хорошо поддерживаются Adafruit).
|
001
002
003
004
005
006
007
008
009
010
011
012
013
014
015
016
017
018
019
020
021
022
023
024
025
026
027
028
029
030
031
032
033
034
035
036
037
038
039
040
041
042
043
044
045
046
047
048
049
050
051
052
053
054
055
056
057
058
059
060
061
062
063
064
065
066
067
068
069
070
071
072
073
074
075
076
077
078
079
080
081
082
083
084
085
086
087
088
089
090
091
092
093
094
095
096
097
098
099
100
101
102
103
104
105
106
107
108
109
110
111
112
113
114
115
116
117
118
119
120
121
122
123
124
125
126
127
128
129
130
131
132
133
134
135
136
137
138
139
140
141
142
143
144
145
146
147
148
149
150
151
152
153
154
155
156
157
158
159
160
161
162
163
164
165
166
167
168
169
170
171
172
173
174
175
176
177
178
179
180
|
#include <ESP8266WiFi.h>#include "Adafruit_MQTT.h"#include "Adafruit_MQTT_Client.h"#include <Wire.h>#include <Adafruit_Sensor.h>#include <Adafruit_BMP085_U.h>#include <Adafruit_TSL2561_U.h>/************************* WiFi Access Point *********************************/#define WLAN_SSID "Lummerland"#define WLAN_PASS "****************"/************************* MQTT Broker Setup *********************************/const int MQTT_PORT = 1883;const char MQTT_SERVER[] PROGMEM = "192.168.0.61";const char MQTT_CLIENTID[] PROGMEM = "ESP-PUBLISHER-SERVICE";const char MQTT_USERNAME[] PROGMEM = "********";const char MQTT_PASSWORD[] PROGMEM = "********";// Create an ESP8266 WiFiClient class to connect to the MQTT server.WiFiClient client;Adafruit_MQTT_Client mqtt(&client, MQTT_SERVER, MQTT_PORT, MQTT_CLIENTID, MQTT_USERNAME, MQTT_PASSWORD);/****************************** Feeds ***************************************/const char TEMPERATURE_FEED[] PROGMEM = "sweethome/sensors/outdoor/temperature";Adafruit_MQTT_Publish temperature_topic = Adafruit_MQTT_Publish(&mqtt, TEMPERATURE_FEED);const char PRESSURE_FEED[] PROGMEM = "sweethome/sensors/outdoor/pressure";Adafruit_MQTT_Publish pressure_topic = Adafruit_MQTT_Publish(&mqtt, PRESSURE_FEED);const char LUMINOSITY_FEED[] PROGMEM = "sweethome/sensors/outdoor/lux";Adafruit_MQTT_Publish luminosity_topic = Adafruit_MQTT_Publish(&mqtt, LUMINOSITY_FEED);Adafruit_BMP085_Unified bmp = Adafruit_BMP085_Unified(10085);Adafruit_TSL2561_Unified tsl = Adafruit_TSL2561_Unified(TSL2561_ADDR_FLOAT, 12345);/*************************** Sketch Code ************************************/void setup() { Serial.begin(115200); delay(10); Serial.println("Sensor Test"); if (!bmp.begin()) { Serial.print("Ooops, no BMP180 detected ... Check your wiring or I2C ADDR!"); while (1); } else { Serial.println("BMP180 ready."); } if (!tsl.begin()) { Serial.print("Ooops, no TSL2561 detected ... Check your wiring or I2C ADDR!"); while (1); } else { Serial.println("TSL2561 ready."); } configureTSL2561(); // Connect to WiFi access point. Serial.println(); Serial.print("Connecting to "); Serial.println(WLAN_SSID); WiFi.begin(WLAN_SSID, WLAN_PASS); while (WiFi.status() != WL_CONNECTED) { delay(500); Serial.print("."); } Serial.println(); Serial.println("WiFi connected"); Serial.println("IP address: "); Serial.println(WiFi.localIP());}void loop() { MQTT_connect(); /* Get a new sensor event */ sensors_event_t bmpEvent; bmp.getEvent(&bmpEvent); if (bmpEvent.pressure) { float temperature; bmp.getTemperature(&temperature); Serial.print("Temperature: "); Serial.print(temperature); Serial.println(" C"); Serial.print("Publish Temperature: "); if (! temperature_topic.publish(temperature)) { Serial.println("Failed"); } else { Serial.println("OK!"); } float pressure = bmpEvent.pressure; Serial.print("Pressure: "); Serial.print(pressure); Serial.println(" hPa"); Serial.print("Publish Pressure: "); if (! pressure_topic.publish(pressure)) { Serial.println("Failed"); } else { Serial.println("OK!"); } } else { Serial.println("Sensor error"); } sensors_event_t tslEvent; tsl.getEvent(&tslEvent); unsigned int luminosity = 0; if (tslEvent.light) { luminosity = tslEvent.light; } Serial.print("Luminosity: "); Serial.print(luminosity); Serial.println(" lux"); Serial.print("Publish Luminosity: "); if (! luminosity_topic.publish(luminosity)) { Serial.println("Failed"); } else { Serial.println("OK!"); } delay(5000);}void configureTSL2561(){ /* You can also manually set the gain or enable auto-gain support */ // tsl.setGain(TSL2561_GAIN_1X); /* No gain ... use in bright light to avoid sensor saturation */ // tsl.setGain(TSL2561_GAIN_16X); /* 16x gain ... use in low light to boost sensitivity */ tsl.enableAutoRange(true); /* Auto-gain ... switches automatically between 1x and 16x */ /* Changing the integration time gives you better sensor resolution (402ms = 16-bit data) */ tsl.setIntegrationTime(TSL2561_INTEGRATIONTIME_13MS); /* fast but low resolution */ // tsl.setIntegrationTime(TSL2561_INTEGRATIONTIME_101MS); /* medium resolution and speed */ // tsl.setIntegrationTime(TSL2561_INTEGRATIONTIME_402MS); /* 16-bit data but slowest conversions */}void MQTT_connect() { int8_t ret; // Stop if already connected. if (mqtt.connected()) { return; } Serial.print("Connecting to MQTT... "); while ((ret = mqtt.connect()) != 0) { // connect will return 0 for connected switch (ret) { case 1: Serial.println("Wrong protocol"); break; case 2: Serial.println("ID rejected"); break; case 3: Serial.println("Server unavailable"); break; case 4: Serial.println("Bad user/password"); break; case 5: Serial.println("Not authenticated"); break; case 6: Serial.println("Failed to subscribe"); break; default: Serial.print("Couldn't connect to server, code: "); Serial.println(ret); break; } Serial.println("Retrying MQTT connection in 5 seconds..."); mqtt.disconnect(); delay(5000); // wait 5 seconds } Serial.println("MQTT Connected!");} |
Чтобы запустить программу на платформе esp, вы должны
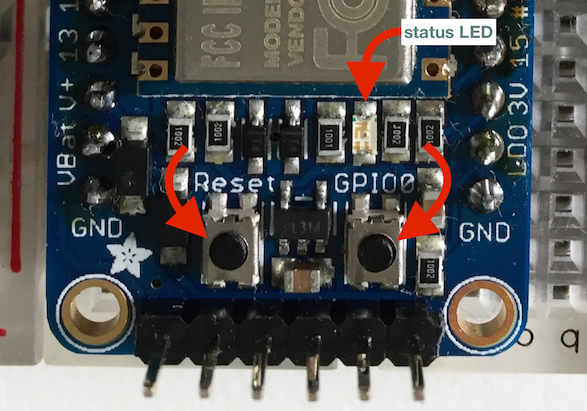
Переведите esp8266 в режим прошивки
нажмите и удерживайте кнопку «Сброс», затем нажмите и удерживайте кнопку «GPIO0», затем отпустите кнопку «Сброс», затем отпустите кнопку «GPIO0» -> включается красный светодиод (с меньшей яркостью)
Готов к загрузке
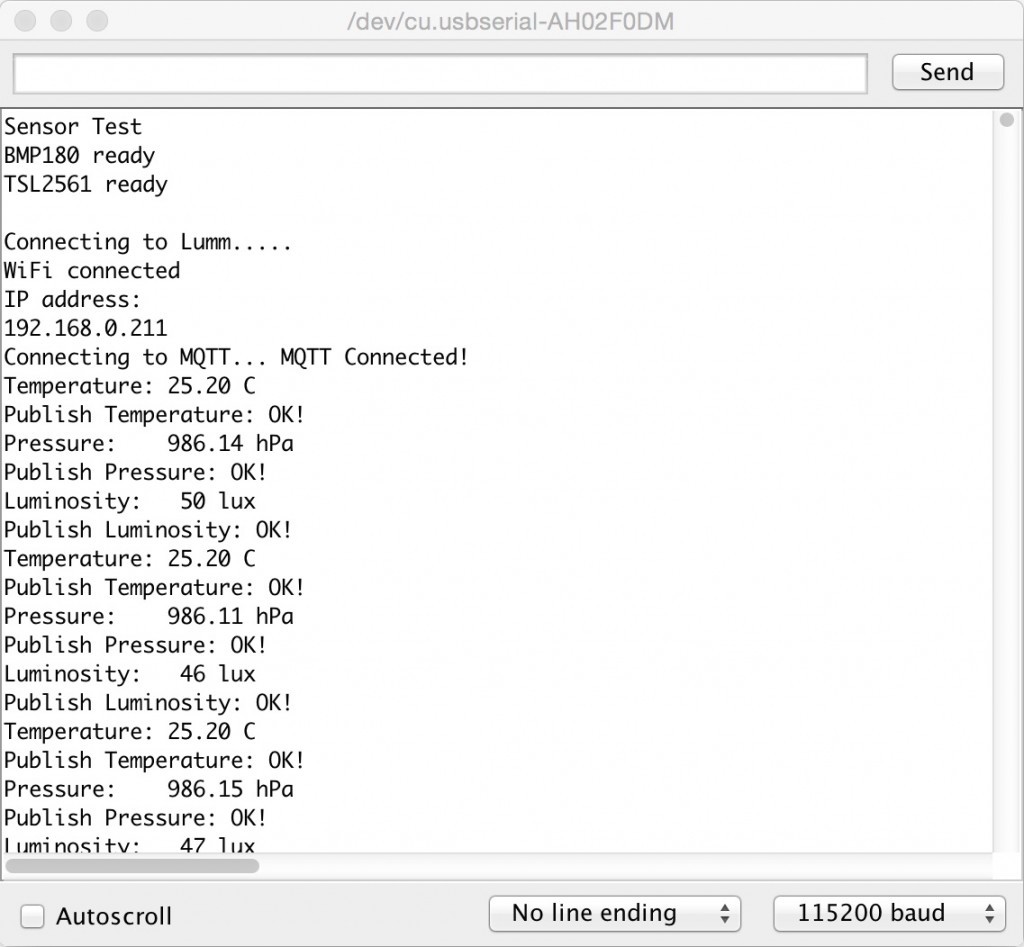
Откройте Serial Monitor, чтобы увидеть, что происходит:
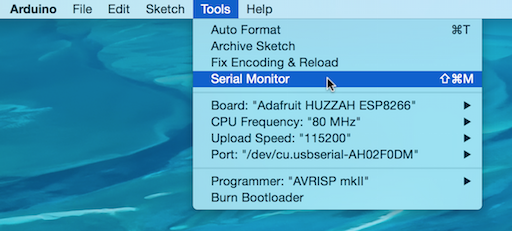
Обратите внимание на настройки «Board», «CPU Frequency», «Speed Upload» и «Port»!
Перед загрузкой вы можете собрать программу, нажав «Подтвердить»:

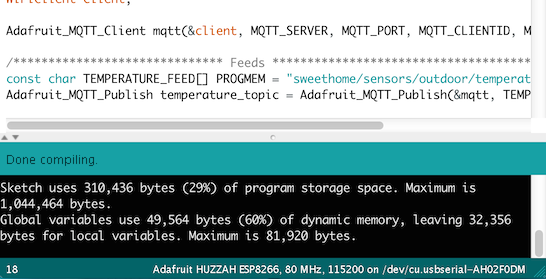
Затем начните загрузку:
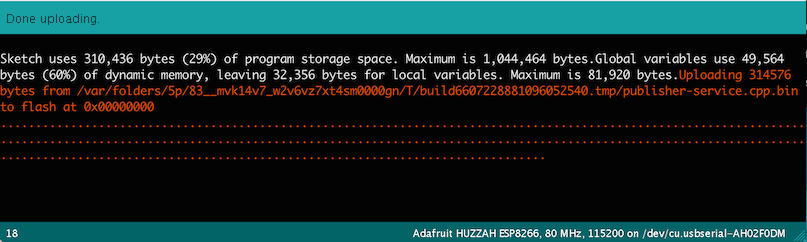
Программа запускается сразу, а Serial Monitor показывает, что происходит:
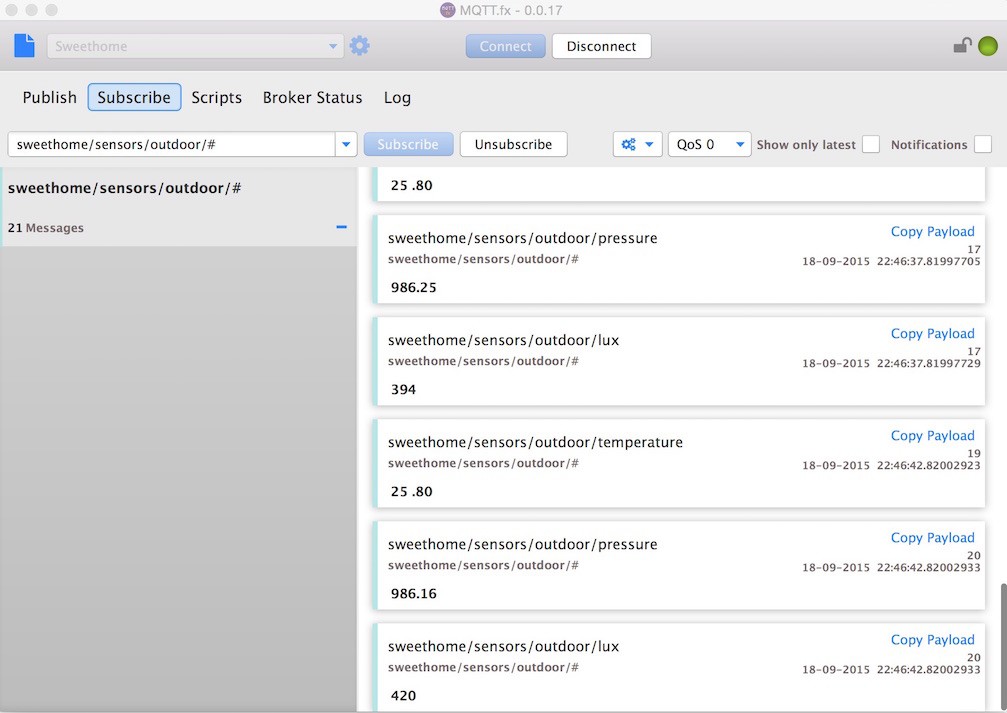
Для отладки / мониторинга сообщений MQTT я использую MQTT.fx (конечно ;-)):
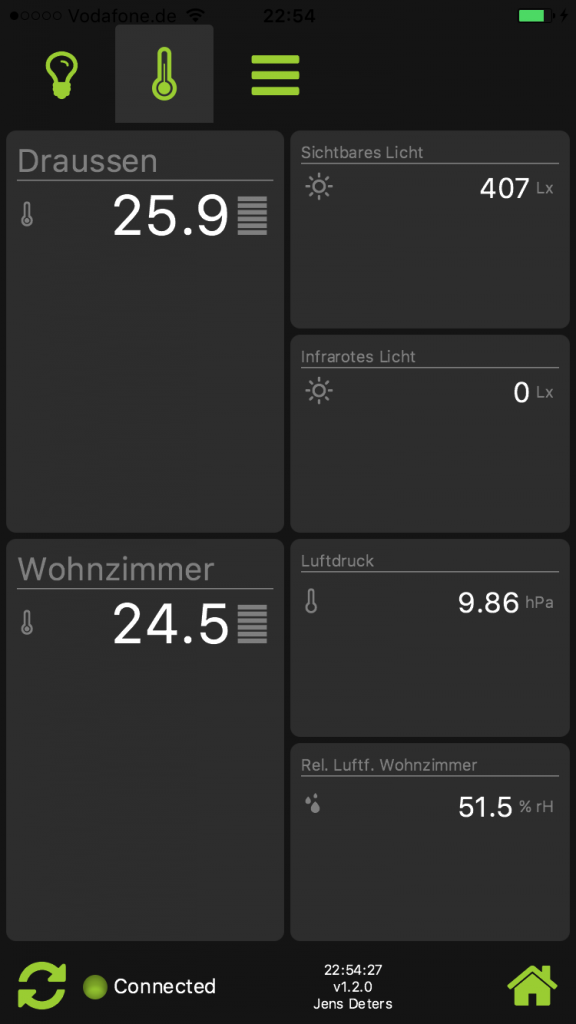
Никаких изменений не пришлось вносить в другие компоненты моих сетей. Замена была прозрачна и для (мобильных) клиентов:
| Ссылка: | Использование esp8266 в качестве хоста для датчиков I2C от нашего партнера JCG Дженса Детерса в блоге JavaFX Delight . |