Вступление
Уведомления — это очень полезный способ взаимодействия с пользователями вашего приложения, а с Android Wear теперь у нас также есть носимые устройства под управлением Android. Поэтому полезно узнать, как воспользоваться этими новыми функциями, добавляя соответствующие действия в уведомления или создавая действия, которые видны только на носимых устройствах.
В этом уроке я собираюсь показать вам современную реализацию уведомлений, как показано во время ввода-вывода Google в этом году. Мы будем использовать новый пакет поддержки и расширять его возможности, добавляя действия, которые видны только на умных часах — единственных носимых устройствах, доступных на Android Wear на момент написания.
1. Предпосылки
Для этого проекта вы можете использовать либо Android Studio, либо Android Developer Tools. Если вы используете Android Studio, добавьте следующую строку в файл build.gradle .
|
1
|
compile «com.android.support:support-v4:20.0.+»
|
2. Настройка проекта
Запустите свою среду IDE и создайте новый проект Android или откройте проект, который вы создали ранее. Для этого урока я собираюсь создать новый проект и назвать его ImprovedNotifications . Не забудьте использовать уникальное имя пакета.

При настройке проекта убедитесь, что вы выбрали опцию « Пустое действие» на шаге « Создание действия» .
После того, как проект создан, создайте новый Activity, ActivatedActivity . Это действие будет вызываться из уведомления на вашем мобильном или носимом устройстве.
Прежде чем двигаться дальше, нам нужно обновить файл strings.xml , добавив строки, которые мы собираемся использовать чуть позже в этом уроке.
|
01
02
03
04
05
06
07
08
09
10
11
12
13
14
|
<?xml version=»1.0″ encoding=»utf-8″?>
<resources>
<string name=»app_name»>ImprovedNotifications</string>
<string name=»title_activity_activated»>ActivatedActivity</string>
<string name=»message»>Hi»!»
<string name=»button_text»>Try me for a new notification</string>
<string name=»notification_title»>Hey Mom»!»
<string name=»notification_text»>Look at me»!»
<string name=»first_action»>Let»‘»s see the author»‘»s twitter profile</string>
<string name=»wearable_action»>I only appear here</string>
</resources>
|
3. Создание макета
Следующим шагом является создание макета для MainActivity и ActivatedActivity . Схема для класса MainActivity показана ниже.
|
01
02
03
04
05
06
07
08
09
10
11
12
13
|
<RelativeLayout xmlns:android=»http://schemas.android.com/apk/res/android»
xmlns:tools=»http://schemas.android.com/tools»
android:layout_width=»match_parent»
android:layout_height=»match_parent»
tools:context=»${relativePackage}.${activityClass}» >
<Button
android:id=»@+id/notification_button»
android:layout_height=»wrap_content»
android:layout_width=»wrap_content»
android:layout_centerInParent=»true»
android:padding=»10dp»
android:text=»@string/button_text»/>
</RelativeLayout>
|
И это макет для класса ActivatedActivity .
|
01
02
03
04
05
06
07
08
09
10
11
12
|
<RelativeLayout xmlns:android=»http://schemas.android.com/apk/res/android»
xmlns:tools=»http://schemas.android.com/tools»
android:layout_width=»match_parent»
android:layout_height=»match_parent»
tools:context=»${relativePackage}.${activityClass}» >
<TextView
android:layout_width=»wrap_content»
android:layout_height=»wrap_content»
android:padding=»10dp»
android:layout_centerInParent=»true»
android:text=»@string/message»/>
</RelativeLayout>
|
4. Создание уведомления
Мы создаем уведомление в классе MainActivity . В приведенном ниже фрагменте кода вы можете увидеть, какие шаги выполняются при создании уведомления. Я прокомментировал блок кода, чтобы помочь вам понять различные шаги, но давайте пройдемся по фрагменту шаг за шагом.
|
01
02
03
04
05
06
07
08
09
10
11
12
13
14
15
16
17
18
19
20
21
22
23
24
25
26
27
28
29
30
31
32
33
34
35
36
37
38
39
40
41
42
43
44
45
46
47
48
49
50
51
52
53
54
55
56
57
58
59
60
61
62
63
64
65
66
67
68
69
70
71
72
73
74
75
76
77
78
79
80
81
82
83
84
85
86
87
88
89
|
package com.androiheroes.improvednotifications;
import android.app.Activity;
import android.app.Notification;
import android.app.PendingIntent;
import android.content.Intent;
import android.net.Uri;
import android.os.Bundle;
import android.support.v4.app.NotificationCompat;
import android.support.v4.app.NotificationManagerCompat;
import android.view.View;
import android.widget.Button;
public class MainActivity extends Activity {
/* Widgets you are going to use */
private Button button;
/*
* This is the notification id
* You can use it to dismiss the notification calling the .cancel() method on the notification_manager object
*/
private int notification_id = 1;
private final String NOTIFICATION_ID = «notification_id»;
/* These are the classes you use to start the notification */
private NotificationCompat.Builder notification_builder;
private NotificationManagerCompat notification_manager;
@Override
protected void onCreate(Bundle savedInstanceState) {
super.onCreate(savedInstanceState);
setContentView(R.layout.activity_main);
/*
* Step 1
* Instantiation of the button you use to start the notification
*/
button = (Button) findViewById(R.id.notification_button);
/*
* Step 2
* Create the intent you are going to launch when your notification is pressed
* and let the PendingIntent handle it
*/
Intent open_activity_intent = new Intent(this, ActivatedActivity.class);
open_activity_intent.putExtra(NOTIFICATION_ID, notification_id);
PendingIntent pending_intent = PendingIntent.getActivity(this, 0, open_activity_intent, PendingIntent.FLAG_CANCEL_CURRENT);
/*
* Step 3
* Here you create the notification and start adding all the attributes you are going to use
*/
notification_builder = new NotificationCompat.Builder(this)
.setSmallIcon(R.drawable.ic_launcher)
.setContentTitle(getString(R.string.notification_title))
.setContentText(getString(R.string.notification_text))
/*
* This method specifies that our notification must have all the default characteristics of a notification
* like sound and vibration
*/
.setDefaults(Notification.DEFAULT_ALL)
/* This method is going to dismiss the notification once it is pressed */
.setAutoCancel(true)
.setContentIntent(pending_intent);
/*
* Step 4
* Here we instantiate the Notification Manager object to start/stop the notifications
*/
notification_manager = NotificationManagerCompat.from(this);
}
@Override
protected void onStart() {
super.onStart();
/*
* Step 5
* The notification is going to appear when you press the button on the screen
*/
button.setOnClickListener(new View.OnClickListener() {
@Override
public void onClick(View v) {
notification_manager.notify(notification_id, notification_builder.build());
}
});
}
}
|
Шаг 1
Сначала мы создаем экземпляр кнопки, которую будем использовать для запуска уведомления. Вы также можете создать уведомление непосредственно в методе onCreate , но с помощью кнопки вы получаете больше контроля над точным временем уведомления.
Шаг 2
На втором шаге мы создаем объект Intent с заданием, которое нужно выполнить при нажатии на уведомление. Мы передаем объект в экземпляр PendingIntent чтобы обработать его позже при вызове.
Шаг 3
Используя библиотеку поддержки Android , мы создаем уведомление с помощью класса Builder объекта NotificationCompat и устанавливаем его атрибуты.
Шаг 4
На этом этапе мы создаем экземпляр NotificationManagerCompat для запуска и / или остановки уведомления в любое время, когда мы захотим. Это сделает тестирование намного проще.
Шаг 5
Когда кнопка нажата, уведомление запускается с использованием метода notify .
Не забудьте использовать классы из библиотеки поддержки Android. Таким образом, вы можете быть уверены, что ваше уведомление будет выглядеть хорошо на старых версиях Android.
Теперь вы можете запустить приложение, нажать кнопку, и в верхней части экрана появится уведомление. Если вы нажмете на уведомление, оно должно перейти к активности ActivatedActivity . С уведомлением, настроенным и работающим, пришло время начинать добавлять действия к нему.
5. Добавление действий в уведомление
Вы можете добавить дополнительные действия к уведомлению, вызвав метод addAction для объекта addAction . Чтобы это работало, вам нужно передать экземпляр PendingIntent с задачей, которую вы хотели бы выполнить.
В следующем фрагменте кода я покажу вам шаги, которые вы должны выполнить, чтобы создать действие с пользовательской задачей. В этом примере я собираюсь перевести вас в свой профиль Twitter в приложении Twitter. Это означает, что мне нужен экземпляр URI указывающий на мой профиль в Twitter, добавьте его в Intent и разрешите PendingIntent обрабатывать его при PendingIntent действия. Вставьте этот блок кода до создания экземпляра объекта notification_builder .
|
1
2
3
4
5
6
7
8
|
/* The action in the handheld notification must perform some task
* In this case the author’s twitter profile is going to be opened, in the twitter app, when it is clicked
* but you can change it with your profile if you want 😉
*/
Intent open_twitter_profile = new Intent(Intent.ACTION_VIEW);
Uri twitter_profile_location = Uri.parse(«twitter://user?screen_name=@kerpie»);
open_twitter_profile.setData(twitter_profile_location);
PendingIntent twitter_intent = PendingIntent.getActivity(this, 0, open_twitter_profile, 0);
|
Чтобы добавить действие, вызовите метод open_twitter_profile объекта open_twitter_profile и open_twitter_profile объект open_twitter_profile мы только что создали.
|
01
02
03
04
05
06
07
08
09
10
11
12
13
14
15
16
17
18
19
20
21
22
23
|
/*
* Here you create the notification and start adding all the attributes
* you are going to use
*/
notification_builder = new NotificationCompat.Builder(this)
.setSmallIcon(R.drawable.ic_launcher)
.setContentTitle(getString(R.string.notification_title))
.setContentText(getString(R.string.notification_text))
/*
* This method specifies that your notification must have all the default characteristics of a notification
* like sound and vibration
*/
.setDefaults(Notification.DEFAULT_ALL)
/* This method is going to dismiss the notification once it is pressed */
.setAutoCancel(true)
.setContentIntent(pending_intent)
/*
* Here you can add actions to your handheld device
* just take care of the quantity of actions you add
* in this case, like in many others, less is more
*/
.addAction(android.R.drawable.ic_dialog_info, getString(R.string.first_action), twitter_intent);
|
Запустите приложение, нажмите кнопку, чтобы вызвать уведомление, и вы увидите, что уведомление появляется вместе с действием, которое мы только что создали.
Хотя вы можете добавить больше действий к уведомлению, используя метод addAction , убедитесь, что пользователь не перегружен количеством действий, которые он может выбрать.
6. Поддержка Android Wear
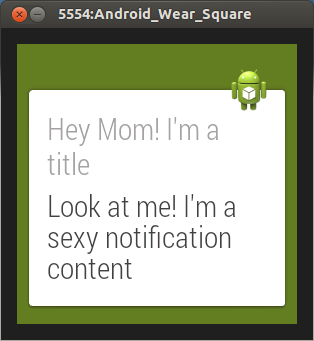
До сих пор мы использовали классы из библиотеки поддержки Android, чтобы убедиться, что уведомления также отображаются на умных часах с Android Wear. Вы можете запустить приложение на физических умных часах или попробовать на эмуляторе из диспетчера виртуальных устройств Android. В любом случае вам нужно синхронизировать ваше устройство с умными часами.
Перед синхронизацией устройства с эмулятором smartwatch необходимо установить приложение Android Wear , которое доступно в Google Play. После того, как вы отключили все остальные устройства Android, подключенные к вашему компьютеру, выполните следующую команду из командной строки.
adb devices
Эта команда выводит список устройств, подключенных к вашей машине разработки. Вы должны увидеть два из них, эмулятор smartwatch и ваше устройство. Затем выполните следующую команду из командной строки, чтобы включить переадресацию портов.
adb -d forward tcp:5601 tcp:5601
Теперь вы можете подключить ваше устройство к эмулятору и включить уведомления с помощью приложения Android Wear. Запустите приложение еще раз и вызовите уведомление. Уведомление должно выглядеть примерно так, как показано ниже.
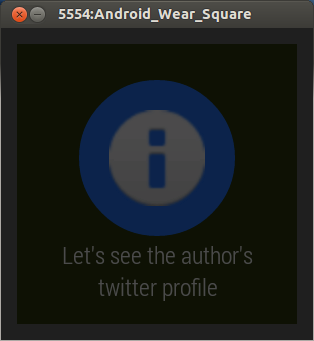
7. Добавление носимых действий
Можно добавить действия, которые видны только на предметах одежды. Это достигается путем вызова метода addAction класса WearableExtender . В результате любые действия, добавленные через класс NotificationCompat.Builder , игнорируются.
Как и раньше, для запуска действия мы используем экземпляр Intent и PendingIntent , но создадим действие, отображаемое на носимом устройстве, с помощью класса Builder специального класса Action , который является частью класса NotificationCompat как показано ниже.
|
1
2
3
4
5
6
7
8
9
|
/* Here we instantiate the Intent we want to use when the action in the smartwatch is pressed */
Intent wearable_intent = new Intent(this, ActivatedActivity.class);
PendingIntent wearable_pending_intent = PendingIntent.getActivity(this, 0, wearable_intent, PendingIntent.FLAG_UPDATE_CURRENT);
/* Now we have an intent for the wearable created we have to create a wearable action using it*/
NotificationCompat.Action wearable_action = new NotificationCompat.Action.Builder(
android.R.drawable.ic_dialog_email,
getString(R.string.wearable_action),
wearable_pending_intent).build();
|
Затем мы добавляем это действие в объект notification_builder используя метод extend как показано ниже.
|
01
02
03
04
05
06
07
08
09
10
11
12
13
14
15
16
17
18
19
20
21
22
23
24
25
26
27
28
|
/*
* Here you create the notification and start adding all the attributes
* you are going to use
*/
notification_builder = new NotificationCompat.Builder(this)
.setSmallIcon(R.drawable.ic_launcher)
.setContentTitle(getString(R.string.notification_title))
.setContentText(getString(R.string.notification_text))
/*
* This method specifies that your notification must have all the default characteristics of a notification
* like sound and vibration
*/
.setDefaults(Notification.DEFAULT_ALL)
/* This method is going to dismiss the notification once it is pressed */
.setAutoCancel(true)
.setContentIntent(pending_intent)
/*
* Here you can add actions to your handheld device
* just take care of the quantity of actions you add
* in this case, like in many others, less is more
*/
.addAction(android.R.drawable.ic_dialog_info, getString(R.string.first_action), twitter_intent)
/*
* Here you add a wearable-only action
* This action won’t be visible in the handheld device
*/
.extend(new WearableExtender().addAction(wearable_action));
|
Запустите приложение и нажмите кнопку, чтобы отобразить уведомление на вашем устройстве. Оно должно отличаться от уведомления, которое появляется на носимом эмуляторе.
Вывод
Умные часы остаются здесь, по крайней мере, какое-то время, и поэтому важно воспользоваться этим новым способом общения с пользователями вашего приложения. Я надеюсь, что вы нашли этот урок полезным и не забудьте поделиться им, если он вам понравился.