В этом уроке мы увидим, как вы можете создать простой макет Android с фиксированным верхним и нижним колонтитулами, но с прокручиваемым контентом. Это может оказаться особенно полезным, когда некоторые компоненты вашего макета всегда должны быть видны пользователю, несмотря на количество отображаемых элементов. Строки меню, кнопки выбора, виджеты или просто заголовки могут быть такими компонентами. Например, при создании приложения «Галерея изображений» вы хотите, чтобы пользователь мог прокручивать список изображений вверх и вниз, но вы также хотите, чтобы строка меню обработки изображений была всегда видимой. Этот учебник предоставит базовую инфраструктуру для создания таких макетов.
В этом руководстве мы будем использовать следующие инструменты на 64-битной платформе Windows:
- JDK 1,7
- Eclipse 4.3 Kepler
- Android SKD 4.3
1. Создайте новый проект Android
Откройте Eclipse IDE и перейдите в Файл -> Создать -> Проект -> Android -> Проект приложения Android.
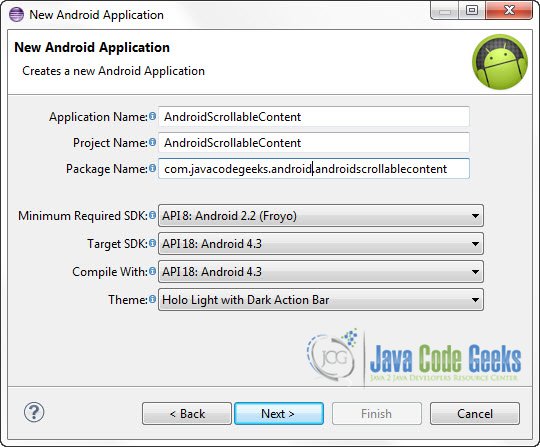
Вы должны указать Имя приложения, Имя проекта и Имя пакета в соответствующих текстовых полях и затем нажать Далее.
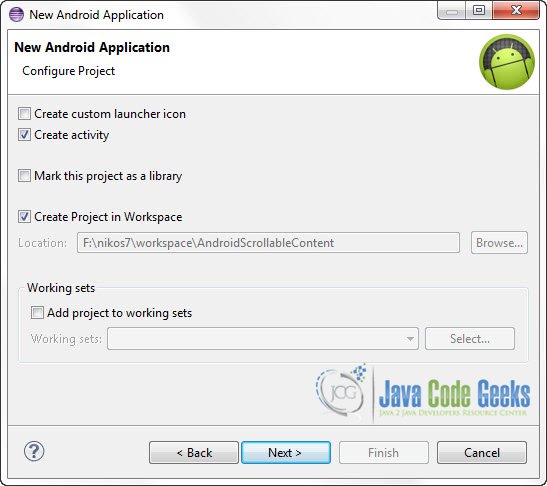
В следующем окне убедитесь, что выбран вариант «Создать действие», чтобы создать новое действие для вашего проекта, и нажмите «Далее». Это необязательно, так как вы можете создать новое действие после создания проекта, но вы можете сделать все это за один шаг.
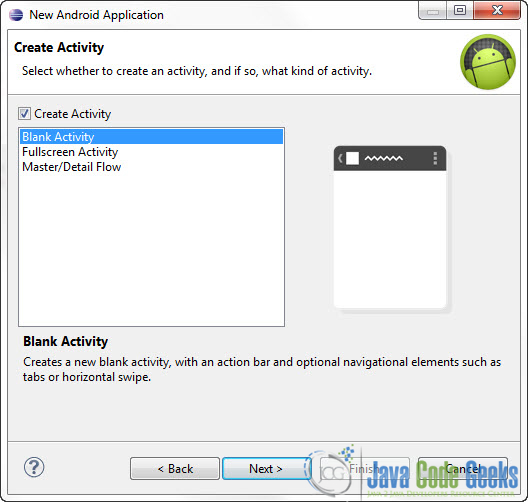
Выберите «BlankActivity» и нажмите «Далее».
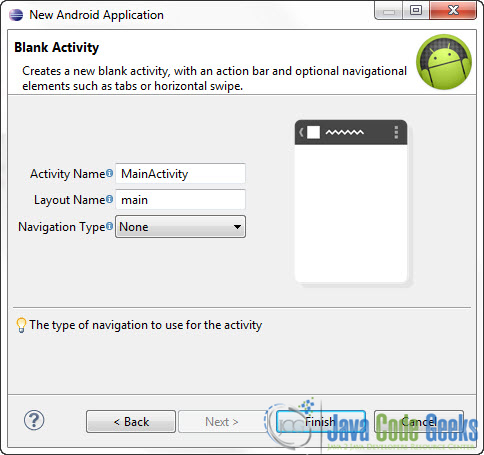
Вам будет предложено указать некоторую информацию о новой деятельности. В текстовом поле «Имя макета» необходимо указать имя файла, который будет содержать описание макета вашего приложения. В нашем случае будет создан файл res/layout/main.xml . Затем нажмите Готово.
2. Создание макета Основного занятия
Откройте файл res/layout/main.xml :
И вставьте следующий код:
main.xml:
|
001
002
003
004
005
006
007
008
009
010
011
012
013
014
015
016
017
018
019
020
021
022
023
024
025
026
027
028
029
030
031
032
033
034
035
036
037
038
039
040
041
042
043
044
045
046
047
048
049
050
051
052
053
054
055
056
057
058
059
060
061
062
063
064
065
066
067
068
069
070
071
072
073
074
075
076
077
078
079
080
081
082
083
084
085
086
087
088
089
090
091
092
093
094
095
096
097
098
099
100
101
102
103
104
105
106
107
108
109
110
111
112
113
114
115
116
117
118
119
120
121
122
123
124
125
126
127
128
129
130
131
132
133
134
135
136
137
138
139
140
141
142
143
144
145
146
147
148
149
150
151
152
|
<?xml version="1.0" encoding="utf-8"?> android:layout_width="match_parent" android:layout_height="match_parent" > <!-- Header aligned to top --> <RelativeLayout android:id="@+id/header" android:layout_width="match_parent" android:layout_height="wrap_content" android:layout_alignParentTop="true" android:background="#FC9" android:gravity="center" > <TextView android:layout_width="wrap_content" android:layout_height="wrap_content" android:layout_margin="5dp" android:text="Fixed Header" android:textColor="#000" android:textSize="20sp" /> </RelativeLayout> <!-- Footer aligned to bottom --> <RelativeLayout android:id="@+id/footer" android:layout_width="match_parent" android:layout_height="wrap_content" android:layout_alignParentBottom="true" android:background="#FC0" android:gravity="center" > <TextView android:layout_width="wrap_content" android:layout_height="wrap_content" android:layout_margin="5dp" android:text="Fixed Footer" android:textColor="#000" android:textSize="20sp" /> </RelativeLayout> <!-- Scrollable Item below header and above footer --> <ScrollView android:id="@+id/scrollableContents" android:layout_width="fill_parent" android:layout_height="fill_parent" android:layout_above="@id/footer" android:background="#005" android:layout_below="@id/header" > <LinearLayout android:layout_width="fill_parent" android:layout_height="wrap_content" android:gravity="center_horizontal" android:orientation="vertical" > <TextView android:layout_width="wrap_content" android:layout_height="wrap_content" android:layout_marginBottom="22dp" android:layout_marginTop="22dp" android:text="Item 1" android:textColor="#CCCCCC" android:textSize="19sp" /> <TextView android:layout_width="wrap_content" android:layout_height="wrap_content" android:layout_marginBottom="22dp" android:layout_marginTop="22dp" android:text="Item 2" android:textColor="#CCCCCC" android:textSize="19sp" /> <TextView android:layout_width="wrap_content" android:layout_height="wrap_content" android:layout_marginBottom="22dp" android:layout_marginTop="22dp" android:text="Item 3" android:textColor="#CCCCCC" android:textSize="19sp" /> <TextView android:layout_width="wrap_content" android:layout_height="wrap_content" android:layout_marginBottom="22dp" android:layout_marginTop="22dp" android:text="Item 4" android:textColor="#CCCCCC" android:textSize="19sp" /> <TextView android:layout_width="wrap_content" android:layout_height="wrap_content" android:layout_marginBottom="22dp" android:layout_marginTop="22dp" android:text="Item 5" android:textColor="#CCCCCC" android:textSize="19sp" /> <TextView android:layout_width="wrap_content" android:layout_height="wrap_content" android:layout_marginBottom="22dp" android:layout_marginTop="22dp" android:text="Item 6" android:textColor="#CCCCCC" android:textSize="19sp" /> <TextView android:layout_width="wrap_content" android:layout_height="wrap_content" android:layout_marginBottom="22dp" android:layout_marginTop="22dp" android:text="Item 7" android:textColor="#CCCCCC" android:textSize="19sp" /> <TextView android:layout_width="wrap_content" android:layout_height="wrap_content" android:layout_marginBottom="22dp" android:layout_marginTop="22dp" android:text="Item 8" android:textColor="#CCCCCC" android:textSize="19sp" /> <TextView android:layout_width="wrap_content" android:layout_height="wrap_content" android:layout_marginBottom="22dp" android:layout_marginTop="22dp" android:text="Item 9" android:textColor="#CCCCCC" android:textSize="19sp" /> <TextView android:layout_width="wrap_content" android:layout_height="wrap_content" android:layout_marginBottom="22dp" android:layout_marginTop="22dp" android:text="Item 10" android:textColor="#CCCCCC" android:textSize="19sp" /> </LinearLayout> </ScrollView></RelativeLayout> |
Идея здесь очень проста. У нас есть два RelativeLayouts , одно выровненное в верхней части экрана, используя android:layout_alignParentTop="true" , и одно выровненное в нижней части экрана, используя android:layout_alignParentBottom="true" . Затем мы просто ScrollView между этими двумя представлениями, используя android:layout_above="@id/footer" и android:layout_below="@id/header" . Эти свойства разместят наш ScrollView над элементом с идентификатором ScrollView footer и под элементом с header идентификатора.
2. Код основной деятельности
Используйте Package Explorer, чтобы перейти к файлу Java созданного вами Activity:
В этом примере вам не нужно ничего менять на автоматически сгенерированный код, чтобы вы могли оставить все как есть.
MainActivity.java:
|
01
02
03
04
05
06
07
08
09
10
11
12
13
14
15
16
17
18
19
20
21
|
package com.javacodegeeks.android.androidscrollablecontent;import android.os.Bundle;import android.app.Activity;import android.view.Menu;public class MainActivity extends Activity { @Override protected void onCreate(Bundle savedInstanceState) { super.onCreate(savedInstanceState); setContentView(R.layout.main); } @Override public boolean onCreateOptionsMenu(Menu menu) { // Inflate the menu; this adds items to the action bar if it is present. getMenuInflater().inflate(R.menu.main, menu); return true; }} |
4. Запустите приложение
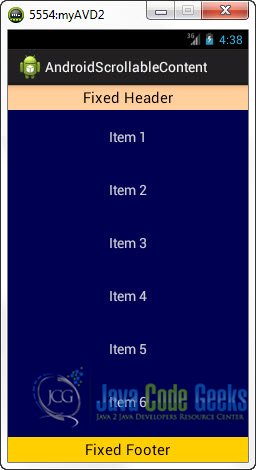
Это основной экран нашего приложения:
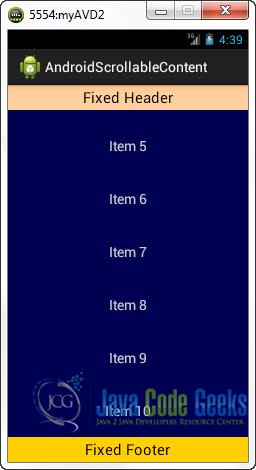
Теперь, если вы прокрутите список элементов вниз, вы увидите, что верхний и нижний колонтитулы занимают свои позиции.
Делаем прокручиваемое содержимое гибким
В приведенном выше коде мы жестко закодировали содержимое ScrollView в основном макете упражнения. Но вы можете динамически раздувать ScrollView в своем коде, например, используя собственный ArrayAdapter . Или, что более важно, вы можете захотеть сделать этот макет повторно используемым для других ваших действий, каждый из которых имеет свое собственное содержимое для отображения.
Чтобы достичь этого, мы просто собираемся отделить основной макет от содержимого ScrollView . main.xml переименуем файл main.xml предыдущего примера в scrollable_contents.xml и просто ScrollView элементы из ScrollView .
scrollable_contents.xml:
|
01
02
03
04
05
06
07
08
09
10
11
12
13
14
15
16
17
18
19
20
21
22
23
24
25
26
27
28
29
30
31
32
33
34
35
36
37
38
39
40
41
42
43
44
45
46
47
48
49
50
51
52
53
54
55
56
|
<?xml version="1.0" encoding="utf-8"?> android:layout_width="match_parent" android:layout_height="match_parent" > <!-- Header aligned to top --> <RelativeLayout android:id="@+id/header" android:layout_width="match_parent" android:layout_height="wrap_content" android:layout_alignParentTop="true" android:background="#FC9" android:gravity="center" > <TextView android:layout_width="wrap_content" android:layout_height="wrap_content" android:layout_margin="5dp" android:text="Fixed Header" android:textColor="#000" android:textSize="20sp" /> </RelativeLayout> <!-- Footer aligned to bottom --> <RelativeLayout android:id="@+id/footer" android:layout_width="match_parent" android:layout_height="wrap_content" android:layout_alignParentBottom="true" android:background="#FC0" android:gravity="center" > <TextView android:layout_width="wrap_content" android:layout_height="wrap_content" android:layout_margin="5dp" android:text="Fixed Footer" android:textColor="#000" android:textSize="20sp" /> </RelativeLayout> <!-- Scrollable Item below header and above footer --> <ScrollView android:id="@+id/scrollableContents" android:layout_width="fill_parent" android:layout_height="fill_parent" android:layout_above="@id/footer" android:background="#005" android:layout_below="@id/header" > <!-- Inflate the contents of the ScrollView dynamicaly --> </ScrollView></RelativeLayout> |
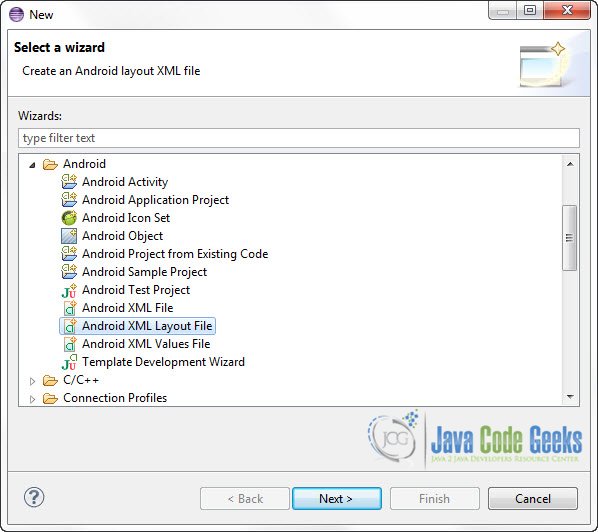
Теперь вы можете создать новый файл XML Layout, содержащий элементы, которыми вы хотите заполнить свой ScrollView . Чтобы создать новый файл макета, перейдите в Package Explorer и найдите папку /res/layout . Щелкните правой кнопкой мыши папку -> Создать -> Другое -> Android -> Файл Android XML Layout:
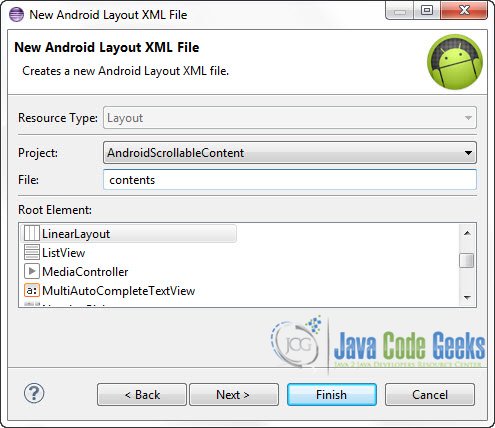
Введите имя для вашего нового файла макета и нажмите «Готово»:
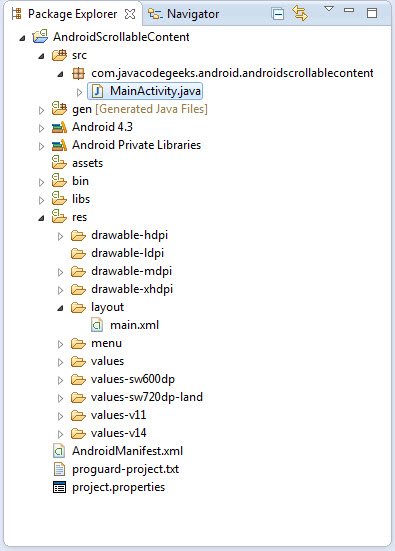
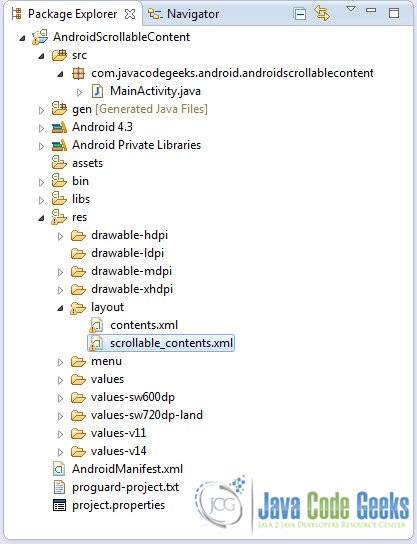
Итак, это новая структура проекта:
Откройте contents.xml и поместите нужные элементы:
contents.xml:
|
01
02
03
04
05
06
07
08
09
10
11
12
13
14
15
16
17
18
19
20
21
22
23
24
25
26
27
28
29
30
31
32
33
34
35
36
37
38
39
40
41
42
43
44
45
46
47
48
49
50
51
52
53
54
55
56
57
58
59
60
61
62
63
64
65
66
67
68
69
70
71
72
73
74
75
76
77
78
79
80
81
82
83
84
85
86
87
88
89
90
91
92
93
94
95
96
97
98
|
<?xml version="1.0" encoding="utf-8"?> android:layout_width="match_parent" android:layout_height="match_parent" android:gravity="center_horizontal" android:orientation="vertical" > <TextView android:layout_width="wrap_content" android:layout_height="wrap_content" android:layout_marginBottom="22dp" android:layout_marginTop="22dp" android:text="Item 1" android:textColor="#CCCCCC" android:textSize="19sp" /> <TextView android:layout_width="wrap_content" android:layout_height="wrap_content" android:layout_marginBottom="22dp" android:layout_marginTop="22dp" android:text="Item 2" android:textColor="#CCCCCC" android:textSize="19sp" /> <TextView android:layout_width="wrap_content" android:layout_height="wrap_content" android:layout_marginBottom="22dp" android:layout_marginTop="22dp" android:text="Item 3" android:textColor="#CCCCCC" android:textSize="19sp" /> <TextView android:layout_width="wrap_content" android:layout_height="wrap_content" android:layout_marginBottom="22dp" android:layout_marginTop="22dp" android:text="Item 4" android:textColor="#CCCCCC" android:textSize="19sp" /> <TextView android:layout_width="wrap_content" android:layout_height="wrap_content" android:layout_marginBottom="22dp" android:layout_marginTop="22dp" android:text="Item 5" android:textColor="#CCCCCC" android:textSize="19sp" /> <TextView android:layout_width="wrap_content" android:layout_height="wrap_content" android:layout_marginBottom="22dp" android:layout_marginTop="22dp" android:text="Item 6" android:textColor="#CCCCCC" android:textSize="19sp" /> <TextView android:layout_width="wrap_content" android:layout_height="wrap_content" android:layout_marginBottom="22dp" android:layout_marginTop="22dp" android:text="Item 7" android:textColor="#CCCCCC" android:textSize="19sp" /> <TextView android:layout_width="wrap_content" android:layout_height="wrap_content" android:layout_marginBottom="22dp" android:layout_marginTop="22dp" android:text="Item 8" android:textColor="#CCCCCC" android:textSize="19sp" /> <TextView android:layout_width="wrap_content" android:layout_height="wrap_content" android:layout_marginBottom="22dp" android:layout_marginTop="22dp" android:text="Item 9" android:textColor="#CCCCCC" android:textSize="19sp" /> <TextView android:layout_width="wrap_content" android:layout_height="wrap_content" android:layout_marginBottom="22dp" android:layout_marginTop="22dp" android:text="Item 10" android:textColor="#CCCCCC" android:textSize="19sp" /></LinearLayout> |
Код основной деятельности
Теперь нам нужно накачать ScrollView элементами из файла contents.xml . Давайте посмотрим, как вы можете это сделать:
MainActivity.java:
|
01
02
03
04
05
06
07
08
09
10
11
12
13
14
15
16
17
18
19
|
package com.javacodegeeks.android.androidscrollablecontent;import android.app.Activity;import android.os.Bundle;import android.widget.ScrollView;public class MainActivity extends Activity { @Override protected void onCreate(Bundle savedInstanceState) { super.onCreate(savedInstanceState); setContentView(R.layout.scrollable_contents); ScrollView scrollable_contents = (ScrollView) findViewById(R.id.scrollableContents); getLayoutInflater().inflate(R.layout.contents, scrollable_contents); }} |
Запустите приложение
Это основной экран нашего приложения:
Теперь, если вы прокрутите список элементов вниз, вы увидите, что верхний и нижний колонтитулы занимают свои позиции.
Скачать проект Eclipse
Это был пример для Android о том, как создать фиксированный верхний и нижний колонтитулы с макетом прокручиваемого содержимого. Загрузите проект Eclipse этого руководства: AndroidScrollableContent.zip
