Это краткое пошаговое руководство с использованием GGTS о том, как создать веб-сервис, получая информацию из базы данных Oracle 11g и предоставляя данные клиенту посредством ответа JSON. В руководстве рассматриваются конфигурации базы данных, модульные и интеграционные тесты, отображение URL-адресов и создание http-ответов из приложения Grails. Прежде чем я начну, я предваряю эту статью, я работаю в учебном заведении и получаю вопросы о доступе к нашей информационной системе для студентов (база данных Oracle) с помощью Grails, как и появился этот учебник. Я изменил имена некоторых таблиц, чтобы защитить их личность.
1) Запустите Groovy / Grails Tool Suite (GGTS можно загрузить с SpringSource ).
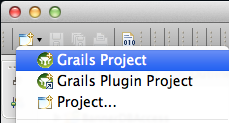
2) Создайте проект Grails. Файл-> Новый-> Проект Grails
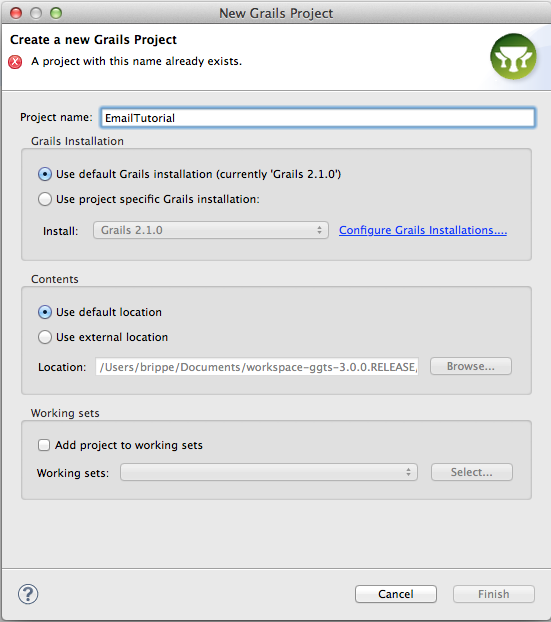
3) Создайте проект под названием «EmailTutorial».
4) По завершении запустите приложение grails run-app из командной строки Grails. 
5) Откройте браузер по адресу http: // localhost: 8080 / EmailTutorial ( GGTS имеет встроенный веб-браузер и отобразит ссылку. в консоли
GGTS ) 6) Вы увидите только DbDocController, нажмите на него. Далее вы увидите «Changelog changelog.groovy not found»
(Новое в Grails 2.1.1 — Плагин dbdoc из переноса базы данных используется для генерации статических HTML-файлов для просмотра журнала изменений или информации об изменениях в базе данных. Для dbDoc не настроена база данных при этом ничего не выводится)
Теперь у вас есть приложение Grails, и оно отвечает на запросы http. Настоящая цель здесь — извлечь информацию из базы данных Oracle. Как?
Более подробную информацию о таблицах базы данных смотрите в конце статьи.
7) Остановите запущенное приложение. Добавьте драйвер oracle jdbc в каталог lib вашего проекта (это делается путем копирования файла в каталог lib).
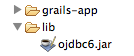
Драйверы JDBC для Oracle 11g доступны непосредственно в Oracle .
8) Затем настройте пул соединений с базой данных из файла DataSource.groovy.
В Grails есть три понятия среды: разработка (запуск приложения из IDE), тестирование (запуск тестов из IDE, тестирование приложения grails) и производство (развертывание приложения на сервере приложений, война grails). У нас есть возможность настроить источники данных для каждой из этих сред. Я добавлю разработку и тестирование конфигураций источника данных:
development {
    dataSource {
        pooled = true
        dialect = org.hibernate.dialect.Oracle10gDialect
        driverClassName = 'oracle.jdbc.OracleDriver'
        username = ''   // YOUR USERNAME AND PASS
        password = ''
        url = 'jdbc:oracle:thin:@<servername>:<port>:<database>'
        dbCreate = 'validate'

    }
}
test {
    dataSource {
        pooled = true
        dialect = org.hibernate.dialect.Oracle10gDialect
        driverClassName = 'oracle.jdbc.OracleDriver'
        username = '' // YOUR USERNAME AND PASS
        password = ''
        url = 'jdbc:oracle:thin:@<servername>:<port>:<database>'
        dbCreate = 'validate'
    }
}
- create — удаляет существующую схему. Создает схему при запуске, сначала удаляя существующие таблицы, индексы и т. д.
- create-drop — то же самое, что и create , но также удаляет таблицы, когда приложение полностью закрывается.
- update — создает отсутствующие таблицы и индексы и обновляет текущую схему без удаления каких-либо таблиц или данных. Обратите внимание, что это не может правильно обрабатывать многие изменения схемы, такие как переименование столбцов (у вас остается старый столбец, содержащий существующие данные).
- validate — не вносит изменений в вашу базу данных. Сравнивает конфигурацию с существующей схемой базы данных и выдает предупреждения.
Документация по источникам данных Grails
9) Как только источник данных настроен, пора создать сервисный объект, который использует источник данных. Создайте объект службы с именем edu.nocccd.banner.services.EmailService. Выберите Файл -> Новый -> Сервис из GGTS.
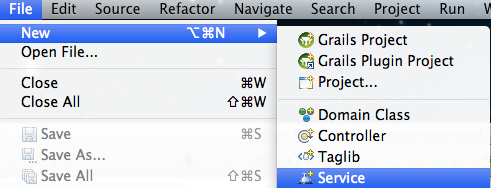
Введите имя сервиса в поле имени в диалоге создания сервиса и нажмите «Готово»
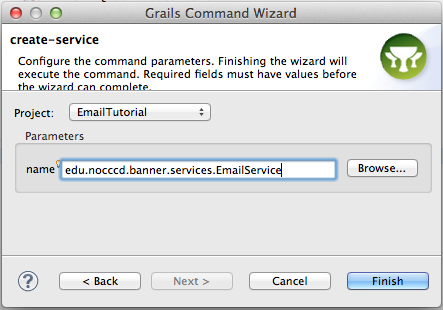
Это создаст EmailService под сервисами в Project Explorer. 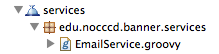
ВНИМАНИЕ: Наряду с сервисным объектом был создан модульный тест под тест / модуль Модульный тест используется для тестирования небольших частей кода. Поскольку EmailService является объектом службы, я хочу создать интеграционный тест для службы. Интеграционные тесты отличаются от модульных тестов тем, что они делают всю среду доступной для тестов, то есть источников данных, юнит-тесты — нет.
10) Удалите модульный тест для сервиса и создайте интеграционный тест. Щелкните правой кнопкой мыши тест / интеграция и выберите New-> Создать тест интеграции Grails.
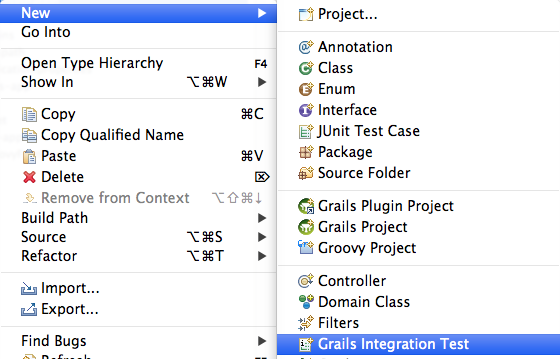
Создать тест с именем
edu.nocccd.banner.services.EmailServiceTests
11) Запустите приложение Grails test-app
** ЭТО ДОЛЖНО (ИЛИ МОЖЕТ) ВЗРЫТЬ с и Исключение
java.lang.ClassNotFoundException: oracle.jdbc.OracleDriver
Добавление ojdbc6.jar в каталог lib не поместило jar в тестовую среду.
12) Запустите grails clean, затем grails compile —refresh-dependencies
Это очищает среду выполнения любых скомпилированных файлов groovy, а затем перекомпилирует их, добавляя любые зависимости, необходимые для пути к классам приложения. Среда IDE может жаловаться на наличие проблем, поскольку мы очистили проект (он не может найти необходимые файлы классов), но продолжите и выполните задачу компиляции, если она выдаст жалобу.
13) Запустите Grails Test-App снова. На этот раз среда должна запуститься, показывая сбойный тест в методе testSomething (), который был сгенерирован при создании теста. Время исправить эту проблему.
14) Добавьте ссылку на источник данных в EmailService (статический источник данных). Затем измените имя serviceMethod () на getEmail (). Вот пример кода для
метод getEmail () версия 1
import groovy.sql.Sql;

class EmailService {

    static dataSource

    def getEmail(String username) {
        assert dataSource != null, "Datasource is null! No Good!!!"
        def sql = Sql.newInstance(dataSource)
        def query = """select last_name from person where
                        username = '@00000000’""" // USE YOUR ID
        try {
            def row = sql.firstRow(query)
            return row.last_name
        } catch(Exception e) {
            log.error "Exception EmailService.getAddress() ${query} - ${e}"
        }
        log.debug("Username - ${username} Email - ")
        return null
    }
}
В базе данных имена пользователей хранятся в виде восьмизначных идентификаторов с добавлением символа @.
Для получения дополнительной информации о groovy.sql.Sql см. Http://groovy.codehaus.org/api/index.html?groovy/sql/Sql.html .
15) Измените интеграционный тест, чтобы использовать EmailService, а затем напишите тест testGetEmail (), заменив сгенерированный метод testSomething ().
def emailService // add as a property of the EmailServiceTests

void testGetEmail() {
    assert emailService != null, "EmailService is null! BAD!"
    // USE YOUR USERNAME AND YOUR LAST NAME - Test for VERSION 1 getEmail()
    assert emailService.getEmail("YOUR USERNAME") == "Rippe", "EmailService.getEmail() FAIL!"

}
Предполагая, что мое имя пользователя — «@ 00000000», а моя фамилия хранится в базе данных как «Rippe». Давайте предположим, что каждое имя пользователя начинается с «@». ** Было бы намного проще просто включить ‘@’ в качестве параметра для методов, но я хотел бы продемонстрировать, как объединять символы в Groovy, поэтому я оставляю код как есть.
// Final Assertion in the Integration Test looks something like
assert emailService.getEmail("MY_ID") == "my@email.com"
16) Запустите grails test-app
. Тесты запускаются и завершаются без сбоев.
17) Если тесты пройдены успешно, вы знаете, что доступ к данным происходит, и пришло время продолжить. В сервисе getEmail (String username) есть параметр username, который мы не используем. Имя пользователя жестко закодировано в запросе, который должен быть параметризован. Нам нужно указать параметр для получения адреса электронной почты. Давайте изменим запрос EmailService и используем параметризацию запроса вместо жесткого кодирования идентификатора баннера.
def query = """select email_address from person
                left join email
                on person.pid = email.pid
                where username = ?
                and email_status_ind = 'A' and
                email_preferred_ind = 'Y'"""
try {
    def row = sql.firstRow(query, [username])
    return row.email_address
The ‘?’ in the query, is a placeholder for our parameterized username. The call to firstRow() that specifies the variable username that is passed to the getEmail method is evaluated at runtime. This allows us to specify the username of the person we’d like the email address of. The columns email_status_ind determine if a particular email address is active and the email_preferred_ind determines if a person has multiple email addresses if this particular address is the preferred address to use for communication.
18) Run the tests again, grails test-app. The tests should fail. The username doesn’t have the ‘@’ sign. Add
username = "@${username}" // concatenates a '@' in front of the username
log.debug("getEmail address for username ${username}")
19) Run the tests again, grails test-app.. Now all is well, the test should successfully complete. The service works and is communicating with Oracle. The integration tests help ensure that the service object is working correctly before code is written at any other level utilizing the service.
20) Time to use the new Service component in the web app that was generated for us when creating the project. Create a controller, edu.nocccd.data.controllers.EmailController, for the application. Right click the controller icon in the Project Explorer, select New -> Controller
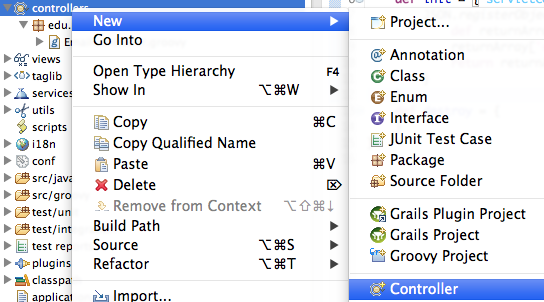
Type the name of the controller, edu.nocccd.data.controllers.EmailController, and click “Finish”
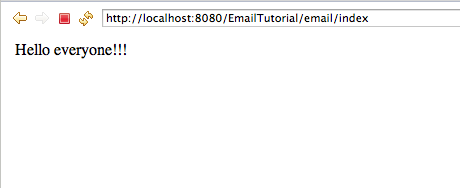
21) Add the following code to the index() method in the EmailController:
def index() {
    render "Hello everyone!!!"
}
22) Run grails run-app and navigate to the main controller page, http://localhost:8080/EmailTutorial/email/index. You should see the following text.
At this point, you should have an app that connects to an Oracle database using a database connection pool, via dataSource and a controller that responds to user requests via the browser. We now need to put the two together.
23) Add the following property to your Controller (edu.nocccd.data.controllers.EmailController):
def emailService
24) Add the following code to the body of your Controller’s (edu.nocccd.data.controllers.EmailController) index() method:
if(emailService == null) {
    log.error("Missing EmailService - need to implement EmailService")
    response.status = 500
    render "Missing my work buddy EmailService!!!"
} else {
    def email = emailService.getEmail('00000000') // your username
    render email
}
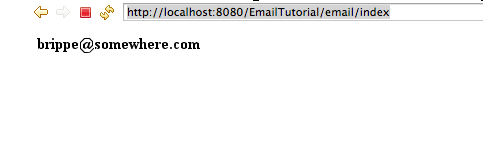
25) Run grails run-app, navigate to the http://localhost:8080/EmailTutorial/email/index. This should output your email address.
26) In the call to getEmail() in the Service object, the username ‘0000000’ is hard coded and not parameterized. This needs to be modified to use the params map that is provided to each controller in a grails application. This means that the controller can accept parameters and forward those to the service object to retrieve the proper email address. Change the method call
def email = emailService.getEmail('00000000') // your username
to
def email = emailService.getEmail(params.username)
In the code from 24.
**NOTE: You can make changes to the classes in the application and save them. You will see that GGTS re-compiles the class(es) and makes them available to the application without starting and stopping the application.
27) Navigate to http://localhost:8080/EmailTutorial/email/index. You should get a NullPointerException in your Console window and the browser will output null. Why? How do we fix it?
28) The easy fix is to change
def email = emailService.getEmail(params.username)
to
def email = emailService.getEmail(params.id)
Теперь вызовите метод index () в контроллере, перейдя по
адресу http: // localhost: 8080 / EmailTutorial / email / index / 00000000 (используя ваш идентификатор вместо 00000000). Это должно дать вам ваш адрес электронной почты. Зачем?
Если вы откроете UrlMappings.groovy из каталога conf, вы увидите следующее:
"/$controller/$action?/$id?" {
    constraints {
        // apply constraints here
    }
}
Эта конфигурация определяет вызываемый контроллер, EmailController, вызываемое действие (метод), index () и параметр, определенный как id, $ id? быть отправленным в метод. Если бы мы хотели определить какие-либо ограничения на параметры, мы могли бы сделать это здесь. Этот файл создает URL, которые отображаются обратно на контроллеры и действия в вашем приложении. Запрос в # 27 не работал, потому что в UrlMapping.groovy не определен параметр с именем «username».
Давайте изменим UrlMapping на что-то более подходящее для приложения и назовем параметр username.
29) Измените UrlMapping.groovy, чтобы он содержал следующий код:
static mappings = {
    "/getEmail/$username?"(controller:"email", action:"getEmail")
}
Save your file. Looking at this code we see that we are creating a new mapping to
http://localhost:8080/EmailTutorial/getEmail/00000000
where 00000000 is defined as the parameter username. The EmailController will respond by calling the action “getEmail()”. Make a request to the uri http://localhost:8080/EmailTutorial/getEmail/00000000 using your username. This request should give you a 404 error. What’s the issue (don’t look)?
30) The problem is there isn’t a defined action “getEmail()” in the controller. We were using index(). The solution is to define a getEmail action. Change the index action to:
def getEmail = {
    if(emailService == null) {
        log.error("Missing EmailService - need to implement EmailService")
        response.status = 500
       render "Missing my work buddy EmailService!!!"
    } else {
       log.debug("Getting some oracle data for ${params.username}")
       def email = emailService.getEmail(params.username)
       render email
    }
}
31) Save the EmailController.groovy file and navigate to http://localhost:8080/EmailTutorial/getEmail/00000000 using your id. Try navigating to the uri using a different username. This should give you a different email address.
32) Most applications don’t simply respond with the data a user is looking for. Most usually respond with XML or JSON (Grails has support for both). These are the two most popular ways of returning data from a uri. We will modify our application to return JSON (Javascript Object Notation) responses. Add the following import statement after your package statement in the EmailController.groovy file:
import grails.converters.JSON;
33) In the getEmail closure, change the line
render email
to
render email as JSON
and save. For more on converters see http://grails.org/Converters+Reference.
34) Navigate to http://localhost:8080/EmailTutorial/getEmail/00000000 using your id. This should output a org.codehaus.groovy.runtime.typehandling.GroovyCastException on the line modified in step 33.

As it turns out, a java.lang.String isn’t enough information to create JSON or XML. Thus, the reason for the error. How do we resolve this issue (don’t look)?
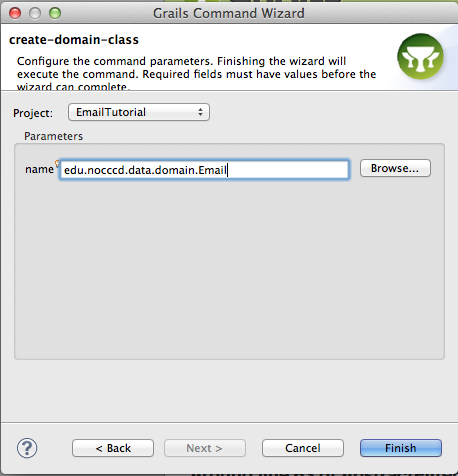
35) To resolve our issue, we need to create a domain object to store our email address. This will give the convert a property name and the value of the property. Right click on domain, select New, and choose Domain Class
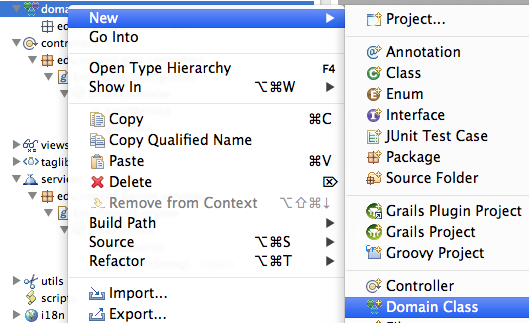
Fill in the class name edu.nocccd.data.domain.Email and click “Finish”
36) Add the address and mapWith property to the Email domain class:
class Email {
    static mapWith = "none" // no persistence
    def address
    static constraints = {
    }
}
(We’ll keep it simple, no constraints) and save the file.
37) Modify the EmailServicegetEmail method to create an Email object and return it as a result. Import the Email class into the EmailService
import edu.nocccd.data.domain.Email;
38) update the getEmail method to
def getEmail(String username) {
    assert dataSource != null, "Datasource is null! No Good!!!"
    def sql = Sql.newInstance(dataSource)
    def query = """select email_address from person
            left join email
            on person.pid = email.pid
            where username = ?
            and email_status_ind = 'A' and
            email_preferred_ind = 'Y'"""

    username = "@${username}"
    log.debug("getEmail address for username ${username}")
    Email email = new Email()
    try {
        def row = sql.firstRow(query, [username])
        email.address = row.email_address
    } catch(Exception e) {
        log.error "Exception EmailService.getEmail() ${query} - ${e}"
    }
    log.debug("Username - ${username} Email - ${email.address}")
    return email
}
Save the file.
39) Navigate to the page, http://localhost:8080/EmailTutorial/getEmail/00000000 where 00000000 is your username. If the app doesn’t respond, stop the grails application and run grails run-app. This will make sure that we are running the latest code.
You should see something similar to

Progress although not the output that we really want for our application. We need to tell the JSON converter what properties we want in the output. Turns out you can do this in your conf/BootStrap.groovy file. We can register object marshaller with the JSON converter telling it what properties we want output. In the output above, we want to get rid of the class and the id. These aren’t data we are looking for in our output. We only want the email address output.
40) Open your conf/BootStrap.groovy file and add the following imports
import grails.converters.JSON;


import edu.nocccd.data.domain.Email;
41) In your conf/BootStrap.groovy, in the init closure add the following:
JSON.registerObjectMarshaller(Email) {
    def returnArray = [:]
    returnArray['email'] = it.address
    return returnArray
}
Save the BootStrap.groovy. Stop and run grails run-app again.
42) Navigate to the page, http://localhost:8080/EmailTutorial/getEmail/00000000 where 00000000 is your username. You should see something similar to

What did I cover
- Creating a datasource with a pooled connection
- Creating service objects for database retrieval using connection pool
- Creating integration tests and running those tests
- Mapping urls to controller actions
- Parameterizing urls
- Creating domain objects for data storage (part of the MVC design pattern)
- Converting domain object to JSON output from a controller
This should be sufficient for our purposes of creating a basic web service for getting an email address from Oracle. There are a whole bunch of other issues I didn’t discuss like logging or the connection pool configuration. I’ll save these for some other tutorial. For now, I’ll leave this tutorial as way of wetting your Grails and Oracle whistle (The tutorial code can be downloaded at https://github.com/brippe/EmailTutorial). Enjoy!
Database Tables
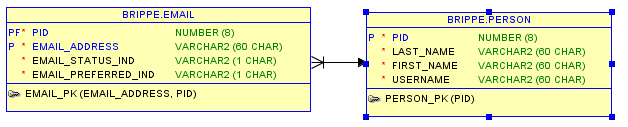
In Oracle, the tutorial is concerned with two tables
1) PERSON — the table where user information is stored
2) EMAIL — the table where email information is stored
The two are linked by a common id called a PID from the PERSON table which is a foreign key for the EMAIL table.
SQL for Tables
-- PERSON TABLE
CREATE TABLE "PERSON" ("PID" NUMBER(8,0),
"LAST_NAME" VARCHAR2(60 CHAR),
"FIRST_NAME" VARCHAR2(60 CHAR),
"USERNAME" VARCHAR2(60 CHAR)) ;

CREATE UNIQUE INDEX "PERSON_PK" ON "PERSON" ("PID") ;
ALTER TABLE "PERSON" ADD CONSTRAINT "PERSON_PK" PRIMARY KEY ("PID") ENABLE;
ALTER TABLE "PERSON" MODIFY ("PID" NOT NULL ENABLE);
ALTER TABLE "PERSON" MODIFY ("LAST_NAME" NOT NULL ENABLE);
ALTER TABLE "PERSON" MODIFY ("FIRST_NAME" NOT NULL ENABLE);
ALTER TABLE "PERSON" MODIFY ("USERNAME" NOT NULL ENABLE);

-- EMAIL TABLE


CREATE TABLE "EMAIL" ("PID" NUMBER(8,0),
"EMAIL_ADDRESS" VARCHAR2(60 CHAR),
"EMAIL_STATUS_IND" VARCHAR2(1 CHAR),
"EMAIL_PREFERRED_IND" VARCHAR2(1 CHAR)) ;

CREATE UNIQUE INDEX "EMAIL_PK" ON "EMAIL" ("EMAIL_ADDRESS", "PID");
ALTER TABLE "EMAIL" ADD CONSTRAINT "EMAIL_PK" PRIMARY KEY ("EMAIL_ADDRESS", "PID") ENABLE;
ALTER TABLE "EMAIL" MODIFY ("PID" NOT NULL ENABLE);
ALTER TABLE "EMAIL" MODIFY ("EMAIL_ADDRESS" NOT NULL ENABLE);
ALTER TABLE "EMAIL" MODIFY ("EMAIL_STATUS_IND" NOT NULL ENABLE);
ALTER TABLE "EMAIL" MODIFY ("EMAIL_PREFERRED_IND" NOT NULL ENABLE);
ALTER TABLE "EMAIL" ADD CONSTRAINT "EMAIL_PERSON_FK1" FOREIGN KEY ("PID") REFERENCES "PERSON" ("PID") ENABLE;
-- PERSON
insert into person values (0, 'Rippe', 'Brad', '@00000000')
insert into person values (1, 'Doe', 'John', '@00000001')
insert into person values (2, 'Doe', 'Jane', '@00000002')

-- EMAIL
insert into email values(0, 'brippe@somewhere.com', 'A', 'Y');
insert into email values(0, 'brippe@somewhereelse.com', 'I', 'N');
insert into email values(1, 'jdoe@somewhere.com', 'A', 'Y');
insert into email values(2, 'jane_doe@somewhere.com', 'A', 'Y');