Сайты с возможностями картирования очень распространены в наши дни. Начиная с государственных и корпоративных корпоративных сайтов до сайтов частных организаций (особенно связанных с путешествиями), все они используют различное картографическое программное обеспечение для предоставления своим пользователям требуемых геопространственных данных.
Геоинформационная система ( ГИС ) является важным компонентом картографического программного обеспечения. Он обеспечивает набор необходимых функций, таких как ввод, управление, анализ и визуализация пространственных данных. GeoServer позволяет вам делиться и публиковать ваши ГИС-ресурсы в Интернете как веб-сервисы.
GeoServer — сервер программного обеспечения Java с открытым исходным кодом. Он используется для генерации, обмена и управления геопространственными данными. Используя открытые стандарты, GeoServer публикует данные из любого основного источника пространственных данных.
Для размещения GeoServer вам потребуется база данных PostgreSQL, расширенная с помощью PostGIS . Это пространственное расширение добавляет поддержку географических объектов, позволяя выполнять запросы местоположения в SQL. С расширением PostGIS PostgreSQL может использоваться в качестве внутренней пространственной базы данных для ГИС.
Итак, давайте рассмотрим, как расширить базу данных PostgreSQL с помощью PostGIS и развернуть GeoServer в среде Jelastic для работы с общими геопространственными данными.
А. Создать среду
Во-первых, нам нужно создать среду как основу для нашего приложения.
1. Зарегистрируйте учетную запись Jelastic (если вы еще этого не сделали) или войдите в свою учетную запись Jelastic.
2. Нажмите на кнопку Создать среду .
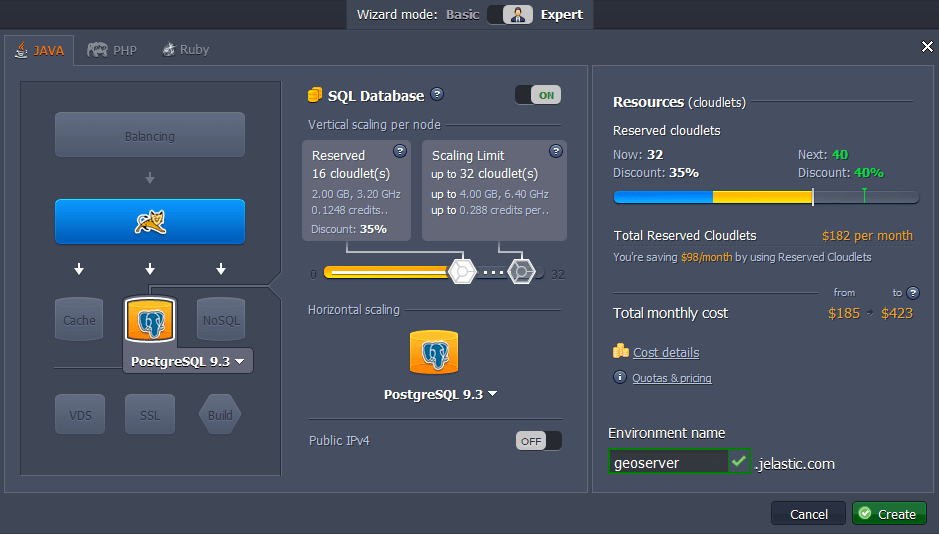
3. Выберите Tomcat 7 в качестве сервера приложений и PostgreSQL 9 в качестве базы данных, которую вы хотите использовать. Установите ограничения ресурсов для каждого узла и введите имя своего окружения (например, геосервер ). Подтвердите создание среды.
4. Через несколько минут ваше окружение появится на приборной панели.
B. Развертывание GeoSever
Теперь мы можем перейти к развертыванию программного обеспечения GeoServer.
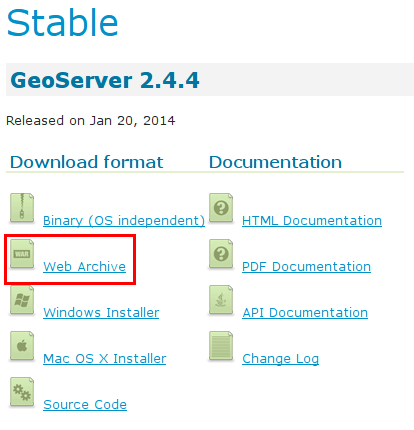
1. Откройте официальный веб-сайт GeoServer и загрузите последний стабильный выпуск в виде веб-архива.
2. По завершении загрузки распакуйте полученный архив.
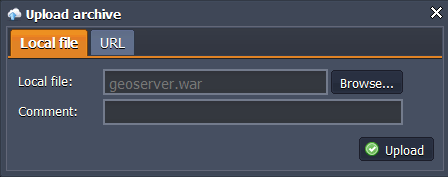
3. Вернитесь обратно на панель управления Jelastic и загрузите файл geoserver.war , расположенный в папке с извлеченным архивным содержимым.
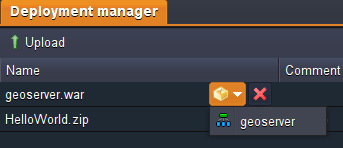
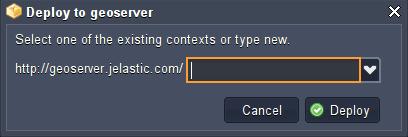
4. Наконец, нажмите кнопку Deploy to .. рядом с файлом .war в списке пакетов и выберите созданную до среды среду, чтобы развернуть в ней приложение GeoServer.
C. Конфигурации PostGIS
На этом этапе мы собираемся добавить расширение PostGIS для нашей базы данных PostgreSQL.
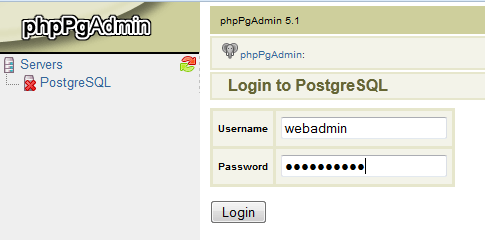
1. Open phpPgAdmin for the PostgreSQL database in your environment by selecting the Open in browser button next to it.
2. Log in with the PostgreSQL credentials you have received via email, after the environment was created.
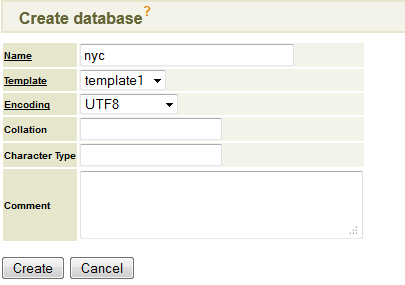
3. Now, you need to create a new database. Do do this, select the Create database button in the opened window.
4. Fill in the form:
- state the name for a new database (in our case, nyc)
- choose UTF8 encoding in the drop-down list
- fill in the other fields if it is required
Click Create button.
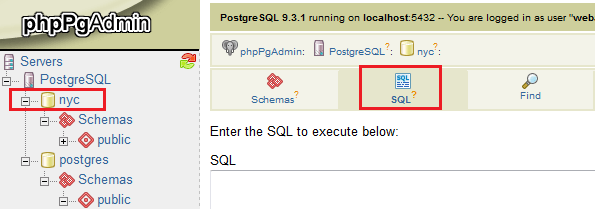
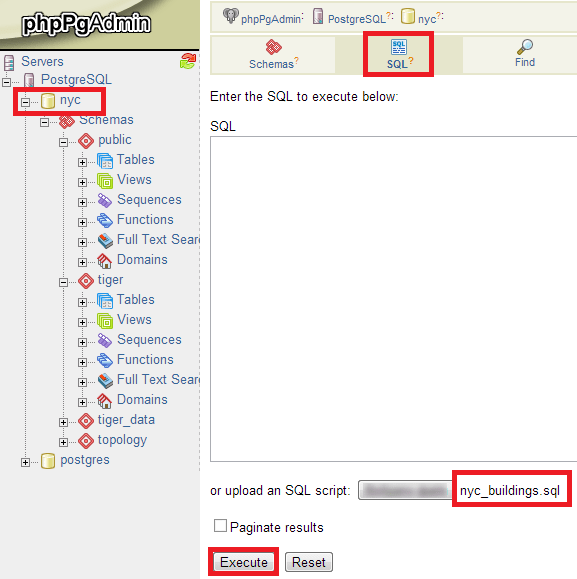
5. Choose your newly created database in the expandable list on the left-hand panel and navigate to the SQL tab.
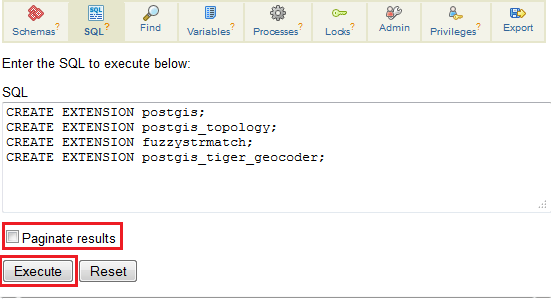
6. Enter the following SQL queries and execute them:
CREATE EXTENSION postgis;
CREATE EXTENSION postgis_topology;
CREATE EXTENSION fuzzystrmatch;
CREATE EXTENSION postgis_tiger_geocoder;
where the attributes are:
- postgis: for PostGIS enabling (includes raster)
- postgis_topology: for Topology enabling
- fuzzystrmatch: fuzzy matching is needed for Tiger
- postgis_tiger_geocoder: for US Tiger Geocoder enabling
Note: Don’t forget to tick off the Paginate results line under the form in order not to get any errors.
That’s all. PostGIS extension is enabled and can be used.
D. Dataset Import
Now, let’s import a PostGIS dump of a dataset to our PostreSQL database. As an example, we are going to use nyc_buildings.zip with a dataset of buildings from New York City.
1. Download nyc_buildings.zip package and extract it. You’ll get the nyc_buildings.sql file.
2. Enter phpPgAdmin for PostgreSQL with your credentials and navigate again to the SQL tab for your database with PostGIS extension (in our case, nyc database).
3. Browse the extracted dataset (e.g. nyc_buildings.sql) on your local computer and upload as an SQL script.
4. Deselect the Paginate results line under the form and Execute the script.
E. Connect GeoServer with Database
Now, we need to connect our GeoServer application with the PostgreSQL database. For this we’ll create a data store for our nyc database.
1. Navigate to the Jelastic dashboard and open the GeoServer environment (select Open in browser next to it).
2. In the opened browser tab, log in with the default GeoServer credentials (admin/geoserver).
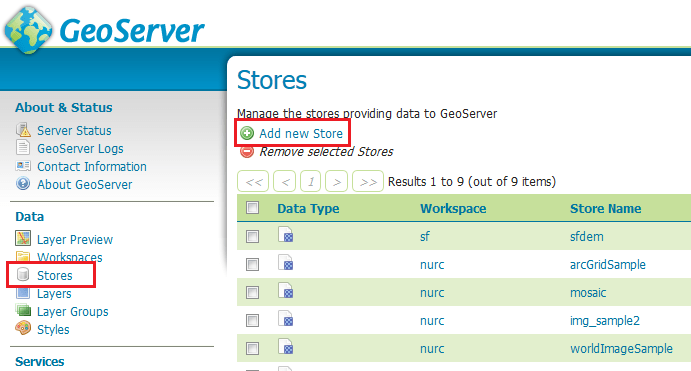
3. Then navigate to the Data > Stores menu item in the left-hand panel and click Add new Store line.
4. In the New data source window select the PostGIS – PostGIS Database option.
5. In the appeared New Vector Data Source window, fill in the following fields:
-
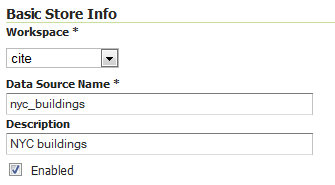
Basic Store Info
Select the citeWorkspace from the drop-down list.
Enter the Data Source Name (for example, nyc_buildings) and a brief Description.
-
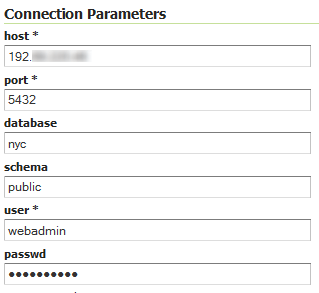
PostGIS database Connection Parameters
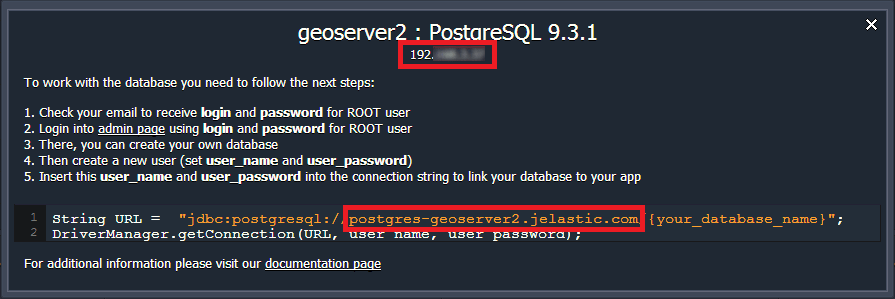
host — database host can be taken from the Info button
database — name of the database you’ve created with PostGIS extension (in our case, nyc)
user and passwd – credentials to the PostgreSQL you’ve received while creating the environment
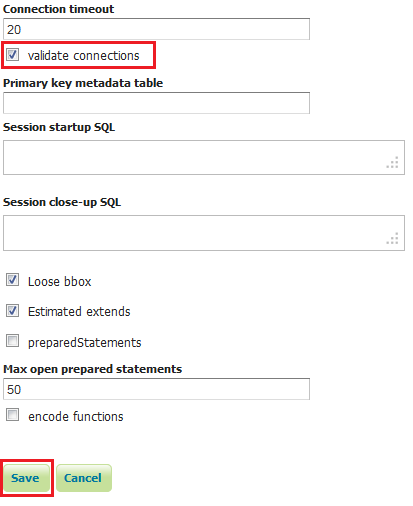
Other fields are filled by default, you can leave the initial values.
Also scroll a little bit lower and check if the Validate connections line is ticked. Then press Save.
The connection is established and as a result, you can see the uploaded PostreSQL nyc_buildings in the list of application resources.
F. Publish and Preview Dataset
Lastly, we need to make just a few configurations to publish the dataset (e.g. nyc_buildings) and to make the required geographical object ready to use.
1. New Vector Data Source (saved in the previous step) will appear in the list of New Layers.
Select Publish next to the added layer (e.g. nyc_buildings).
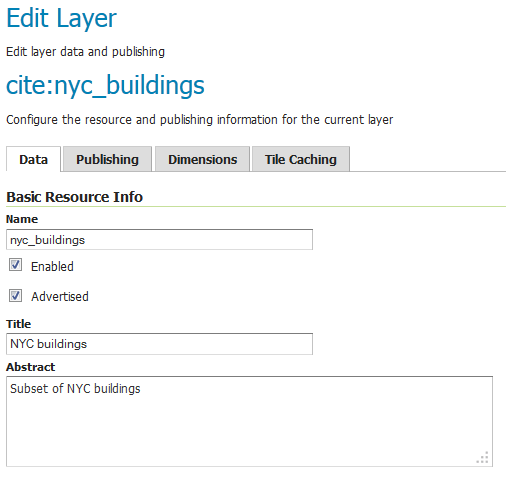
2. In the opened Edit Layer window enter a Title and an Abstract for your resource.
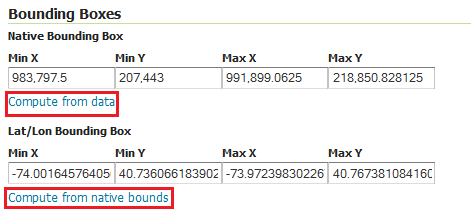
3. Scroll down the page and select Compute from dataand Compute from native bounds buttons in the Bounding Boxes configuration block.
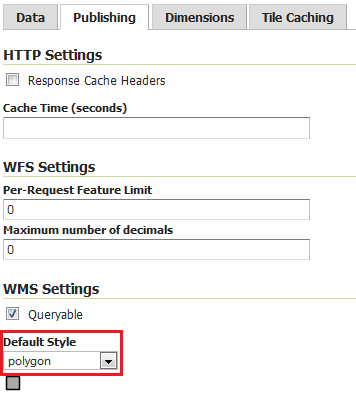
4. Then switch to the Publishing tab and ensure the polygon layer style is selected as default.
5. Finally, scroll down to the bottom of the page and select the Save button. The layer is published.
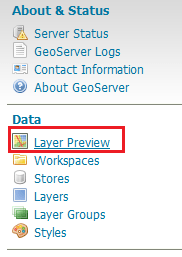
6. Now you can navigate to the Data > Layer Preview menu item.
Here, you’ll see a list of all layers configured in GeoServer with previews provided in various formats for each.
7. Select the OpenLayers button next to your layer (NYC buildings, in our case).
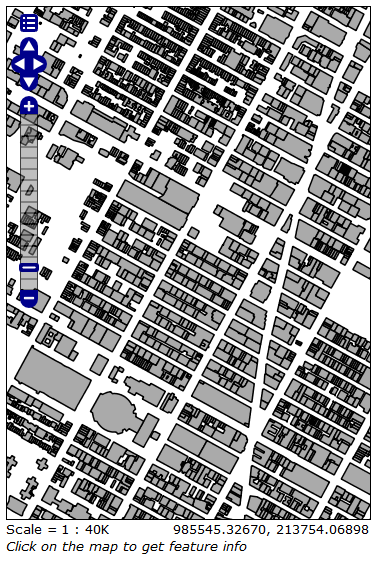
8. As a result, you will see the required geographical object. In our case, this is an interactive map of New York City buildings.
You can use Preview Map to zoom and pan around the dataset, as well as display the attributes of the features. Enjoy!
Conclusion
In such a way, you can add to your sites different interactive maps in a variety of output formats. With GeoServer, you not only just generate nicely styled maps, but you can also share and edit the source of data. Load, publish, style and share geospatial data easily with GeoServer hosted on Jelastic’s platform.
Nowadays an incredibly diverse variety of mapping software is available. Please comment below which system is usually used by you to display your spatial information to the world.
