
Ken Fogel is the Program Coordinator and Chairperson of the Computer Science Technology program at Dawson College in Montreal, Canada. He is also a Program Consultant to and part-time instructor in the Computer Institute of Concordia University‘s School of Extended Learning. He blogs at omniprogrammer.com and tweets @omniprof. His regular columns about NetBeans in education are listed here.
…and On The Job!
Following on from part 1, in this next article on Maven in the classroom, we will start looking at the Maven pom.xml file that NetBeans 8 provides when it creates a Maven-based JavaFX project. By looking at the whole file, this article will also be an introduction to Maven in general.
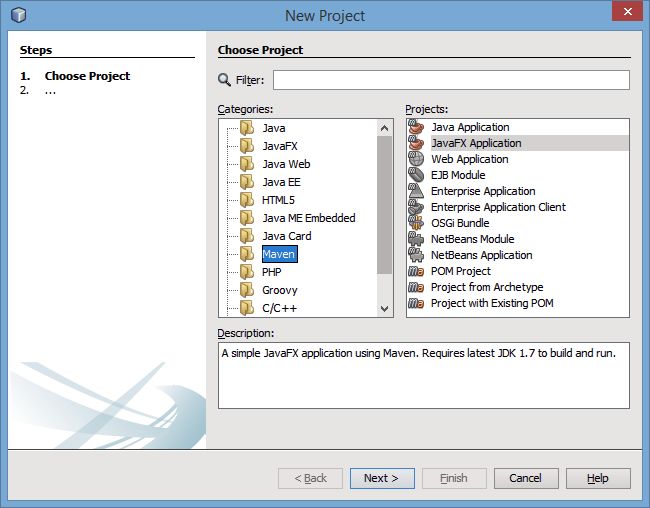
To begin, we need to create a new Maven project. As we are focusing on JavaFX, we choose a Maven JavaFX Application project template:
The next dialog requires you to name your project. In a Maven project, there are two parts to the project designation. The first is the Artifact Id and the project name you enter will be used for this. The second part is the Group Id. It should be a two word name in all lower case characters with a period as a separator. The name/group id and artifact id become the default package name in the project. You can choose a different package name rather than use the group id and artifact but that will just confuse anyone working on the project with you.
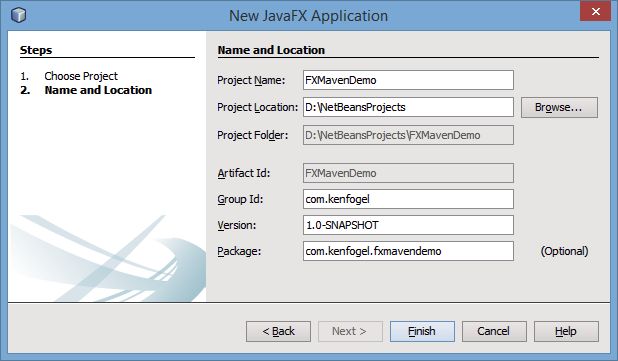
In the world of Maven, the libraries your project may need, such as the MySQL driver or the slf4j logger, are stored in a repository. Every entry in the repository is expected to have a unique name. The combination of Group Id and Artifact Id must make up a name unique in the repository.
A repository is a directory either on your local disk or on a remote server. As a side note, remote servers are now called ‘The Cloud’. Don’t you love marketing! Files that are needed by your project that are not in the local repository are retrieved from the remote server and stored in your local repository. The retrieval of the needed files is carried out when you use Maven to build the project. The standard repository for Maven is found at maven.org. The location of the local repository on your disk is in a folder named .m2 and usually found in your home directory. Your projects can be added to your local repository but not the remote server repository.
Once you have finished with this dialog, NetBeans will create the project. In NetBeans, the project that is created contains a basic “Hello World” program made up of the standard components of a JavaFX program. Right mouse-click on the project name and select Run from the context menu.
If this is the first time you are using Maven, then there will be a delay before the program is built and runs. Maven must create the local repository and download its plugins from its own personal Internet repository at repo.maven.apache.org. Here is just a portion of downloads that occur the first time you use Maven (click to enlarge the screenshot):

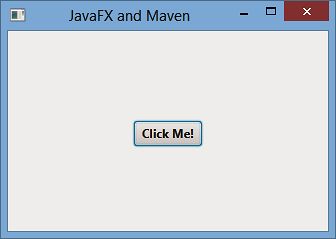
If all has gone well you should see the following:
Если вы запустите этот проект снова, вы увидите, что он не загружает никаких файлов. Они находятся в локальном репозитории, поэтому нет необходимости их извлекать снова.
Структура
каталогов проекта Структура каталогов проекта Maven отличается от стандартной структуры проекта NetBeans. Эта структура позволяет использовать проект Maven в любой среде IDE без необходимости конвертировать его в собственный формат среды IDE. На следующем изображении вы видите три проекта. Первое — это стандартное Java-приложение NetBeans. Второе — приложение Maven JavaFX, а третье — приложение NetBeans JavaFX.
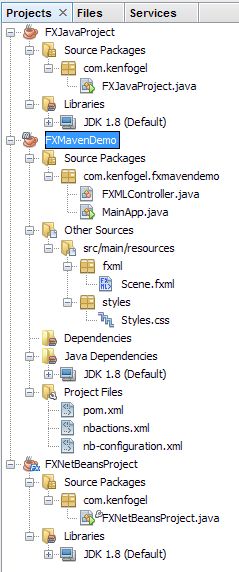
Проект Maven JavaFX также создает пример приложения, которое мы запустили для тестирования среды. Для нас более интересен тот факт, что эта структура каталогов представляет собой наилучшую практику для разработки приложения JavaFX. Вам не нужны никакие файлы, которые были созданы, и вы, вероятно, удалите их. Большинство уроков для начинающих не используют файлы fxml и css в своих первых примерах. С этим макетом вы знаете, где они должны быть размещены, когда вы будете их использовать.
Файл pom.xml
Интересующий меня файл — это объектная модель проекта (POM) с именем pom.xml. Это определяет, какие действия будет выполнять Maven. Давайте посмотрим на это по одному разделу за раз:
<?xml version="1.0" encoding="UTF-8"?>
<project xmlns=http://maven.apache.org/POM/4.0.0
   xmlns:xsi="http://www.w3.org/2001/XMLSchema-instance"
   xsi:schemaLocation="http://maven.apache.org/POM/4.0.0
   http://maven.apache.org/xsd/maven-4.0.0.xsd
Эти первые строки являются декларацией XML. Это говорит нам о том, что мы планируем использовать XML версии 1.0, единственную версию XML, о которой я знаю. Кодировка относится к набору символов, который используется в документе. UTF-8 является наиболее распространенной формой кодирования, и хотя вы можете подумать, что это означает 8-битное кодирование, на самом деле это означает, что документ полностью поддерживает Unicode. Все это означает, что документ может быть 8-битным ASCII, 16-битным Unicode или 32-битным Unicode.
Следующая строка содержит корневой тег XML с именем project. За тегом следуют ссылки на пространство имен и схему, используемые в документе. Все, что вам нужно знать об этом, — это то, что редактор XML использует эту информацию для проверки того, что теги, которые вы используете в документе, являются допустимыми тегами Maven.
<modelVersion>4.0.0</modelVersion>
Тег modelVersion определяет версию объектной модели, которую использует POM. Это требуется и было 4.0.0, пока я использую Maven.
<groupId>com.kenfogel</groupId>
<artifactId>FXMavenDemo</artifactId>
GroupId и artifactId были определены при создании проекта.
<version>1.0-SNAPSHOT</version>
Версия является текущей версией проекта. Все, что вы здесь разместите, будет добавлено в JAR-файл, который создает Maven, если вы не переопределите его с другими тегами. Вы можете положить сюда все, что захотите. Одно общее соглашение в управлении версиями заключается в том, чтобы включать строку ‘-SNAPSHOT’ в любую используемую вами схему управления версиями. SNAPSHOT подразумевает проект в стадии разработки.
<packaging>jar</packaging>
Тег упаковки указывает нам формат файла, который будет построен. Выборы: фляга, война и ухо.
<name>FXMavenDemo</name>
Тег имени позволяет нам связать имя со сборкой. ArtifactId — это обычно название проекта. Имя является необязательным тегом для внутреннего использования. Теперь для краткого урока истории. Внутреннее название для Windows 95 было Чикаго.
Существует ряд других необязательных тегов, которые можно использовать для предоставления дополнительной информации о проекте, такой как URL и описание. Как вы увидите, когда мы посмотрим на новую версию файла pom в следующей статье, я использую некоторые из них.
 <properties>
   <project.build.sourceEncoding>UTF-8</project.build.sourceEncoding
   <mainClass>com.kenfogel.fxmavendemo.MainApp</mainClass>
 </properties>
The properties section allows you to declare variables akin to environment variables that can be used in later sections of the pom. Within the properties tag you can make up any tag names you want. The two that are declared in this file are:
${project.build.sourceEncoding}
${mainClass}
Later in this pom file is <argument>${mainClass}</argument>. The variable will be replaced with com.kenfogel.fxmavendemo.MainApp.
The next section reads
 <organization>
   <!-- Used as the 'Vendor' for JNLP generation -->
   <name>Your Organisation</name>
 </organization>
JNLP stands for Java Network Launch Protocol. It is used to enable Java applets or applications to be delivered via the web to a client computer. To be able to use this method of application delivery you must be able to sign your application with a valid certificate just like those used for SSL security for web transactions. If you are developing commercial Java applications then you will need to have a certificate.
In the next article we will look at the meat of the POM file, which provides the plugins listed in the «build» section.