
Это вторая из серии публикаций, посвященных новой среде тестирования с открытым исходным кодом «Красный олень» ( https://github.com/jboss-reddeer/reddeer ) для Eclipse. В предыдущем посте из этой серии мы представили Red Deer, узнали, как установить его в Eclipse, изучили некоторые его интересные функции, а также создали и запустили пример тестовой программы с нуля.
Одна из проблем создания эффективных автоматизированных тестов заключается в том, чтобы сделать тесты самодостаточными, чтобы иметь возможность настроить требуемую рабочую среду, и достаточно надежными, чтобы определить, правильно ли настроена эта операционная среда.
В первом посте из этой серии мы кратко рассмотрели реализацию классом требований Red Deer. В этом посте мы более подробно рассмотрим требования, в том числе то, как Red Deer поддерживает создание пользовательских требований.
Кейс для требований к автоматизированным испытаниям
Давайте начнем с определения контекста, почему тестовым программам нужны требования. Часто бывает так, что набор автоматических тестов запускается без присмотра, и все тесты не проходят, не из-за ошибки в тестируемом программном обеспечении, а из-за сломанной или неполной тестовой среды. Когда мы ссылаемся на «требование» к оленю, мы говорим о действиях, которые должны быть выполнены, или объектах, которые должны быть созданы, прежде чем можно будет запустить тест. Примерами этих требований являются определение учетной записи пользователя или создание и проверка подключения к базе данных.
Что отличает использование требований Red Deer от создания менее формального набора требований с помощью аннотации @BeforeClass, предоставляемой JUnit, так это то, что если требования не выполняются, то рассматриваемый тест не запускается. Это может сэкономить вам много времени на выполнение теста и время отладки ошибок теста.
Требования Red Deer реализованы в RedDeerSuite. Тест, использующий требования, должен выполняться с пакетом RedDeerSuite и аннотироваться с помощью @RunWith (RedDeerSuite.class)
OOTB Red Deer Требования
Как мы видели в первом посте этой серии, Red Deer в настоящее время предоставляет OOTB (готовые) предопределенные требования, которые позволяют вам очистить текущее рабочее пространство и открыть перспективу.
Использовать эти требования просто. Все, что вам нужно сделать, это добавить эти операторы импорта в свои тестовые программы Red Deer:
import org.jboss.reddeer.eclipse.ui.perspectives.JavaBrowsingPerspective;
import org.jboss.reddeer.requirements.cleanworkspace.CleanWorkspaceRequirement.CleanWorkspace;
import org.jboss.reddeer.requirements.openperspective.OpenPerspectiveRequirement.OpenPerspective;
И мы также должны добавить ссылку на org.jboss.reddeer.requirements в требуемый список комплектов в файле MANIFEST.MF нашего примера. И, наконец, добавьте эти аннотации в тестовую программу:
@CleanWorkspace
@OpenPerspective (JavaBrowsingPerspective.class)
Что если вы хотите определить свои собственные требования? Давайте продолжим и рассмотрим, как Red Deer тоже это поддерживает.
Различные способы реализации новых требований к оленю
Red Deer поддерживает (4) пути реализации новых требований. Мы рассмотрим их в порядке их относительной сложности:
- Простые требования
- Требования с параметрами
- Требования с конфигурацией на основе свойств
- Требования с пользовательской схемой
Чтобы изучить, как Red Deer поддерживает реализацию новых требований, мы на самом деле создадим несколько новых требований в исходном коде Red Deer. Для этого нам нужно скачать копию исходного кода Red Deer. Чтобы выполнить эту загрузку, перейдите в нужный каталог и введите следующую команду:
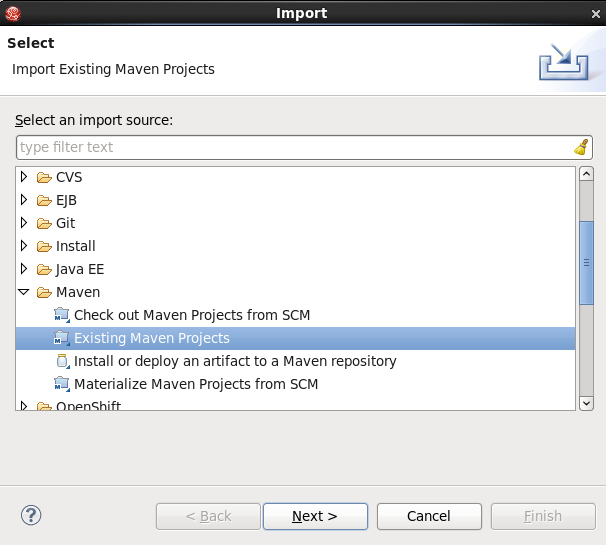
А затем импортируйте Red Deer в затмение в виде набора существующих проектов Maven:
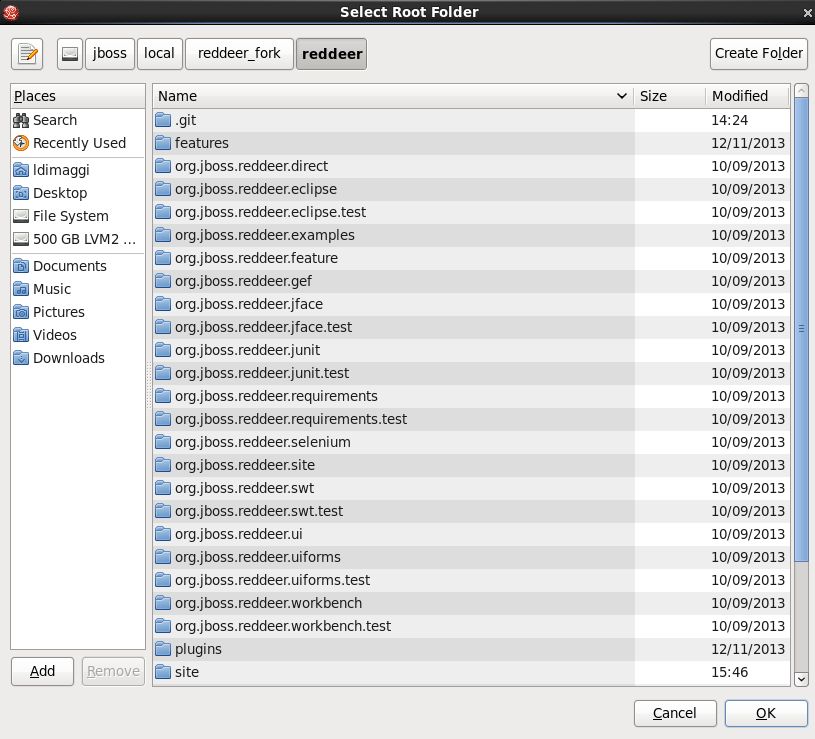
Если вы перейдете на верхний уровень каталога, в который вы загрузили исходный код Red Deer, вы увидите это:
Что вы хотите сделать, это выбрать все проекты Red Deer.
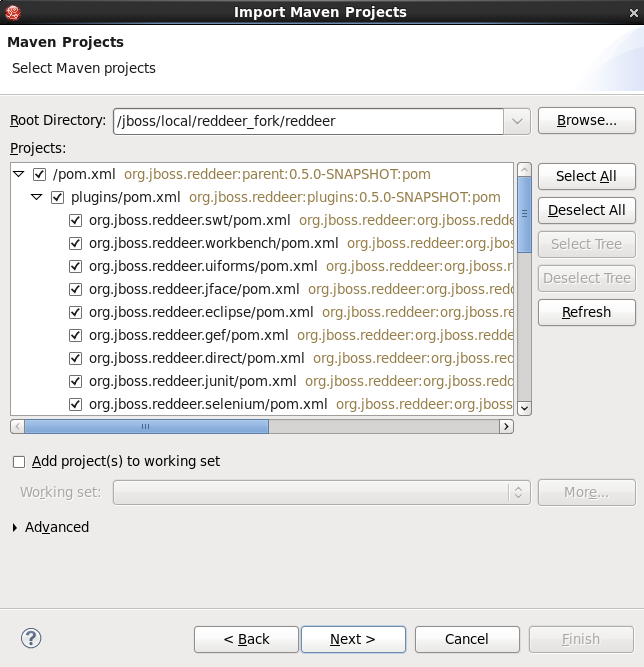
После того, как вы нажмете «Далее & gt;» ключ, Eclipse будет импортировать все пакеты Red Deer как проекты maven. (Это может занять несколько минут.)
Хорошо, теперь мы можем перейти к созданию новых требований. Мы начнем с самого простого из (4) типов, простого требования.
Реализация простого требования
Простое требование состоит из (2) частей: «исполняющего» класса, который предоставляет код, выполняемый при вызове требования, и аннотации, которая ссылается на этот исполняющий класс. В качестве иллюстрации давайте рассмотрим скелет «AdminUserRequirement», предоставляемый для загрузки Red Deer. Это требование предназначено в качестве примера для реализации полного требования, чтобы убедиться, что пользователь уровня администратора определен до того, как будет предпринята попытка запустить тест.
Исходный файл, который вы хотите найти:
/plugins/org.jboss.reddeer.examples/src/org/jboss/reddeer/junit/annotation/simple/AdminUserRequirement.java
Хотя это небольшой файл, это полный пример. Стоит рассмотреть это построчно:
package org.jboss.reddeer.junit.annotation.simple;
import java.lang.annotation.ElementType;
import java.lang.annotation.Retention;
import java.lang.annotation.RetentionPolicy;
import java.lang.annotation.Target;
import org.jboss.reddeer.junit.requirement.Requirement;
import org.jboss.reddeer.junit.annotation.simple.AdminUserRequirement.AdminUser;

/**
 * Admin user test requirement
 * @author lucia jelinkova
 *
 */

 public class AdminUserRequirement implements Requirement<AdminUser> {

   @Retention(RetentionPolicy.RUNTIME)
   @Target(ElementType.TYPE)

   public @interface AdminUser {
   }

   public boolean canFulfill() {
     // return true if you can connect to the database
     return true;
   }

   public void fulfill() {
     // create an admin user in the database if it does not exist yet
   }

   public void setDeclaration(AdminUser declaration) {
     // no need to access the annotation
   }
}
Важными элементами в этом файле являются:
- Строка 17 — @Retention — указывает, как хранится помеченная аннотация — будь то только в коде, скомпилированным в класс или доступным во время выполнения посредством отражения.
- Строка 18 — @Target — помечает другую аннотацию для ограничения типов элементов Java, к которым может применяться аннотация
- Строка 20 — интерфейс AdminUser — определяет тип объекта, используемый заданным требованием.
- Строка 23 — метод canFulfill — в полностью написанном требовании этот метод будет включать код для определения, может ли требование быть выполнено (или «выполнено»). Этот метод всегда возвращает значение true.
- Строка 32 — метод execute. А вот код, который будет выполнен, если метод canFulfill возвращает значение true.
Для примера соответствующей аннотации в действии, давайте посмотрим на тестовую программу, которая входит в класс выполнения. Тестовая программа здесь:
/plugins/org.jboss.reddeer.examples/src/org/jboss/reddeer/junit/annotation/simple/AdminUserTest.java
Эта тестовая программа также очень короткая, так как это скелет. Схема есть, но конкретная логика, которая реализует требование AdminUser, оставлена как «упражнение для читателя».
package org.jboss.reddeer.junit.annotation.simple;
import org.jboss.reddeer.junit.runner.RedDeerSuite;
import org.jboss.reddeer.junit.annotation.simple.AdminUserRequirement.AdminUser;
import org.junit.Test;
import org.junit.runner.RunWith;

@RunWith(RedDeerSuite.class)
@AdminUser

 /**
 * Test with AdminUser requirement
 * @author lucia jelinova
 *
 */

 public class AdminUserTest {

   @Test
   public void test(){
    // put test logic here
   }
}
Аннотация @AdminUser в строке NN рассказывает всю историю. Когда эта аннотация выполняется, вызывается выполняющий класс, и если метод canFulfill () возвращает true, тест выполняется. Если метод возвращает false, то тест не выполняется.
Давайте запустим этот тест и посмотрим, что произойдет.
Сначала найдите файл AdminUserTest.java в представлении eclipse Navigator: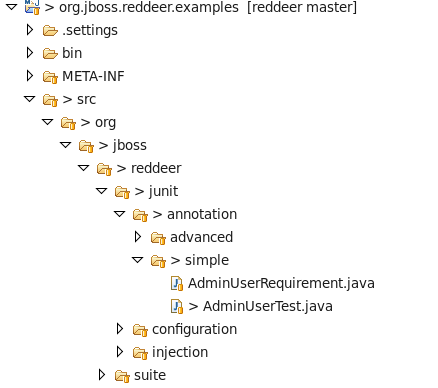
Затем щелкните правой кнопкой мыши и укажите, что он будет выполнен как тест JUnit:
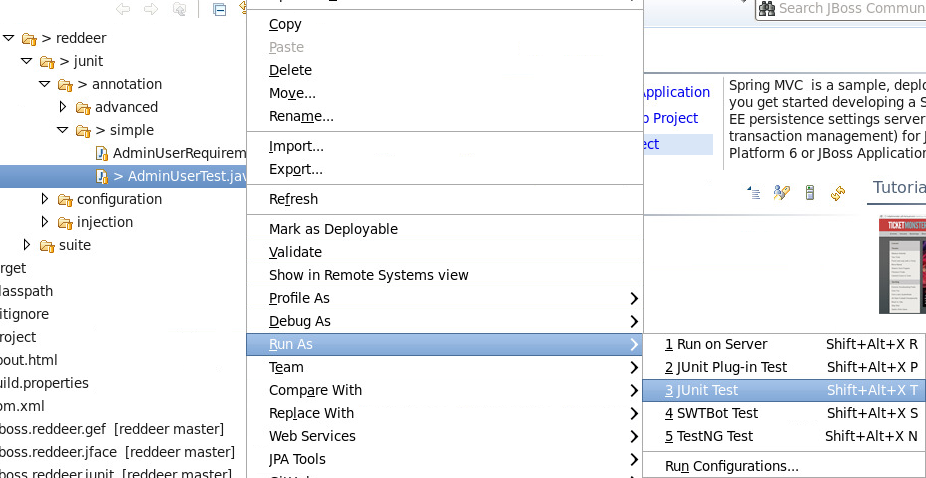
И, что неудивительно, вот успешный результат теста:

Прежде чем двигаться дальше, давайте изменим метод canFulFill (), чтобы он возвращал ложное значение, и повторно запустим тест. Результаты выглядят так:
22:11:04.923 INFO [main][RequirementsRunnerBuilder] Found test class org.jboss.reddeer.junit.annotation.simple.AdminUserTest

22:11:04.924 INFO [main][RequirementsBuilder] Creating requirements for test class org.jboss.reddeer.junit.annotation.simple.AdminUserTest

22:11:04.925 DEBUG [main][RequirementsBuilder] Found requirement class org.jboss.reddeer.junit.annotation.simple.AdminUserRequirement for annotation interface org.jboss.reddeer.junit.annotation.simple.AdminUserRequirement$AdminUser

22:11:04.927 INFO [main][Requirements] Requirement class org.jboss.reddeer.junit.annotation.simple.AdminUserRequirement can be fulfilled: false

22:11:04.927 INFO [main][RequirementsRunnerBuilder] All requirements cannot be fulfilled, the test will NOT run
Таким образом, на этот раз требование не было выполнено, и тест не был выполнен. Обратите внимание, что требование сделало работу за нас. Нам не нужно было писать много нового кода, чтобы определить, выполнено ли требование, чтобы решить, стоит ли запускать тест.
Это все хорошо для простого требования. Но что делать, если мы хотим сделать требование более гибким, позволив нам передать его параметру? Давайте посмотрим на это дальше.
Реализация требования с параметрами
Чтобы реализовать требование, которое принимает один или несколько параметров, мы должны сделать два дополнения к простому требованию, которое мы только что рассмотрели.
Во-первых, мы должны использовать другое определение требования. Код, который мы хотим посмотреть на этот раз, находится здесь:
/plugins/org.jboss.reddeer.examples/src/org/jboss/reddeer/junit/annotation/advanced/UserRequirement.java
Файл выглядит так:
package org.jboss.reddeer.junit.annotation.advanced;
import java.lang.annotation.ElementType;
import java.lang.annotation.Retention;
import java.lang.annotation.RetentionPolicy;
import java.lang.annotation.Target;
import org.jboss.reddeer.junit.requirement.Requirement;
import org.jboss.reddeer.junit.annotation.advanced.UserRequirement.User;

/**
 * Parameterized requirement with parameter name
 * @author vpakan
 *
 */

 public class UserRequirement implements Requirement<User> {

   @Retention(RetentionPolicy.RUNTIME)
   @Target(ElementType.TYPE)

   public @interface User {
     String name();
   }

   private User user;
   public boolean canFulfill() {
     // return true if you can connect to the database
     return true;
   }

   public void fulfill() {
     System.out.println("Fulfilling reuirement User with name: " + user.name());
     // create an admin user in the database if it does not exist yet
   }

   public void setDeclaration(User user) {
     this.user = user;
   }
}
Важное различие между этим классом и исходным AdminUserRequirement, которое мы рассмотрели только что:
-
Строка 20. Интерфейс «Пользователь» теперь определяет строковый параметр «имя», а в строке NNN здесь определяется объект «Пользователь».
Во-вторых, мы должны изменить декларацию требования в тестовой программе. Тестовая программа, которую мы рассмотрим в этот раз, находится здесь:
/plugins/org.jboss.reddeer.examples/src/org/jboss/reddeer/junit/annotation/advanced/UserTest.java
Наконец, наша тестовая программа для этого требования выглядит следующим образом:
package org.jboss.reddeer.junit.annotation.advanced;
import org.jboss.reddeer.junit.runner.RedDeerSuite;
import org.jboss.reddeer.junit.annotation.advanced.UserRequirement.User;
import org.junit.Test;
import org.junit.runner.RunWith;

@RunWith(RedDeerSuite.class)
@User(name="admin")

 /**
 * Test with parameterized requirement User
 * @author lucia jelinkova
 *
 */

 public class UserTest {

   @Test
   public void test(){
     // put test logic here
   }
}
Интересная строка в этом тесте:
-
Строка 8 — @User (name = «admin») — где мы устанавливаем значение параметра «name».
Когда мы запускаем UserTest как тест JUnit, мы видим этот вывод:
20:46:03.554 INFO [main][RequirementsRunnerBuilder] Found test class org.jboss.reddeer.junit.annotation.advanced.UserTest

20:46:03.555 INFO [main][RequirementsBuilder] Creating requirements for test class org.jboss.reddeer.junit.annotation.advanced.UserTest

20:46:03.556 DEBUG [main][RequirementsBuilder] Found requirement class org.jboss.reddeer.junit.annotation.advanced.UserRequirement for annotation interface org.jboss.reddeer.junit.annotation.advanced.UserRequirement$User

20:46:03.558 INFO [main][Requirements] Requirement class org.jboss.reddeer.junit.annotation.advanced.UserRequirement can be fulfilled: true

20:46:03.558 INFO [main][RequirementsRunnerBuilder] All requirements can be fulfilled, the test will run

20:46:03.575 INFO [main][RedDeerSuite] RedDeer suite created

20:46:03.584 INFO [main][Requirements] Fulfilling requirement of class org.jboss.reddeer.junit.annotation.advanced.UserRequirement

Fulfilling requirement User with name: admin

20:46:03.585 DEBUG [main][RequirementsRunner] Injecting fulfilled requirements into test instance

20:46:03.587 INFO [main][RequirementsRunner] Started test: test(org.jboss.reddeer.junit.annotation.advanced.UserTest)20:46:03.588 INFO [main][RequirementsRunner] Finished test: test(org.jboss.reddeer.junit.annotation.advanced.UserTest)
Хотя это делает требования более гибкими, когда вы можете добавлять параметры к их определению, оно все еще ограничено в качестве решения, поскольку вы должны обрабатывать отдельные параметры по одному. К счастью, Red Deer также поддерживает определение тестовых конфигураций в ваших собственных XML-схемах.
Определение сложных конфигураций — два подхода
Red Deer поддерживает два разных подхода к определению сложных конфигураций. Вы также можете:
- Определите конфигурацию как набор (ключ = значение) свойств. Если вы выберете этот подход, вам также потребуется определить методы установки для каждого свойства в классе выполнения вашего требования.
- Создайте собственную схему XML. Если вы выберете этот подход, вам придется создать объект конфигурации в тестовом коде, а затем внедрить этот объект в ваши требования.
Независимо от того, какой подход вы выберете, вы сохраняете данные конфигурации либо в отдельном XML-файле, либо в каталоге XML-файлов, а затем передаете эти файлы в свою тестовую программу, определяя этот аргумент JVM при запуске своих тестовых программ:
-Dreddeer.config = / дом / путь / к / файлу / или / каталог
Давайте рассмотрим каждый из этих подходов подробно. Начнем с подхода, основанного на свойствах.
Требования с конфигурацией на основе свойств
Первое, что мы должны сделать, чтобы использовать конфигурацию на основе свойств, — это определить свойства. Мы сделаем это в файле XML, который соответствует файлу схемы XSD требований Red Deer.
Вы можете просмотреть XSD здесь: http://cloud.github.com/downloads/jboss-reddeer/reddeer/RedDeerSchema.xsd
Код для этого примера здесь:
/jboss/local/reddeer_fork/reddeer/plugins/org.jboss.reddeer.examples/src/org/jboss/reddeer/junit/configuration/simple
И — вот наш файл свойств. Обратите внимание, что требование, определенное в этом файле, содержит два свойства: name и ip (IP-адрес).
<?xml version="1.0" encoding="UTF-8"?>
<testrun
  xmlns="http://www.jboss.org/NS/Req"
  xmlns:xsi="http://www.w3.org/2001/XMLSchema-instance"
  xmlns:server="http://www.jboss.org/NS/ServerReq"
  xsi:schemaLocation="http://www.jboss.org/NS/Req http://cloud.github.com/downloads/jboss-reddeer/reddeer/RedDeerSchema.xsd http://www.jboss.org/NS/ServerReq ServerRequirements.xsd">

  <requirements>
    <requirement class="org.jboss.reddeer.junit.annotation.simple.UserRequirement" name="userRequirement">
       <property key="name" value="USERS_ADMINISTRATION" />
       <property key="ip" value="127.0.0.1" />
     </requirement>
   </requirements>
</testrun>
Let’s now expand on the “UserRequirement” example that we defined a few minutes ago. What we want to be able to do is to remove hardcoded requirements data from the source code and instead define that data in set of properties.
To use this requirements.xml file, we have to make some changes to the UserRequirement.java class.
package org.jboss.reddeer.junit.annotation.simple;
import java.lang.annotation.ElementType;
import java.lang.annotation.Retention;
import java.lang.annotation.RetentionPolicy;
import java.lang.annotation.Target;
import org.jboss.reddeer.junit.requirement.Requirement;
import org.jboss.reddeer.junit.annotation.simple.UserRequirement.User;
import org.jboss.reddeer.junit.requirement.PropertyConfiguration;

 /**
 * Admin user test requirement
 * @author lucia jelinkova
 */

 public class UserRequirement implements Requirement<User> , PropertyConfiguration
 {
   @Retention(RetentionPolicy.RUNTIME)
   @Target(ElementType.TYPE)
   public @interface User {
   }
   private String name;
   private String ip;

   public boolean canFulfill() {
     // return true if you can connect to the database
     return true;
   }

   public void fulfill() {
     System.out.println("Fulfilling User requirement with\nName: " + name
         + "\nIP: " + ip);
     // create an admin user in the database if it does not exist yet
   }

   @Override
   public void setDeclaration(User user) {
     // annotation has no parameters no need to store reference to it
   }

   public void setName(String name) {
     this.name = name;
   }

   public void setIp(String ip) {
     this.ip = ip;
   }

   public String getName() {
     return name;
   }

   public String getIp() {
     return ip;
   }
}
- The important changes are the addition of this import statement at line 8:
- import org.jboss.reddeer.junit.requirement.PropertyConfiguration
- And the addition of the implement clauses for the Requirement (with a type of User), and the PropertyConfiguration (so that the properties can be read) at line 15:
- public class UserRequirement implements Requirement , PropertyConfiguration
And addition of the setter methods for the name and ip properties.
Finally, here is the updated test program:
package org.jboss.reddeer.junit.annotation.simple;
import org.jboss.reddeer.junit.runner.RedDeerSuite;
import org.jboss.reddeer.junit.annotation.simple.UserRequirement.User;
import org.junit.Test;
import org.junit.runner.RunWith;
import org.jboss.reddeer.junit.requirement.inject.InjectRequirement;

@RunWith(RedDeerSuite.class)
@User
 /**
 * Test with AdminUser requirement
 * @author lucia jelinova
 *
 */

 public class UserTest {

   @InjectRequirement
   private UserRequirement userRequirement;

   @Test
   public void test(){
     System.out.println("The test is running");
     System.out.println(userRequirement.getName());
    // put test logic here
   }
}
What’s new in the test program is the addition of the import statement for the requirement injection:
import org.jboss.reddeer.junit.requirement.inject.InjectRequirement;
And the code to define and inject the UserRequirement:
@InjectRequirement
private UserRequirement userRequirement;
When we run the test, we have to reference the configuration file via a Java VM argument . This means that we must define a new “run configuration” that is based on the JUnit run configuration provided in Eclipse and provide the VM argument that references the configuration file:
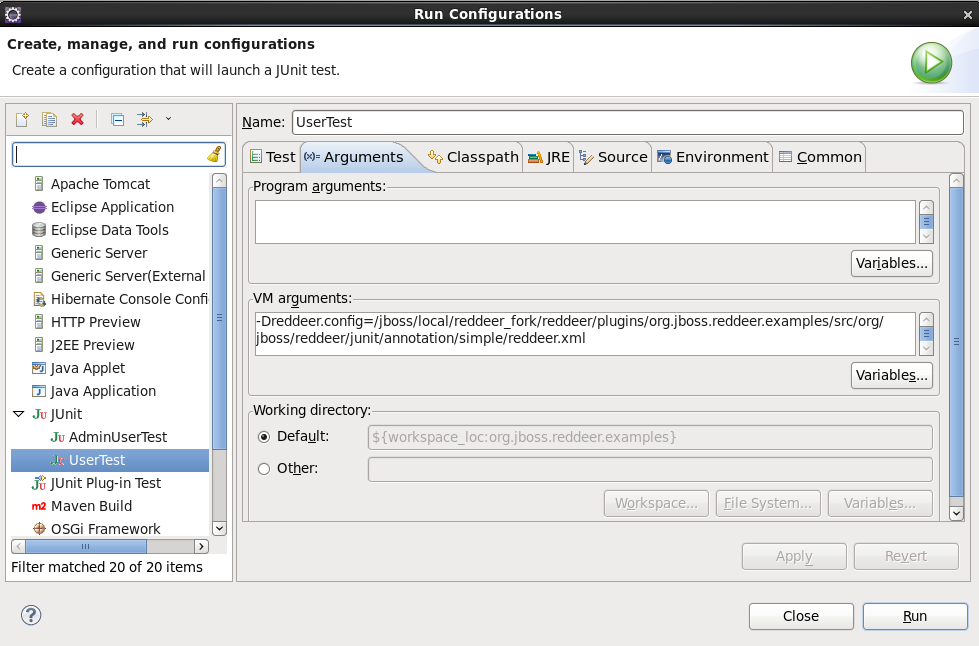
In our example, the -Dreddeer.config VM argument is defined as:
-Dreddeer.config=/jboss/local/reddeer_fork/reddeer/plugins/org.jboss.reddeer.examples/src/org/jboss/reddeer/junit/annotation/simple/reddeer.xml
To execute the test, right-click on the UserTest class, and select the run configuration we just created:

And, the test generates this test output in the console:
22:40:50.988 INFO [main][RedDeerSuite] Creating RedDeer suite...

22:40:50.990 INFO [main][SuiteConfiguration] Looking up configuration files defined via property reddeer.config=/jboss/local/reddeer_fork/reddeer/plugins/org.jboss.reddeer.examples/src/org/jboss/reddeer/junit/annotation/simple/reddeer.xml

22:40:50.991 INFO [main][SuiteConfiguration] Found configuration file /jboss/local/reddeer_fork/reddeer/plugins/org.jboss.reddeer.examples/src/org/jboss/reddeer/junit/annotation/simple/reddeer.xml

22:40:50.992 INFO [main][RedDeerSuite] Adding suite with name reddeer.xml to RedDeer suite

22:40:51.012 INFO [main][RequirementsRunnerBuilder] Found test class org.jboss.reddeer.junit.annotation.simple.UserTest

22:40:51.025 INFO [main][RequirementsBuilder] Creating requirements for test class org.jboss.reddeer.junit.annotation.simple.UserTest

22:40:51.027 DEBUG [main][RequirementsBuilder] Found requirement class org.jboss.reddeer.junit.annotation.simple.UserRequirement for annotation interface org.jboss.reddeer.junit.annotation.simple.UserRequirement$User

22:40:51.027 DEBUG [main][PropertyBasedConfigurator] Setting property based configuration to requirement class org.jboss.reddeer.junit.annotation.simple.UserRequirement

22:40:51.031 DEBUG [main][XMLReader] Reading configuration for class org.jboss.reddeer.junit.internal.configuration.entity.PropertyBasedConfiguration

22:40:51.827 DEBUG [main][PropertyBasedConfigurator] Configuration successfully set

22:40:51.828 INFO [main][Requirements] Requirement class org.jboss.reddeer.junit.annotation.simple.UserRequirement can be fulfilled: true

22:40:51.828 INFO [main][RequirementsRunnerBuilder] All requirements can be fulfilled, the test will run

22:40:51.865 INFO [main][RedDeerSuite] RedDeer suite created

22:40:51.874 INFO [main][Requirements] Fulfilling requirement of class org.jboss.reddeer.junit.annotation.simple.UserRequirement

Fulfilling User requirement with

Name: USERS_ADMINISTRATION

IP: 127.0.0.1

22:40:51.875 DEBUG [main][RequirementsRunner] Injecting fulfilled requirements into test instance

22:40:51.876 INFO [main][RequirementsRunner] Started test: test reddeer.xml(org.jboss.reddeer.junit.annotation.simple.UserTest)

22:40:51.876 INFO [main][RequirementsRunner] Started test: test reddeer.xml(org.jboss.reddeer.junit.annotation.simple.UserTest)

The test is running

USERS_ADMINISTRATION

22:40:51.878 INFO [main][RequirementsRunner] Finished test: test reddeer.xml(org.jboss.reddeer.junit.annotation.simple.UserTest)

22:40:51.878 INFO [main][RequirementsRunner] Finished test: test reddeer.xml(org.jboss.reddeer.junit.annotation.simple.UserTest)
Requirements with a Custom Schema
The fourth and final approach to defining new requirements is to create a custom XML schema. This is the most complex approach, but it also provides you with the most flexibility as you can more easily share requirements in multiple configuration files. Also, this approach can protect you against forgetting to define properties in the configuration files by designating specific properties as required XML elements.
To use this approach, you create a custom XML schema, then you create a configuration object in the test programs, and inject that object into your requirement. The configuration details are defined in an XML file and accessed through JAXB annotations.
Let’s take a look at an example. The code for this example is available in Red Deer here:
/plugins/org.jboss.reddeer.examples/src/org/jboss/reddeer/junit/configuration/advanced
In order to use a custom XML schema, you need a custom schema. In this example, the schema is defined in a local file:
/plugins/org.jboss.reddeer.examples/src/org/jboss/reddeer/junit/configuration/advanced/RedDeerRequirements.xsd
This example schema is fairly simple, but it provides the flexibility needed for the example to define a test configuration of key=value pairs in the context of testruns and requirements. Also, the schema enforces the “required” setting for the requirement name.
The configuration for requirement is defined in an XML requirement configuration file, the format of which complies with the custom schema:
<?xml version="1.0" encoding="UTF-8"?>
<testrun
  xmlns="http://www.jboss.org/NS/Req"
  xmlns:xsi="http://www.w3.org/2001/XMLSchema-instance"
  xmlns:user="http://www.jboss.org/NS/user-schema"
  xsi:schemaLocation="http://www.jboss.org/NS/Req RedDeerRequirements.xsd http://www.jboss.org/NS/user-schema user-schema.xsd">
  <requirements>
    <user:user-requirement name="user-requirement">
      <user:db-name>USERS_ADMINISTRATION</user:db-name>
       <user:ip>127.0.0.1</user:ip>
       <user:port>1111</user:port>
     </user:user-requirement>
   </requirements>
</testrun>
In order to make use of this configuration, the Requirement class must instantiate a “UserConfiguration” object for the requirement. The UserRequirement class implements the org.jboss.reddeer.junit.requirement.CustomConfiguration interface with and specifies a type of UserConfiguration to enable the use of custom configurations:
package org.jboss.reddeer.junit.configuration.advanced;
import java.lang.annotation.ElementType;
import java.lang.annotation.Retention;
import java.lang.annotation.RetentionPolicy;
import java.lang.annotation.Target;
import org.jboss.reddeer.junit.requirement.CustomConfiguration;
import org.jboss.reddeer.junit.requirement.Requirement;
import org.jboss.reddeer.junit.configuration.advanced.UserRequirement.User;

 /**
 * User requirement using configuration from custom xml file
 * @author lucia jelinkova
 *
 */

 public class UserRequirement implements Requirement<User>, CustomConfiguration<UserConfiguration> {
   @Retention(RetentionPolicy.RUNTIME)
   @Target(ElementType.TYPE)

   public @interface User {
     String name();
   }

   private User user;
   private UserConfiguration userConfiguration;

   public boolean canFulfill() {
     // return true if you can connect to the database
     return true;
   }

   public void fulfill() {
     System.out.println("fulfiling requirement User with\nName: " + user.name() +
       "\nDB name: " +  userConfiguration.getDbName() +
       "\nPort: " + userConfiguration.getPort() +
       "\nIP: " + userConfiguration.getIp());
     // create an admin user in the database if it does not exist yet
   }

   public void setDeclaration(User user) {
     this.user = user;
   }

   public Class<UserConfiguration> getConfigurationClass() {
     return UserConfiguration.class;
   }

   public void setConfiguration(UserConfiguration config) {
     this.userConfiguration = config;
   }
}
- The UserConfiguration object (see line 25) is used by the org.jboss.reddeer.junit.requirement.CustomConfiguration class to provide the values for the requirement.
The UserConfiguration definition (see below) maps the requirement as defined in the elements defined in the requirement XML file.
package org.jboss.reddeer.junit.configuration.advanced;
import javax.xml.bind.annotation.XmlElement;
import javax.xml.bind.annotation.XmlRootElement;

/**
* Stores user requirement configuration loaded from custom xml file
* @author lucia jelinkova
*
*/

 @XmlRootElement(name="user-requirement", namespace="http://www.jboss.org/NS/user-schema")
 public class UserConfiguration {
   private String dbName;
   private String ip;
   private String port;

   public String getIp() {
     return ip;
   }

   @XmlElement(namespace="http://www.jboss.org/NS/user-schema")
   public void setIp(String ip) {
     this.ip = ip;
   }

   public String getPort() {
     return port;
   }

   @XmlElement(namespace="http://www.jboss.org/NS/user-schema")
   public void setPort(String port) {
     this.port = port;
   }

   public String getDbName() {
     return dbName;
   }

   @XmlElement(name="db-name", namespace="http://www.jboss.org/NS/user-schema")
   public void setDbName(String dbName) {
     this.dbName = dbName;
   }
}
Note the getter and setter methods in the class definition. These methods make use of JAXB annotations to access the configuration element values.
The test program looks largely the same as the test programs that we’ve used in the earlier examples. (It’s a nice characteristic of Red Deer tests in that since the “heavy lifting” is performed by the Red Deer harness, the tests can be kept simple, and therefore kept easy to maintain.)
package org.jboss.reddeer.junit.configuration.advanced;
import org.jboss.reddeer.junit.runner.RedDeerSuite;
import org.jboss.reddeer.junit.configuration.advanced.UserRequirement.User;
import org.junit.Test;
import org.junit.runner.RunWith;

/**
* User test using configuration from custom xml file
* Set VM parameter -Dreddeer.config to point to directory with requirements.xml file
* -Dreddeer.config=${project_loc}/src/org/jboss/reddeer/junit/configuration/advanced
* @author lucia jelinkova
*/

 @RunWith(RedDeerSuite.class)
 @User(name="admin")
 public class UserTest {
   @Test

   public void test(){
     // put your test logic here
   }
}
When the program is run, the console shows that the requirement was successfully met:
21:26:25.075 INFO [main][RedDeerSuite] Creating RedDeer suite...

21:26:25.077 INFO [main][SuiteConfiguration] Looking up configuration files defined via property reddeer.config=/jboss/local/reddeer_fork/reddeer/plugins/org.jboss.reddeer.examples/src/org/jboss/reddeer/junit/configuration/advanced/requirements.xml

21:26:25.077 INFO [main][SuiteConfiguration] Found configuration file /jboss/local/reddeer_fork/reddeer/plugins/org.jboss.reddeer.examples/src/org/jboss/reddeer/junit/configuration/advanced/requirements.xml

21:26:25.078 INFO [main][RedDeerSuite] Adding suite with name requirements.xml to RedDeer suite

21:26:25.084 INFO [main][RequirementsRunnerBuilder] Found test class org.jboss.reddeer.junit.configuration.advanced.UserTest

21:26:25.087 INFO [main][RequirementsBuilder] Creating requirements for test class org.jboss.reddeer.junit.configuration.advanced.UserTest

21:26:25.089 DEBUG [main][RequirementsBuilder] Found requirement class org.jboss.reddeer.junit.configuration.advanced.UserRequirement for annotation interface org.jboss.reddeer.junit.configuration.advanced.UserRequirement$User

21:26:25.089 DEBUG [main][CustomConfigurator] Setting custom configuration to requirement class org.jboss.reddeer.junit.configuration.advanced.UserRequirement

21:26:25.090 DEBUG [main][CustomConfigurator] Configuration object associated with requirement class org.jboss.reddeer.junit.configuration.advanced.UserRequirement is class org.jboss.reddeer.junit.configuration.advanced.UserConfiguration

21:26:25.090 DEBUG [main][XMLReader] Reading configuration for class org.jboss.reddeer.junit.configuration.advanced.UserConfiguration

21:26:25.782 DEBUG [main][CustomConfigurator] Configuration successfully set

21:26:25.832 INFO [main][Requirements] Requirement class org.jboss.reddeer.junit.configuration.advanced.UserRequirement can be fulfilled: true

21:26:25.832 INFO [main][RequirementsRunnerBuilder] All requirements can be fulfilled, the test will run

21:26:25.911 INFO [main][RedDeerSuite] RedDeer suite created

21:26:25.921 INFO [main][Requirements] Fulfilling requirement of class org.jboss.reddeer.junit.configuration.advanced.UserRequirement

fulfiling requirement User with

Name: admin

DB name: USERS_ADMINISTRATION

Port: 1111

IP: 127.0.0.1

21:26:25.922 DEBUG [main][RequirementsRunner] Injecting fulfilled requirements into test instance

21:26:25.923 INFO [main][RequirementsRunner] Started test: test requirements.xml(org.jboss.reddeer.junit.configuration.advanced.UserTest)

21:26:25.924 INFO [main][RequirementsRunner] Started test: test requirements.xml(org.jboss.reddeer.junit.configuration.advanced.UserTest)

21:26:25.925 INFO [main][RequirementsRunner] Finished test: test requirements.xml(org.jboss.reddeer.junit.configuration.advanced.UserTest)

21:26:25.925 INFO [main][RequirementsRunner] Finished test: test requirements.xml(org.jboss.reddeer.junit.configuration.advanced.UserTest)
Before we move on, let’s try introducing an error in the XML test configuration and then see how Red Deer can trap that error. I don’t know about you, but avoiding typos is sometimes difficult for me. Let’s “inadvertently” remove the (required) name for the requirement. And rerun the test. This time, the console output shows:
ERROR [main][XMLReader] cvc-complex-type.4: Attribute ‘name’ must appear on element ‘user:user-requirement’.
And the Junit output shows:
org.jboss.reddeer.junit.configuration.RedDeerConfigurationException: Xml configuration is not valid.
Recap
In this post, we examined the (4) ways in which Red Deer supports creating your own custom test configurations. These methods range from simple requirements that optionally include parameters, to more complex requirements that can be defined in external XML files, either as key=value pairs or in a custom schema, that can be be shared between multiple test cases.
It’s often the case that automated test runs can fail not because of bugs in software under test, but because the environment required by the test was properly initialized. Red Deer, by providing multiple approaches to create custom requirements helps you to ensure that your test failures can be more easily debugged and configuration errors are detected.
What’s Next?
In the next post in this series, we’ll take a look at how Red Deer makes creating new tests from scratch easier through its keystroke recorder feature.
References