Вы можете создавать приложения OpenShift и управлять ими в Eclipse с помощью последней версии плагина OpenShift для JBoss Tools. Они либо предустановлены с последней версией JBoss Developer Studio (9.0.0.GA), либо вы можете установить их в существующий Eclipse Mars. В этом посте рассказывается о развертывании практической лаборатории Java EE 7 в OpenShift с помощью JBoss Developer Studio.
Обзор инструментов OpenShift 3
Инструменты OpenShift 3 включены в TechPreview. Это позволит вам подключаться к серверам OpenShift 3 с помощью OAuth или Basic-аутентификации, управлять проектами OpenShit 3, развертывать новые приложения в облаке, используя предопределенные (или ваши собственные) шаблоны, или даже изображения Docker. Вы сможете импортировать существующие приложения в свою рабочую область, отслеживать их с помощью удаленной потоковой передачи журналов непосредственно в локальную консоль или включить переадресацию портов и получать доступ к их данным, как если бы они были локальными.
Начать
Установите универсальную виртуальную машину OpenShift 3 и запустите локальный экземпляр с помощью vagrant. Войдите через утилиту командной строки oc через admin / admin и получите свой токен OAuth:
oc login https://localhost:8334
oc whoami -t
И пока мы находимся в командной строке, давайте создадим новый проект OpenShift для этого примера.
oc new-project javaeehol --display-name="Java EE 7 HOL w/ WildFly MySql"
Установите и запустите вашу JBoss Developer Studio . Если вы хотите начать работу с JBoss Tools в существующем дистрибутиве Eclipse, используйте этот пакет на торговой площадке Eclipse .
Создайте новый проект OpenShift. Выберите OpenShift 3 в качестве типа сервера, измените сервер на https: // localhost: 8443 и введите токен, полученный из CLI, в поле токена. Когда вы нажимаете «Далее», учетные данные проверяются, и при использовании виртуальной машины «все в одном» необходимо принять предупреждение о неподписанном сертификате.
Выберите проект из первого выпадающего списка в следующем диалоге. Диалог также перечисляет все доступные шаблоны на вашем сервере. Полный список можно найти на GitHub . Мы хотим использовать наш собственный шаблон в этом случае. Java EE 7 Hands-On-Lab была преобразована в шаблон Kubernetes Бен Парес. Итак, мы собираемся использовать это. Загрузите его из репозитория Ben’s Github и сохраните его локально.
Откройте его в текстовом редакторе и измените значение «apiVersion» с v1beta3 на «v1». И в строке 47 находится запись хоста, которая говорит: «www.example.com», измените это на «jee-sample.openshiftdev.local». И пока вы находитесь в текстовом редакторе, обязательно добавьте в ваш файл hosts запись, которая отображает петлевой интерфейс на измененное имя домена.
127.0.0.1 jee-sample.openshiftdev.localNow back to JBDS.
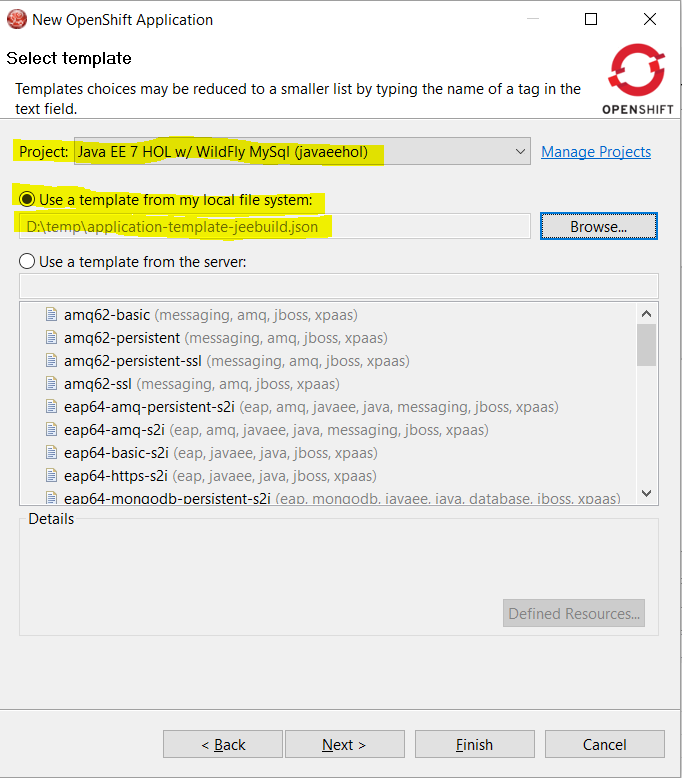
Select «Use a template from my local file system» and browse to the place you saved it.
After clicking next you see another dialogue which allows you to change the template parameter values for the various passwords. Leave everything as it is and click «next» again.
The following dialogue will let you add additional labels. Just click «Finish» now.
The final dialogue gives you an overview about the executed actions and generated passwords. Make sure to write them down in case you need them later.
You can also access the GitHub webhook secrets and URLs. After clicking «ok» a last wizard clones the application from GitHub into a folder of your choice locally. It get’s opened in JBDS and you can browse through the various resources and explore the example a bit. While you’re doing that, OpenShift actually triggered a build of the sample application. When you point your browser to the web console at http://localhost:8443/ and log in with admin/admin and select the JavaEE project, you can see the MySQL service running and a build job:
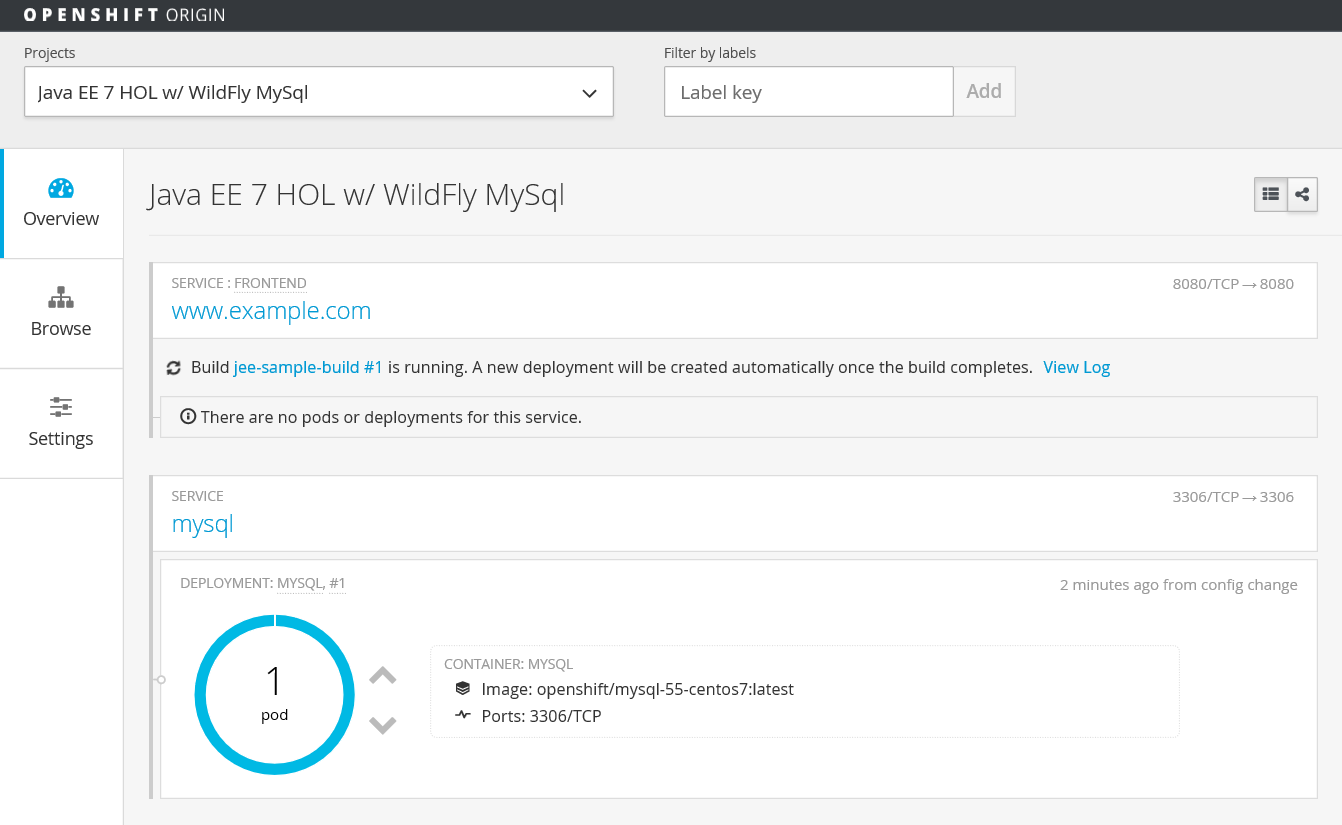
After a couple of minutes, this one finishes and you see the running frontend-service. Let’s briefly look into the build logs:
oc get builds #Shows the one successful build
oc build-logs  jee-sample-build-1  #Shows the log output for the build
Everything looks good. You can see, that the maven dependencies are downloaded and looking at the various image streams with:
oc get isyou can see, that there are two:
NAME         DOCKER REPO                                TAGS      UPDATED
jee-sample   172.30.236.154:5000/javaeehol/jee-sample
wildfly      openshift/wildfly-90-centos7               latest    57 seconds ago
OpenShift actually build a new docker image with the JavaEE-hol in it and deploys the result as a new pod. Time to see everything in action. Point your browser to http://jee-sample.openshiftdev.local:1080/movieplex7-1.0-SNAPSHOT/ and see the Movieplex application in action.

Are you wondering about the weird port? 1080 is actually a specialty of the OpenShift all-in-one-VM. Because, we assume that you already have a service running on port 80 and because of that, the NAT mapping in VirtualBox assigns port 1080 to port 80 on the OpenShift master. Unfortunately, this makes some things in the OpenShift Eclipse tooling a little unhandy. But, it’s a local installation and has this one drawback. Let’s explore the tooling features a little bit more
OpenShift Explorer View — The embedded Web Console.
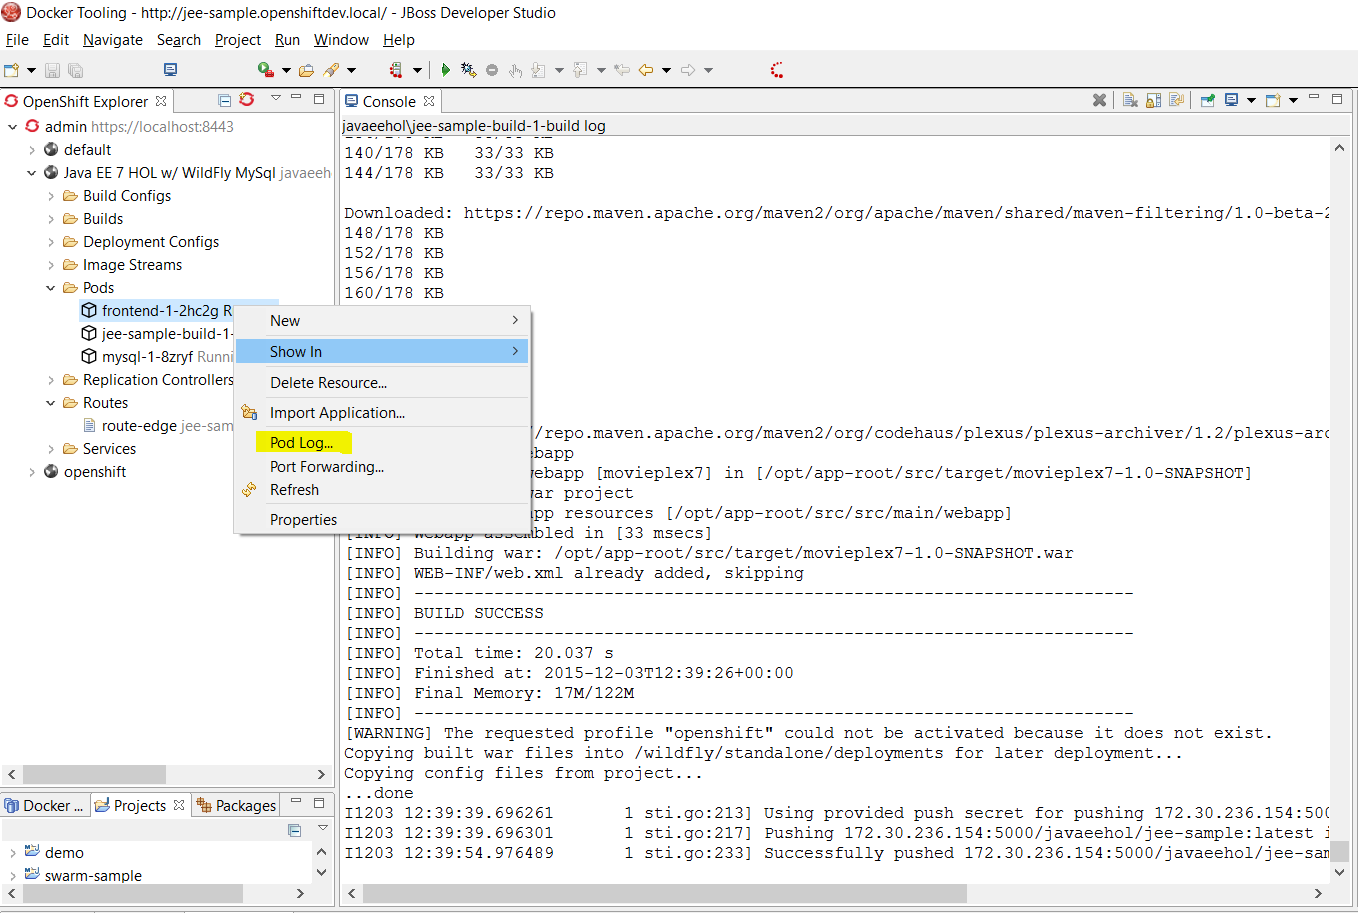
The OpenShift Explorer View lets you connect to OpenShift 3 instances, create new applications, manage domains or projects, execute action such as Port-Forwarding and Tail Files (Log Streaming). Specific actions are available, depending on the version of the OpenShift instance you’re connected to. For OpenShift 2 connections, you can configure cartridges, for OpenShift 3, you can access Pods, Routes, Services and deploy Docker images. Just expand the tree and right click on the resource you’re interested in. For example, like in the following screenshot to access the frontend logs.
You can find even more details about the Docker Tooling and other features in the detailed feature description.