В этой статье я объяснил способ обработки одноразового пароля (OTP) в веб-приложении Spring Boot с помощью библиотеки Google Guava.
Одноразовый пароль (OTP) — это пароль для проверки пользователя во время безопасной транзакции. В основном, эта концепция используется в банковских системах и других защищенных веб-сайтах.
Наиболее важным преимуществом, с которым обращаются OTP, является то, что, в отличие от статических паролей, они не уязвимы для атак воспроизведения. Это означает, что потенциальный злоумышленник, которому удастся записать OTP, который уже использовался для входа в службу или проведения транзакции, не сможет злоупотребить ею, поскольку он больше не будет действительным. Второе важное преимущество заключается в том, что пользователь, который использует один и тот же (или аналогичный) пароль для нескольких систем, не становится уязвимым на всех из них, если злоумышленник получает пароль для одной из них.
Пароли OTP генерируются с использованием математического алгоритма; В этом примере я использовал понятия случайных чисел.
Способ доставки OTP в веб-приложение.
1. Мобильное устройство (SMS)
2. Электронная почта
Я показал шаги для настройки OTP по электронной почте. Я использовал библиотеку Google Guava для кэширования номера OTP для проверки и установки таймера на срок действия кэшированного OTP.
Примечание . Этот пример относится к приложению для настройки не кластерного сервера.
Библиотека Google Guava кэширует номер OTP в памяти сервера и проверяет OTP на том же сервере. Если мы хотим настроить его в кластерной среде или на балансировщике нагрузки, мы можем использовать Memcached .
Быстрые шаги по настройке OTP-концепций в Spring Boot
Используемые инструменты:
- Spring Boot 1.5.3.RELEASE
- Весна 4.3.8. РЕЛИЗ
- Spring Security 4.2.2
- Тимлеф 2.1.5. ВЫПУСК
- Дополнения Thymeleaf Spring Security4 2.1.3
- гуайява
- MySQL
- JQuery
- Bootstrap 3
- Maven 3
- Java 8
Исходный код проекта: SpringBoot-OTP
Исходный код был проверен с использованием SonorQube (анализатор качества кода). Пожалуйста, обратитесь к моей статье DZone SonorQube.
Пример экрана:
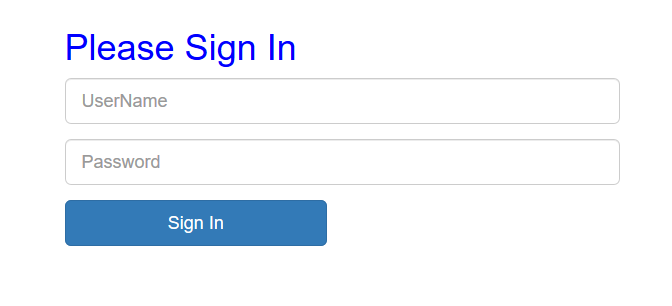
Экран 1: Экран входа в систему
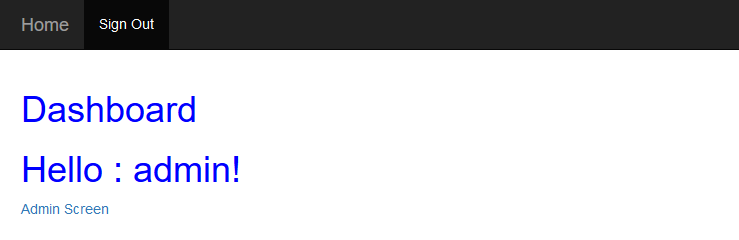
Экран 2:
Я передал учетные данные администратора на экране входа в систему и был перенаправлен на панель администратора.
Экран 3:
Экран OTP

OTP Mail

Проверить OTP
1. Успешная OTP (после каждой успешной проверки в течение срока сервер очищает кеш).

2. Неудачный OTP 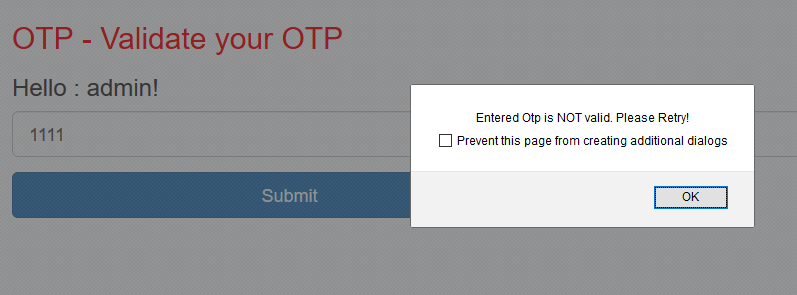
Структура проекта

Шаг 1: Pom.xml
<?xml version="1.0" encoding="UTF-8"?>
<project xmlns="http://maven.apache.org/POM/4.0.0" xmlns:xsi="http://www.w3.org/2001/XMLSchema-instance"
         xsi:schemaLocation="http://maven.apache.org/POM/4.0.0 http://maven.apache.org/xsd/maven-4.0.0.xsd">
    <modelVersion>4.0.0</modelVersion>

    <groupId>com.shri</groupId>
    <artifactId>SpringBoot-OTP</artifactId>
    <version>0.0.1-SNAPSHOT</version>
    <packaging>jar</packaging>

    <name>SpringBoot-OTP</name>
    <description>Demo project for Spring Boot</description>

    <parent>
        <groupId>org.springframework.boot</groupId>
        <artifactId>spring-boot-starter-parent</artifactId>
        <version>1.5.8.RELEASE</version>
        <relativePath/> <!-- lookup parent from repository -->
    </parent>

    <properties>
        <project.build.sourceEncoding>UTF-8</project.build.sourceEncoding>
        <project.reporting.outputEncoding>UTF-8</project.reporting.outputEncoding>
        <java.version>1.8</java.version>
        <mysql.version>5.1.17</mysql.version>
    </properties>

    <dependencies>

        <dependency>
            <groupId>org.springframework.boot</groupId>
            <artifactId>spring-boot-devtools</artifactId>
            <optional>true</optional>
        </dependency>

        <dependency>
            <groupId>org.springframework.boot</groupId>
            <artifactId>spring-boot-starter</artifactId>
        </dependency>

        <dependency>
            <groupId>org.springframework.boot</groupId>
            <artifactId>spring-boot-starter-test</artifactId>
            <scope>test</scope>
        </dependency>

        <dependency>
            <groupId>org.springframework.boot</groupId>
            <artifactId>spring-boot-starter-web</artifactId>
        </dependency>

        <dependency>
            <groupId>org.springframework.boot</groupId>
            <artifactId>spring-boot-starter-data-jpa</artifactId>
        </dependency>

         <!-- Spring Security -->
        <dependency>
            <groupId>org.springframework.boot</groupId>
            <artifactId>spring-boot-starter-security</artifactId>
        </dependency>

        <dependency>
             <groupId>mysql</groupId>
    <artifactId>mysql-connector-java</artifactId>
     <version>${mysql.version}</version>
        </dependency>

        <dependency>
            <groupId>org.springframework.boot</groupId>
            <artifactId>spring-boot-starter-thymeleaf</artifactId>
        </dependency>

       <dependency>
    <groupId>org.springframework.boot</groupId>
    <artifactId>spring-boot-starter-mail</artifactId>
</dependency>

        <dependency>
       <groupId>org.thymeleaf.extras</groupId>
        <artifactId>thymeleaf-extras-springsecurity4</artifactId>
   </dependency>

        <!-- Optional, for bootstrap -->
<dependency>
<groupId>org.webjars</groupId>
<artifactId>bootstrap</artifactId>
<version>3.3.7</version>
</dependency>

          <!-- Optional, for jquery -->
         <dependency>
            <groupId>org.webjars</groupId>
            <artifactId>jquery</artifactId>
            <version>2.2.4</version>
        </dependency>
       <!-- Google Guava -->
        <dependency>
    <groupId>com.google.guava</groupId>
    <artifactId>guava</artifactId>
    <version>19.0</version>
</dependency>
    </dependencies>

    <build>
        <plugins>
            <plugin>
                <groupId>org.springframework.boot</groupId>
                <artifactId>spring-boot-maven-plugin</artifactId>
            </plugin>
        </plugins>
    </build>
</project>
Шаг 2: файл Application.properties
server.port=8081
spring.thymeleaf.cache=false
spring.thymeleaf.enabled=true
spring.thymeleaf.prefix=classpath:/templates/
spring.thymeleaf.suffix=.html

spring.application.name=Spring Boot OTP

#spring.datasource.driver-class-name=com.mysql.jdbc.Driver
spring.datasource.url=jdbc:mysql://localhost:3306/test
spring.datasource.username=root
spring.datasource.password=

spring.jpa.properties.hibernate.dialect = org.hibernate.dialect.MySQLDialect
spring.jpa.properties.hibernate.id.new_generator_mappings = false
spring.jpa.properties.hibernate.format_sql = true
#spring.jpa.hibernate.ddl-auto=create

logging.level.org.hibernate.SQL=DEBUG
logging.level.org.hibernate.type.descriptor.sql.BasicBinder=TRACE
logging.level.org.springframework.web=INFO
logging.file=logs/spring-otp.log
log4j.logger.org.thymeleaf=DEBUG

#Http Authentication
#security.user.name=test
#security.user.password=test

spring.mail.host=smtp.gmail.com
spring.mail.port=587
spring.mail.username=
spring.mail.password=
spring.mail.properties.mail.smtp.auth=true
spring.mail.properties.mail.smtp.starttls.enable=true
Шаг 3: Основное приложение Spring Boot
Spring Boot по умолчанию защищает все ваши страницы с помощью обычной аутентификации.
Чтобы включить Spring-boot Basic Authentication, раскомментируйте security.user.nameи security.user.passwordв файле свойств приложения
Отключить базовую аутентификацию Spring-Boot.
Используйте @EnableAutoConfiguration(exclude = {SecurityAutoConfiguration.class})и комментируйте security.user.nameи security.password.nameв файле свойств приложения.
package com.shri.config;

import org.springframework.boot.SpringApplication;
import org.springframework.boot.autoconfigure.EnableAutoConfiguration;
import org.springframework.boot.autoconfigure.SpringBootApplication;
import org.springframework.boot.autoconfigure.domain.EntityScan;
import org.springframework.boot.autoconfigure.security.SecurityAutoConfiguration;
import org.springframework.data.jpa.repository.config.EnableJpaRepositories;

@EnableJpaRepositories("com.shri.repo")
@EntityScan("com.shri.model")
@EnableAutoConfiguration(exclude = {SecurityAutoConfiguration.class})//bypass this spring boot security mechanism.
@SpringBootApplication(scanBasePackages = {"com.shri"})
public class Application {

    public static void main(String[] args) {
        SpringApplication.run(Application.class, args);
    }
}
Шаг 4: SpringSecurityConfig.java
Я использовал базу данных для проверки учетных данных пользователя (MySQL DB).
package com.shri.config;

import org.springframework.beans.factory.annotation.Autowired;
import org.springframework.context.annotation.Configuration;
import org.springframework.security.config.annotation.authentication.builders.AuthenticationManagerBuilder;
import org.springframework.security.config.annotation.web.builders.HttpSecurity;
import org.springframework.security.config.annotation.web.configuration.EnableWebSecurity;
import org.springframework.security.config.annotation.web.configuration.WebSecurityConfigurerAdapter;
import org.springframework.security.crypto.bcrypt.BCryptPasswordEncoder;
import org.springframework.security.web.access.AccessDeniedHandler;
import com.shri.service.MyUserDetailsService;
/**
 * @author shrisowdhaman
 * Dec 12, 2017
 */
@Configuration
@EnableWebSecurity
public class SpringSecurityConfig extends WebSecurityConfigurerAdapter {

@Autowired
private AccessDeniedHandler accessDeniedHandler;

@Autowired
private MyUserDetailsService myUserDetailsService;

@Override
protected void configure(HttpSecurity http) throws Exception {

http.csrf().disable().authorizeRequests()
.antMatchers("/","/aboutus").permitAll()  //dashboard , Aboutus page will be permit to all user
.antMatchers("/admin/**").hasAnyRole("ADMIN") //Only admin user can login
.antMatchers("/user/**").hasAnyRole("USER") //Only normal user can login
.anyRequest().authenticated() //Rest of all request need authentication
        .and()
        .formLogin()
.loginPage("/login")  //Loginform all can access ..
.defaultSuccessUrl("/dashboard")
.failureUrl("/login?error")
.permitAll()
.and()
        .logout()
.permitAll()
.and()
        .exceptionHandling().accessDeniedHandler(accessDeniedHandler);
}

@Autowired
public void configureGlobal(AuthenticationManagerBuilder auth) throws Exception {

BCryptPasswordEncoder passwordEncoder = new BCryptPasswordEncoder();
auth.userDetailsService(myUserDetailsService).passwordEncoder(passwordEncoder);;
    }
}
Шаг 5: HomeController.java используется для рутинга
package com.shri.controller;

import javax.servlet.http.HttpServletRequest;
import javax.servlet.http.HttpServletResponse;

import org.slf4j.Logger;
import org.slf4j.LoggerFactory;
import org.springframework.beans.factory.annotation.Autowired;
import org.springframework.beans.factory.annotation.Value;
import org.springframework.security.core.Authentication;
import org.springframework.security.core.context.SecurityContextHolder;
import org.springframework.security.web.authentication.logout.SecurityContextLogoutHandler;
import org.springframework.stereotype.Controller;
import org.springframework.ui.Model;
import org.springframework.web.bind.annotation.GetMapping;
import org.springframework.web.bind.annotation.RequestMapping;
import org.springframework.web.bind.annotation.RequestMethod;
import org.springframework.web.bind.annotation.ResponseBody;

import com.shri.repo.BookRepository;
import com.shri.service.OtpService;


@Controller
public class HomeController {

private final Logger logger = LoggerFactory.getLogger(this.getClass());

    @Value("${spring.application.name}")
    String appName;

    @Autowired
    BookRepository repo;

    @Autowired
public OtpService otpService;

    @GetMapping("/")
    public String homePage(Model model) {

    String message = " Welcome to my Page";

        model.addAttribute("appName", appName);
        model.addAttribute("message", message);

    Authentication auth = SecurityContextHolder.getContext().getAuthentication();
        logger.info("username: " + auth.getName());

        return "signin";
    }

    @GetMapping("/dashboard")
    public String dashboard(){
    Authentication auth = SecurityContextHolder.getContext().getAuthentication();
        logger.info("username: " + auth.getName());

    return "dashboard";
    }

    @GetMapping("/login")
    public String login() {
        return "signin";
    }

    @GetMapping("/admin")
    public String admin() {
        return "admin";
    }

    @GetMapping("/user")
    public String user() {
        return "user";
    }

    @GetMapping("/aboutus")
    public String about() {
        return "aboutus";
    }

    @GetMapping("/403")
    public String error403() {
        return "error/403";
    }

    @RequestMapping(value="/logout", method = RequestMethod.GET)
    public @ResponseBody String logout(HttpServletRequest request, HttpServletResponse response){

       Authentication auth = SecurityContextHolder.getContext().getAuthentication();
       if (auth != null){
       String username = auth.getName();

       //Remove the recently used OTP from server.
       otpService.clearOTP(username);

       new SecurityContextLogoutHandler().logout(request, response, auth);
       }

   return "redirect:/login?logout";
    }

}
Шаг 6: OtpController.java
Контроллер OTP используется для проверки OTP и запуска почты для пользователя с OTP. Мы можем легко реализовать SMS OTP с помощью шлюза SMS API.
package com.shri.controller;

import java.util.HashMap;
import java.util.Map;
import org.slf4j.Logger;
import org.slf4j.LoggerFactory;
import org.springframework.beans.factory.annotation.Autowired;
import org.springframework.security.core.Authentication;
import org.springframework.security.core.context.SecurityContextHolder;
import org.springframework.stereotype.Controller;
import org.springframework.web.bind.annotation.GetMapping;
import org.springframework.web.bind.annotation.RequestMapping;
import org.springframework.web.bind.annotation.RequestMethod;
import org.springframework.web.bind.annotation.RequestParam;
import org.springframework.web.bind.annotation.ResponseBody;

import com.shri.service.MyEmailService;
import com.shri.service.OtpService;
import com.shri.utility.EmailTemplate;

/**
 * @author shrisowdhaman
 * Dec 15, 2017
 */
@Controller
public class OtpController {

private final Logger logger = LoggerFactory.getLogger(this.getClass());

@Autowired
public OtpService otpService;

@Autowired
public MyEmailService myEmailService;

@GetMapping("/generateOtp")
public String generateOtp(){

Authentication auth = SecurityContextHolder.getContext().getAuthentication();
String username = auth.getName();

int otp = otpService.generateOTP(username);

logger.info("OTP : "+otp);

//Generate The Template to send OTP
EmailTemplate template = new EmailTemplate("SendOtp.html");

Map<String,String> replacements = new HashMap<String,String>();
replacements.put("user", username);
replacements.put("otpnum", String.valueOf(otp));

String message = template.getTemplate(replacements);

myEmailService.sendOtpMessage("shrisowdhaman@gmail.com", "OTP -SpringBoot", message);

return "otppage";
}

@RequestMapping(value ="/validateOtp", method = RequestMethod.GET)
public @ResponseBody String validateOtp(@RequestParam("otpnum") int otpnum){

final String SUCCESS = "Entered Otp is valid";

final String FAIL = "Entered Otp is NOT valid. Please Retry!";

Authentication auth = SecurityContextHolder.getContext().getAuthentication();
String username = auth.getName();

logger.info(" Otp Number : "+otpnum);

//Validate the Otp
if(otpnum >= 0){
int serverOtp = otpService.getOtp(username);

if(serverOtp > 0){
if(otpnum == serverOtp){
otpService.clearOTP(username);
return ("Entered Otp is valid");
}else{
return SUCCESS;
}
}else {
return FAIL;
}
}else {
return FAIL;
}
}
}
Шаг 7: OTP Service.java
Я установил срок годности на 5 минут.
package com.shri.service;

import java.util.Random;
import java.util.concurrent.TimeUnit;

import org.springframework.stereotype.Service;

import com.google.common.cache.LoadingCache;
import com.google.common.cache.CacheBuilder;
import com.google.common.cache.CacheLoader;

/**
 * @author shrisowdhaman
 * Dec 15, 2017
 */
@Service
public class OtpService {

//cache based on username and OPT MAX 8
 private static final Integer EXPIRE_MINS = 5;

 private LoadingCache<String, Integer> otpCache;

 public OtpService(){
 super();
 otpCache = CacheBuilder.newBuilder().
     expireAfterWrite(EXPIRE_MINS, TimeUnit.MINUTES).build(new CacheLoader<String, Integer>() {
      public Integer load(String key) {
             return 0;
       }
   });
 }

//This method is used to push the opt number against Key. Rewrite the OTP if it exists
 //Using user id  as key
 public int generateOTP(String key){

Random random = new Random();
int otp = 100000 + random.nextInt(900000);
otpCache.put(key, otp);
return otp;
 }

 //This method is used to return the OPT number against Key->Key values is username
 public int getOtp(String key){
try{
 return otpCache.get(key);
}catch (Exception e){
 return 0;
}
 }

//This method is used to clear the OTP catched already
public void clearOTP(String key){
 otpCache.invalidate(key);
 }
}
Шаг 6: MyEmailService.java
package com.shri.service;

import org.slf4j.Logger;
import org.slf4j.LoggerFactory;
import org.springframework.beans.factory.annotation.Autowired;
import org.springframework.mail.SimpleMailMessage;
import org.springframework.mail.javamail.JavaMailSender;
import org.springframework.stereotype.Service;

/**
 * @author shrisowdhaman
 * Dec 18, 2017
 */
@Service
public class MyEmailService  {

private final Logger logger = LoggerFactory.getLogger(this.getClass());

@Autowired
private JavaMailSender javaMailSender;

public void sendOtpMessage(String to, String subject, String message) {

 SimpleMailMessage simpleMailMessage = new SimpleMailMessage();
 simpleMailMessage.setTo(to);
 simpleMailMessage.setSubject(subject);
 simpleMailMessage.setText(message);

 logger.info(subject);
 logger.info(to);
 logger.info(message);

 //Uncomment to send mail
 //javaMailSender.send(simpleMailMessage);
}
}
Шаг 7: EmailTemplate.java (используется для замены имени пользователя и OTP в файле HTML.)
package com.shri.utility;

import java.io.File;
import java.io.IOException;
import java.nio.file.Files;
import java.util.Map;

/**
 * @author shrisowdhaman
 * Dec 18, 2017
 */
public class EmailTemplate {

private String templateId;

private String template;

private Map<String, String> replacementParams;

public EmailTemplate(String templateId) {
this.templateId = templateId;
try {
this.template = loadTemplate(templateId);
} catch (Exception e) {
this.template = "Empty";
}
}

private String loadTemplate(String templateId) throws Exception {
ClassLoader classLoader = getClass().getClassLoader();
File file = new File(classLoader.getResource(templateId).getFile());
String content = "Empty";
try {
content = new String(Files.readAllBytes(file.toPath()));
} catch (IOException e) {
throw new Exception("Could not read template with ID = " + templateId);
}
return content;
}

public String getTemplate(Map<String, String> replacements) {
String cTemplate = this.template;

//Replace the String
for (Map.Entry<String, String> entry : replacements.entrySet()) {
cTemplate = cTemplate.replace("{{" + entry.getKey() + "}}", entry.getValue());
}
return cTemplate;
}
}
Шаг 8: MyUserDetailsService.java
Чтобы добиться проверки имени пользователя на уровне базы данных, нам нужно перезаписать UserDetailsServiceкласс.
package com.shri.service;

import java.util.Arrays;

import org.springframework.beans.factory.annotation.Autowired;
import org.springframework.security.core.GrantedAuthority;
import org.springframework.security.core.authority.SimpleGrantedAuthority;
import org.springframework.security.core.userdetails.UserDetails;
import org.springframework.security.core.userdetails.UserDetailsService;
import org.springframework.security.core.userdetails.UsernameNotFoundException;
import org.springframework.stereotype.Service;

import com.shri.model.User;
import com.shri.repo.UserRepository;

/**
 * @author shrisowdhaman
 * Dec 14, 2017
 */
@Service
public class MyUserDetailsService implements UserDetailsService {

@Autowired
    private UserRepository userRepository;

@Override
public UserDetails loadUserByUsername(String username) throws UsernameNotFoundException {

User user = userRepository.findByUsername(username);

GrantedAuthority authority = new SimpleGrantedAuthority(user.getRole());
UserDetails userDetails = (UserDetails) new org.springframework.security.core.userdetails.User(user.getUsername(),
user.getPassword(), Arrays.asList(authority));

return userDetails;
}

}
Шаг 9:
dashboard.html
<html xmlns="http://www.w3.org/1999/xhtml"
xmlns:th="http://www.thymeleaf.org"
xmlns:sec="http://www.thymeleaf.org/thymeleaf-extras-springsecurity4">
<head>
<div th:replace="header :: header-css" />
</head>
<body>

<div th:replace="header :: header" />

<div class="container">

<div class="starter-template">
<h1>Dashboard</h1>

<h1 th:inline="text">Hello :
[[${#httpServletRequest.remoteUser}]]!</h1>

</div>

<div sec:authorize="hasRole('ROLE_ADMIN')">
<a th:href="@{/admin}">Admin Screen</a>
</div>
<div sec:authorize="hasRole('ROLE_USER')">
<a th:href="@{/user}">User Screen</a>
</div>
</div>

<script type="text/javascript"
src="webjars/bootstrap/3.3.7/js/bootstrap.min.js"></script>
</body>
</html>
Шаг 10:
OtpPage.html
Функциональность Ajax реализована для проверки OTP.
<html xmlns="http://www.w3.org/1999/xhtml"
xmlns:th="http://www.thymeleaf.org"
xmlns:sec="http://www.thymeleaf.org/thymeleaf-extras-springsecurity4">

<head>
<div th:replace="header :: header-css" />

</head>
<body>
<div th:replace="header :: header" />
<div class="container">

<div class="starter-template">
<h2>OTP - Validate your OTP</h2>

<h3 th:inline="text">Hello :
[[${#httpServletRequest.remoteUser}]]!</h3>

 <form id="validateOtp" name="validateOtp" method="post">
                <fieldset>

                    <div th:if="${param.error}">
                        <div class="alert alert-danger">
                            Invalid Otp Try Again
                        </div>
                    </div>

                    <div class="form-group">
                        <input type="text" name="otpnum" id="otpnum" class="form-control input-lg"
                               required="true" autofocus="true"/>
                    </div>

                    <div class="row">
                        <div class="col-xs-6 col-sm-6 col-md-6">
                            <input type="submit" class="btn btn-lg btn-primary btn-block" value="Submit"/>
                        </div>
                        <div class="col-xs-6 col-sm-6 col-md-6">
                        </div>
                    </div>
                </fieldset>
            </form>
</div>
</div>

<script type="text/javascript"
src="webjars/bootstrap/3.3.7/js/bootstrap.min.js"></script>
<script type="text/javascript"
        src="webjars/jquery/2.2.4/jquery.min.js"></script>


<script type="text/javascript">
$(document).ready(function () {

    $("#validateOtp").submit(function (event) {

        //stop submit the form, we will post it manually.
        event.preventDefault();

        var data  = 'otpnum='+$("#otpnum").val();

        alert(data);

        $.ajax({
            type: "GET",
            url:  "/validateOtp",
            data: data,
            dataType: 'text',
            cache: false,
            timeout: 600000,
            success : function(response) {
                    alert( response );
                },
                error : function(xhr, status, error) {
                    alert(xhr.responseText);
                }
        });
    });
});
</script>
</body>
</html>
Шаг 11:
Шаблон электронной почты
<!DOCTYPE html>
<html>
<head>

</head>
<body>
<h1> Hi {{user}}</h1>
<br/>
<h2> Your Otp Number is {{otpnum}}</h2>
<br/>
Thanks,
</body>
</html>