Изучать новый язык непросто, но с конкретными примерами и пошаговыми инструкциями это мощный способ добиться успеха. По этой причине я решил написать серию пошаговых руководств.
Давайте использовать возможности Go для создания сервера HTTP REST API в Go.
Вам также могут понравиться:
Преимущества API REST с HTTP / 2
Иди, иди, иди
Как и в предыдущей статье, первое, что нужно сделать, это установить GVM (менеджер версий Go) и, конечно же, Go.
Чтобы установить Go, вы можете выполнить процедуру установки на официальном сайте или установить Go через GVM. GVM — это очень практичная версия для Go, которая позволяет обновить вашу версию Go, указав, какую версию вы хотите.
Монтаж:
Для Баш:
bash < <(curl -s-S-L https://raw.githubusercontent.com/moovweb/gvm/master/binscripts/gvm-installer)Для зш:
zsh < <(curl -s-S-L https://raw.githubusercontent.com/moovweb/gvm/master/binscripts/gvm-installer)Использование :
$ gvm

Usage: gvm [command]

Description:

GVM is the Go Version Manager

Commands:

version — print the gvm version number

get — gets the latest code (for debugging)

use — select a go version to use (--default to set permanently)

diff — view changes to Go root

help — display this usage text

implode — completely remove gvm

install — install go versions

uninstall — uninstall go versions

cross — install go cross compilers

linkthis — link this directory into GOPATH

list — list installed go versions

listall — list available versions

alias — manage go version aliases

pkgset — manage go packages sets

pkgenv — edit the environment for a package set
Команда GVM, которая нас особенно заинтересует, — это команда gvm install , которая используется следующим образом:
$ gvm install [version] [options]Перейти к установке:
$ gvm install go1.13.3 -B
$ gvm use go1.13.3 --default
В файле .zshrc или .bashrc установите переменные окружения $ GOROOT и $ GOPATH. Вот пример:
[[ -s"$HOME/.gvm/scripts/gvm" ]] && source"$HOME/.gvm/scripts/gvm"
exportGOPATH=$HOME/go
exportGOBIN=$GOPATH/bin
exportPATH=${PATH}:$GOBIN
That’s it, Go is installed along with its version manager. Now it’s time to get to the heart of the matter and create our first CLI.
Init Your App
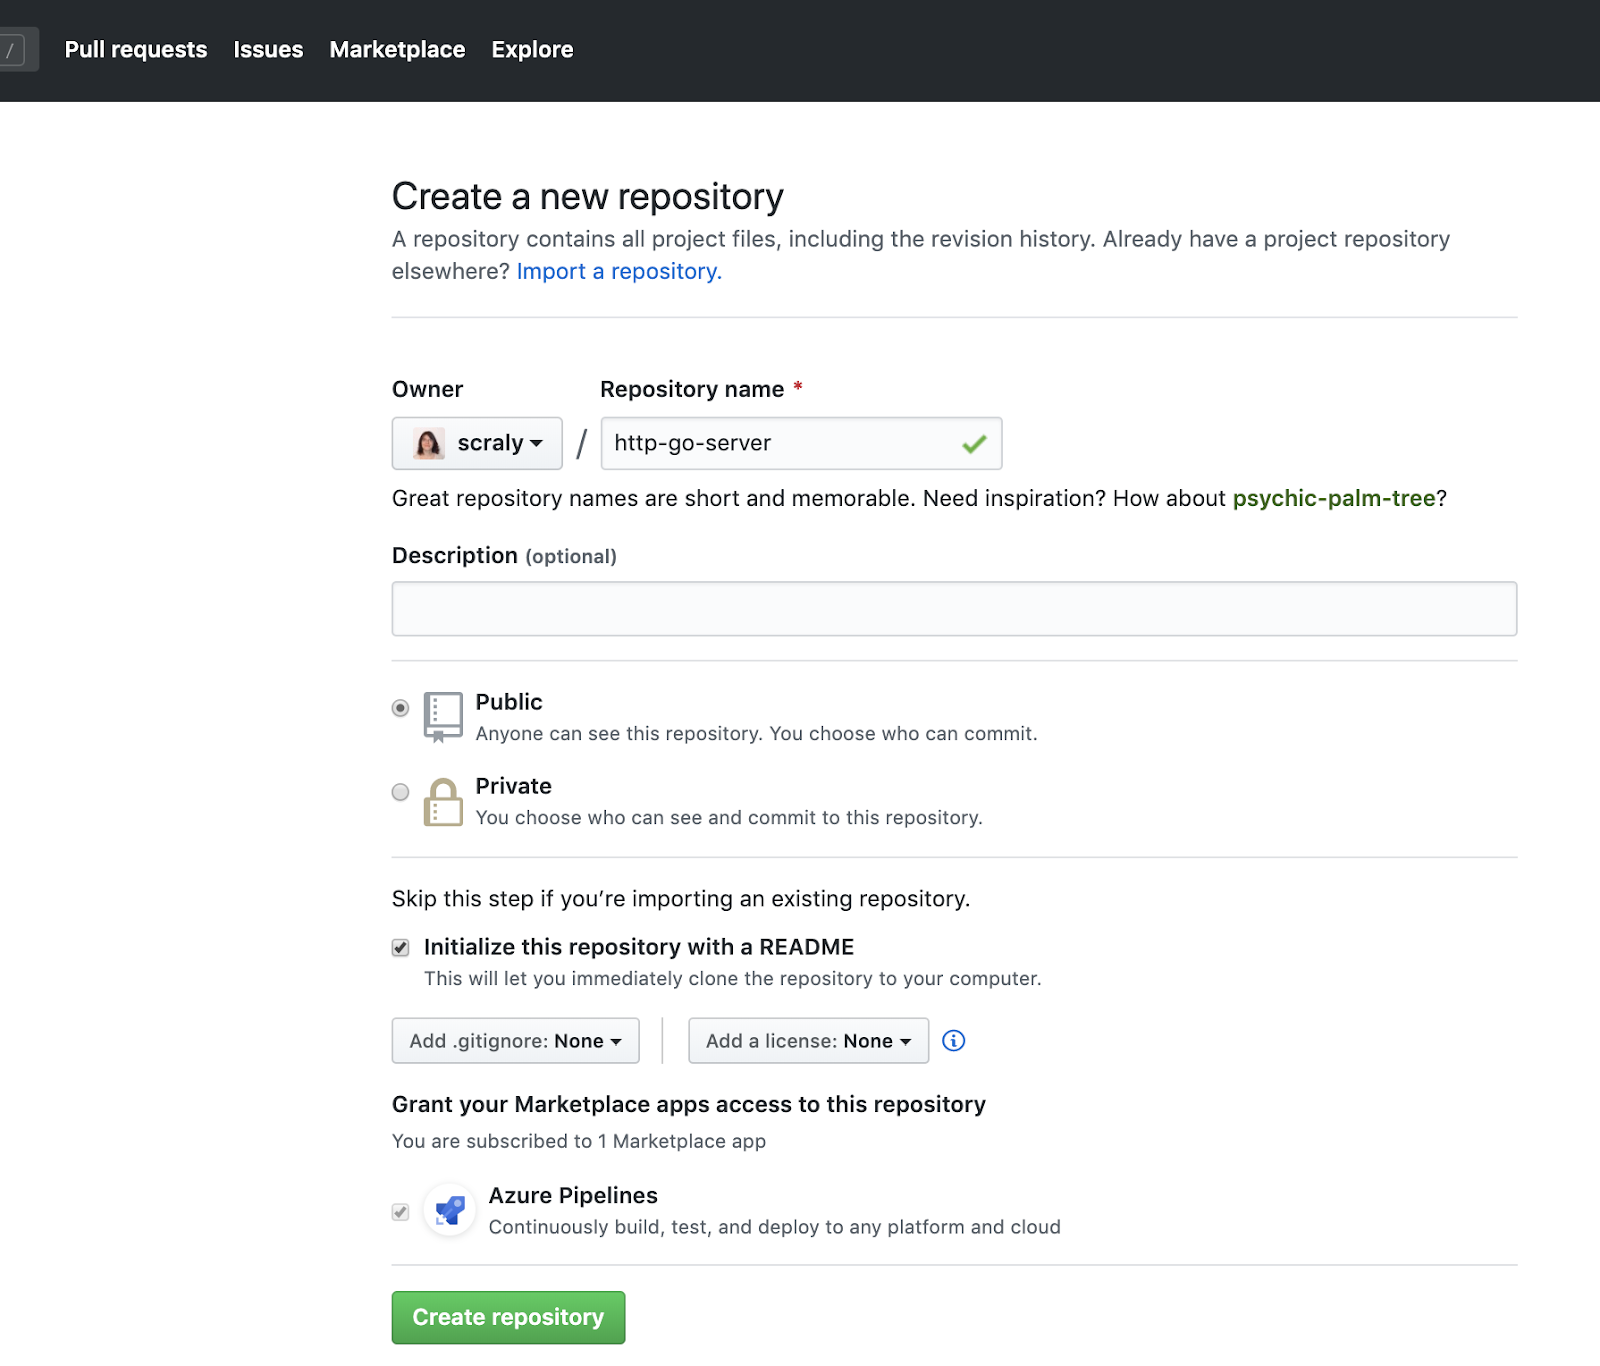
Now it’s time to create our repository in GitHub (in order to share and open-source it).
For that, I logged in Github website, clicked on the repositories link, and created a new repository called “http-go-server”:
Now, in your local machines, git clone this new repo where you want.
«Where I want? Are you sure?»
We will use Go modules for dependencies so don’t forget to tell us to git clone outside of our GOPATH. In fact, good news, since Go version 1.13, we no longer have to worry about it. Go modules now works outside and inside the GOPATH!
It’s the reason I have chosen to use Go version 1.13 in this article.
So, we have to git clone the repo in order to retrieve it in our machine and to sync it to the git repository:
$ git clone https://github.com/scraly/http-go-server.git

$ cd http-go-server
Now, we have to initialize go modules (dependencies management):
$ go mod init github.com/scraly/http-go-server

go: creating new go.mod: module github.com.scraly/http-go-server
We will create a simple HTTP server but with good practices in code organization. So we will not put all our code in a main.go file and that’s it, but we will create a code organization and organize our code.
Create the following folders organization:
.
├── README.md
├── bin
├── doc
├── go.mod
├── internal
├── pkg
│   └── swagger
└── scripts
Let’s Create an HTTP Server
Now it’s time to code our HTTP server.
Go is a powerful language. One of its powers is to come to a lot of built-in packages like net/HTTP that will interest us.
We will start to create a main.go file in the internal/ folder like this:
package main

import (
    "fmt"
    "html"
    "log"
    "net/http"
)

func main() {

    http.HandleFunc("/", func(w http.ResponseWriter, r *http.Request) {
        fmt.Fprintf(w, "Hello, %q", html.EscapeString(r.URL.Path))
    })

    log.Println(“Listening on localhost:8080")

    log.Fatal(http.ListenAndServe(":8080", nil))

}
This simple example starts an HTTP server, listens on port 8080 incoming requests, and serves on /.
Now, it’s time to build our app in order to test it and then launch the app binary:
$ go run internal/main.go

2019/10/27 20:53:39 Listening on localhost:8080 ...
In order to test your HTTP server, you can curl on localhost:8080 or go to this endpoint in your browser:
$ curl localhost:8080

Hello, "/"%
Great, we created a tiny HTTP server and it’s working.
And now we can build it in a binary executable fine:
$ go build -o bin/http-go-server internal/main.goPerfect, we’ve done it in minutes…yes but we will go further and further in this article :-).
Let’s Use a Makefile
I don’t want to execute each of the commands manually, so, for the continuous improvement of our apps, a good practice is to create a Makefile file and then we could build our app, generate files, generate swagger docs, check licenses, and execute unit tests and static tests directly through making commands.
We can define a set of tasks in a Makefile (a make file) that will be executed by make tool.
So, for this project, I created a Makefile that you can directly download, and it will be time-saving.
Makefile: https://raw.githubusercontent.com/scraly/http-go-server/master/Makefile
For the curious, in a Makefile, we create several targets that will execute one or several commands.
To summarize, a target needs, or not, prerequisites and will execute a recipe:
target: prerequisites
<TAB> recipe
In my Makefile I created, for example, a build target that builds and packages our app in a bin/http-go-server binary file:
## Build all binaries

build:

 $(GO) build -o bin/http-go-server internal/main.go
HTTP Endpoints Definition Time
We will now step up our HTTP server and use Swagger, which handles definitions of our HTTP endpoints.
What Is Swagger?
Swagger allows you to provide standardized documentation of your APIs compliant to OpenAPI specifications.
With a swagger specification file in input, thanks to the Swagger application, you can generate the code and at the end, and you can provide users the API documentation in HTML.
If you want to build a public API, don’t hesitate to use Swagger.
Swagger installation:
Please refer to go-swagger installation page.
And then, you can check the version of Swagger app in order to check the tool is correctly installed in your system.
$ swagger versionThe first things to do now is to create our swagger specification file in our code:
pkg/swagger/swagger.yml:
consumes:

- application/json

info:

description: HTTP server in Go with Swagger endpoints definition

title: http-go-server

version: 0.1.0

produces:

- application/json

schemes:

- http

swagger: "2.0"


paths:

/healthz:

get:

operationId: checkHealth

produces:

- text/plain

responses:

'200':

description: OK message

schema:

type: string

enum:

- OK


/hello/{user}:

get:

description: Returns a greeting to the user!

parameters:

- name: user

in: path

type: string

required: true

description: The name of the user to greet.

responses:

200:

description: Returns the greeting.

schema:

type: string

400:

description: Invalid characters in "user" were provided.
After each modification of a swagger file, a good practice is to check the validity of the file.
In order to do that, we can use the command swagger validate:
$ swagger validate pkg/swagger/swagger.yml

2019/10/27 21:14:47

The swagger spec at "pkg/swagger/swagger.yml" is valid against swagger specification 2.0
Or we can use a Makefile target:
$ make swagger.validate

2019/10/27 21:15:12

The swagger spec at "pkg/swagger/swagger.yml" is valid against swagger specification 2.0
Cool, our swagger file is valid.
We will now create our swagger definitions in an HTML doc. For that, I use a docker image, which takes into consideration our swagger YAML definition and returns a pretty HTML page:
$ make swagger.docIf you open the generated doc/index.html page in a browser, you can view HTML endpoints definitions:
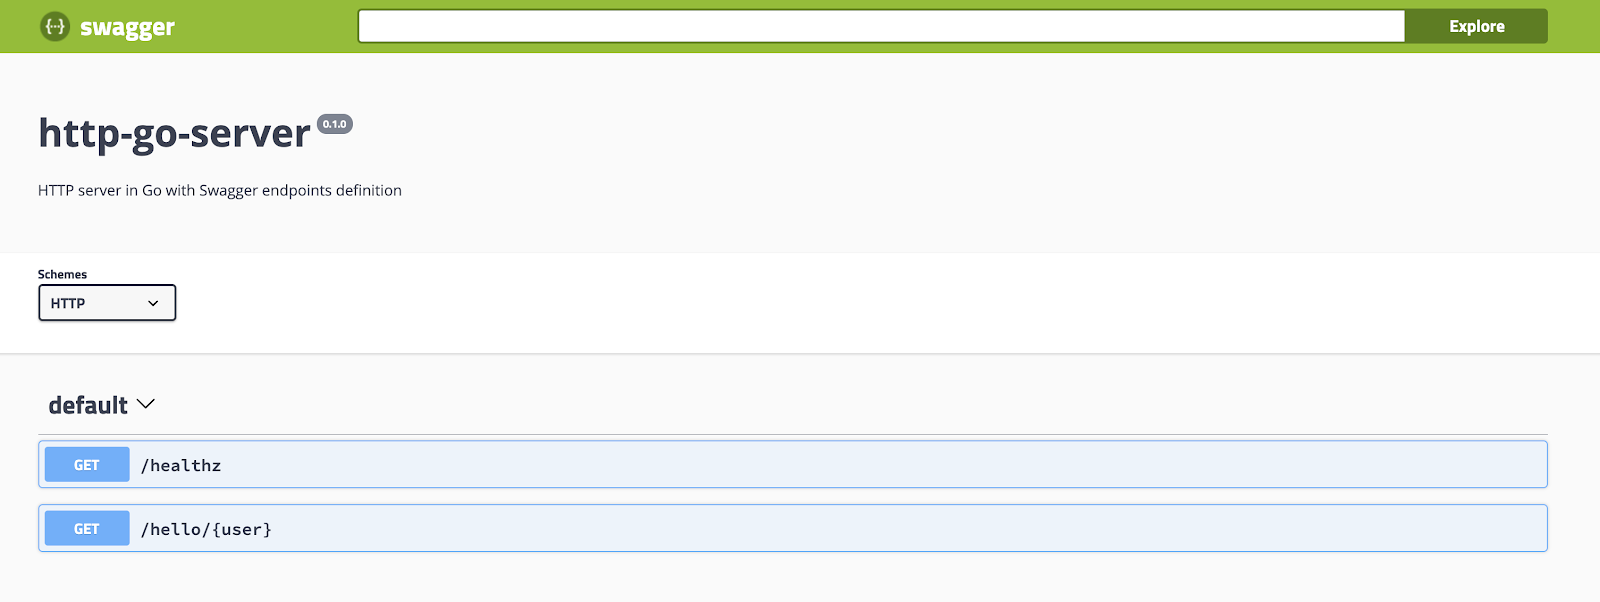
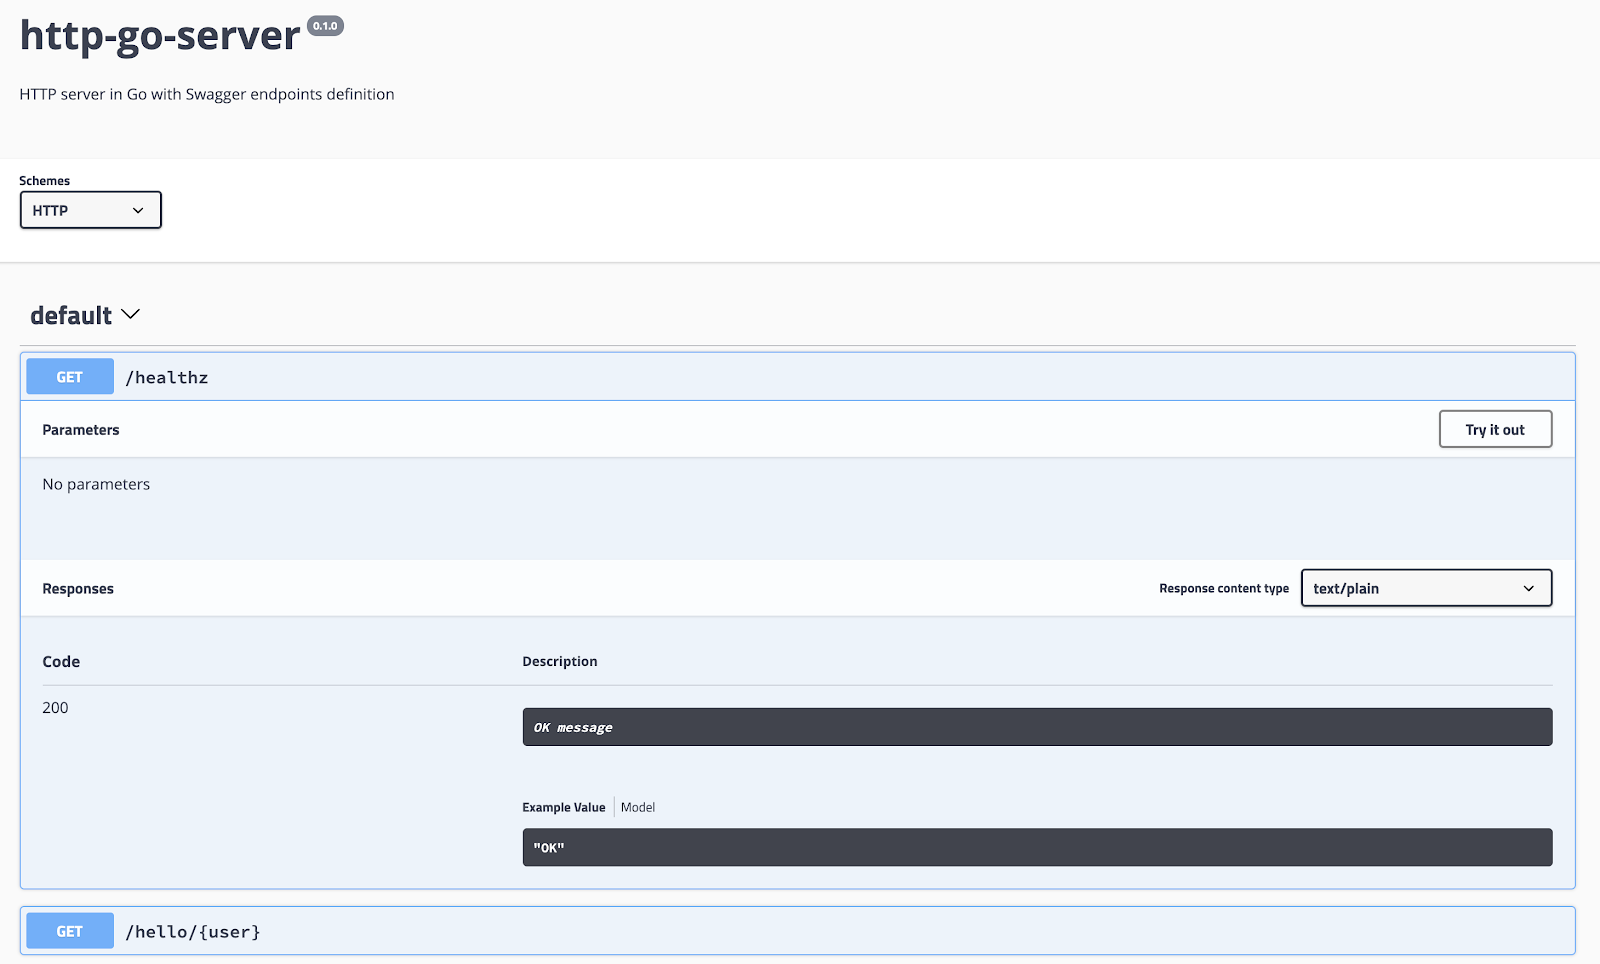
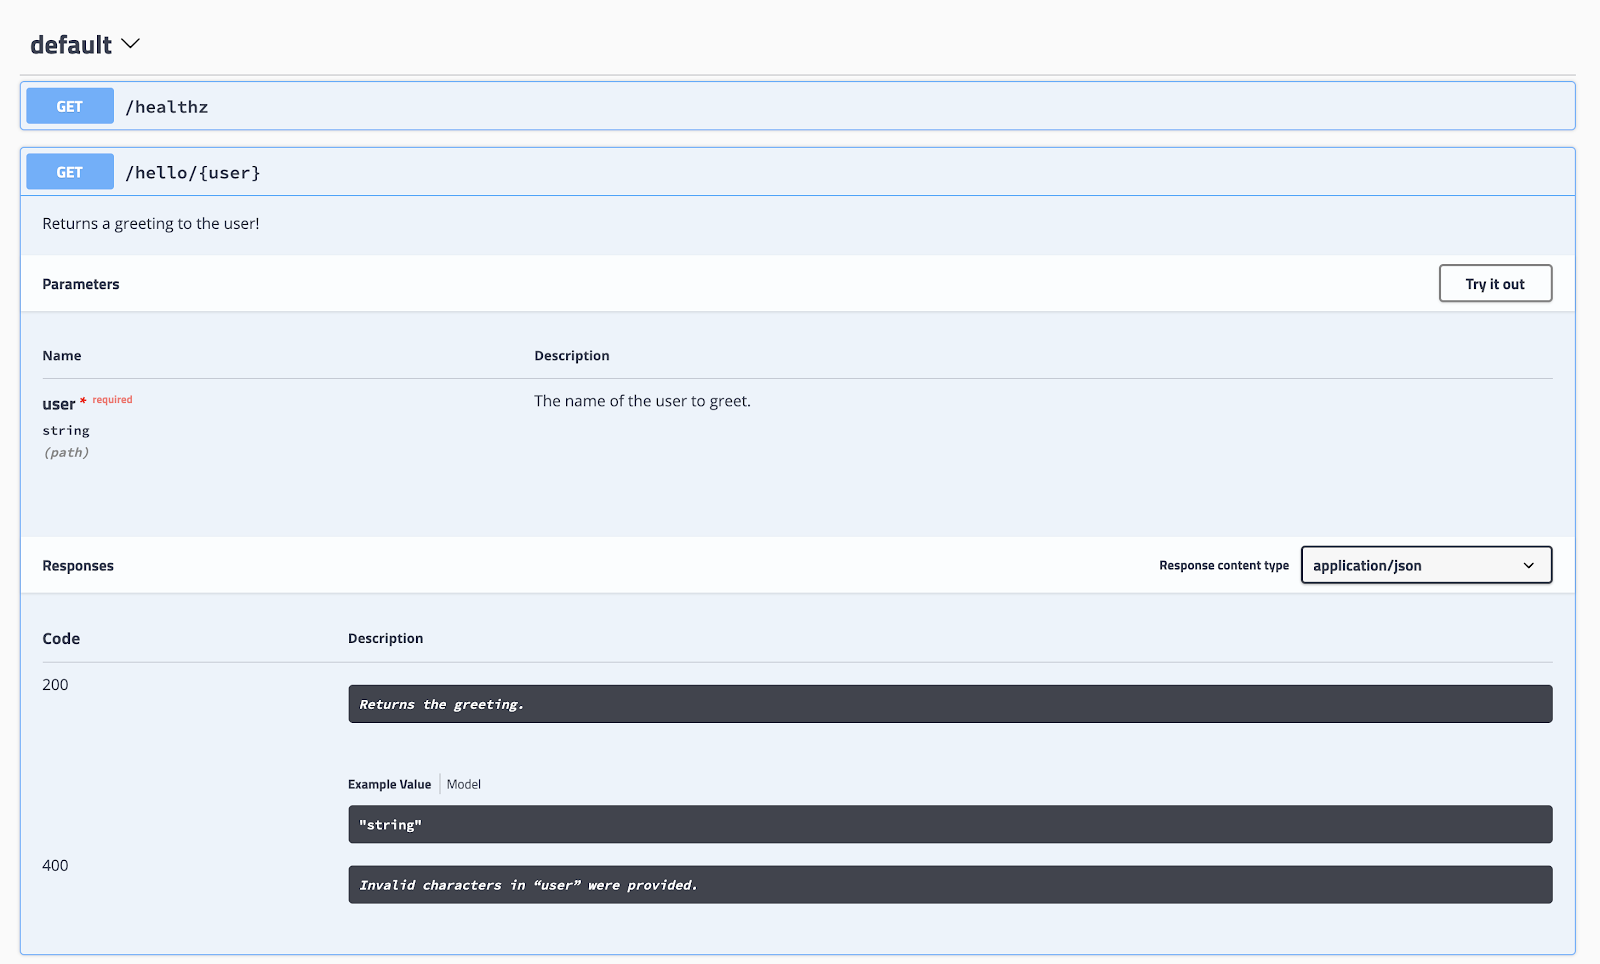
Nice, it’s human-readable.
Now, we can generate Go code thanks to swagger specifications.
In order to do this, we go in the package pkg/swagger/ and now we will create a gen.go file like this:
package swagger

//go:generate rm -rf server
//go:generate mkdir -p server
//go:generate swagger generate server --quiet --target server --name hello-api --spec swagger.yml --exclude-main
Thanks to our Makefile we can execute make generate for generating swagger go code:
$ make generate

==> generating go code

GOFLAGS=-mod=vendor go generate github.com.scraly/http-go-server/internal github.com.scraly/http-go-server/pkg/swagger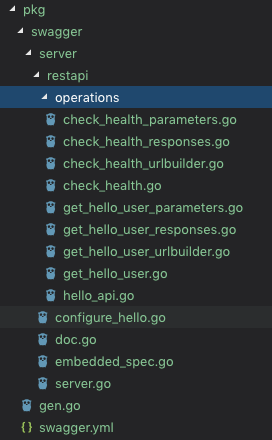
As you can see below, with a swagger endpoint definitions in input, a lot of code has been generated, and it’s time-saving for our HTTP server implementation.
Let’s edit our main.go file with the use of Swagger:
package main

import (
"log"

"github.com/go-openapi/loads"
"github.com/scraly/http-go-server/pkg/swagger/server/restapi"

"github.com/scraly/http-go-server/pkg/swagger/server/restapi/operations"
)

func main() {

  // Initialize Swagger
  swaggerSpec, err := loads.Analyzed(restapi.SwaggerJSON, "")
  if err != nil {
    log.Fatalln(err)
  }

  api := operations.NewHelloAPI(swaggerSpec)
  server := restapi.NewServer(api)
  defer server.Shutdown()

  server.Port = 8080

  // Start listening using having the handlers and port
  // already set up.
  if err := server.Serve(); err != nil {
    log.Fatalln(err)
  }

}
Let’s launch our server:
$ go run internal/main.go

2019/10/28 14:27:26 Serving hello at http://[::]:8080
And now we can do several tests:
$ curl localhost:8080

{"code":404,"message":"path / was not found"}%


$ curl localhost:8080/hello

{"code":404,"message":"path /hello was not found"}%


$ curl localhost:8080/hello/aurelie

"operation GetHelloUser has not yet been implemented"
Perfect, our HTTP server is answering and even tells us that GetHelloUser has not yet been implemented, so let’s implement it!
Edit main.go file like this:
package main

import (
"log"

"github.com/go-openapi/loads"
"github.com/go-openapi/runtime/middleware"
"github.com/scraly/http-go-server/pkg/swagger/server/restapi"

"github.com/scraly/http-go-server/pkg/swagger/server/restapi/operations"
)

func main() {

  // Initialize Swagger
  swaggerSpec, err := loads.Analyzed(restapi.SwaggerJSON, "")
  if err != nil {
  log.Fatalln(err)
  }

  api := operations.NewHelloAPI(swaggerSpec)
  server := restapi.NewServer(api)

  defer func() {
    if err := server.Shutdown(); err != nil {
      // error handle
      log.Fatalln(err)
    }
  }()

  server.Port = 8080

  // Implement the CheckHealth handler
  api.CheckHealthHandler = operations.CheckHealthHandlerFunc(
  func(user operations.CheckHealthParams) middleware.Responder {
  return operations.NewCheckHealthOK().WithPayload("OK")
  })

  // Implement the GetHelloUser handler
  api.GetHelloUserHandler = operations.GetHelloUserHandlerFunc(
  func(user operations.GetHelloUserParams) middleware.Responder {
  return operations.NewGetHelloUserOK().WithPayload("Hello " + user.User + "!")
  })

  // Start server which listening
  if err := server.Serve(); err != nil {
  log.Fatalln(err)
  }

}
Once again, we e-launch our server:
$ go run internal/main.go

2019/10/28 21:45:38 Serving hello at http://[::]:8080


$ curl localhost:8080/hello/aurelie

"Hello aurelie!"


$ curl localhost:8080/healthz

OK%
Great, we have an HTTP server following OpenAPI specifications and two routes:
- GET /healthz
- GET /hello/{name}
We can stop here because our HTTP server is working, but we will go further.
We will create new functions for routes implementation in our main.go file (at the end of the file):
//Health route returns OK
func Health(operations.CheckHealthParams) middleware.Responder {
return operations.NewCheckHealthOK().WithPayload("OK")
}

//GetHelloUser returns Hello + your name
func GetHelloUser(user operations.GetHelloUserParams) middleware.Responder {
return operations.NewGetHelloUserOK().WithPayload("Hello " + user.User + "!")
}
And now we just need to call theses new functions in the main function:
func main() {

  // Initialize Swagger
  swaggerSpec, err := loads.Analyzed(restapi.SwaggerJSON, "")
  if err != nil {
      log.Fatalln(err)
  }

  api := operations.NewHelloAPI(swaggerSpec)
  server := restapi.NewServer(api)

  defer func() {
    if err := server.Shutdown(); err != nil {
    // error handle
    log.Fatalln(err)
    }
  }()


  server.Port = 8080

  api.CheckHealthHandler = operations.CheckHealthHandlerFunc(Health)
  api.GetHelloUserHandler = operations.GetHelloUserHandlerFunc(GetHelloUser)

  // Start server which listening
  if err := server.Serve(); err != nil {
  log.Fatalln(err)
  }

}
Like usual, we test if static tests pass and if our app builds:
$ make lint.full

==> linters (slow)

INFO [config_reader] Config search paths: [./ /Users/uidn3817/git/github.com/scraly/http-go-server/internal /Users/uidn3817/git/github.com/scraly/http-go-server /Users/uidn3817/git/github.com/scraly /Users/uidn3817/git/github.com /Users/uidn3817/git /Users/uidn3817 /Users /]

INFO [config_reader] Used config file .golangci.yml

INFO [lintersdb] Active 13 linters: [deadcode errcheck goimports golint govet ineffassign maligned misspell nakedret structcheck typecheck unconvert varcheck]

INFO [loader] Go packages loading at mode load types and syntax took 1.474090863s

INFO [loader] SSA repr building timing: packages building 15.964643ms, total 220.705097ms

INFO [runner] worker.4 took 652.824µs with stages: deadcode: 244.82µs, unconvert: 110.42µs, errcheck: 102.565µs, varcheck: 81.099µs, structcheck: 38.623µs, maligned: 34.263µs, nakedret: 22.825µs, typecheck: 5.339µs

INFO [runner] worker.6 took 1.883µs

INFO [runner] worker.8 took 2.125µs

INFO [runner] worker.5 took 1.040528ms with stages: ineffassign: 1.035173ms

INFO [runner] worker.7 took 3.211184ms with stages: goimports: 3.2029ms

INFO [runner] worker.3 took 102.06494ms with stages: misspell: 102.056568ms

INFO [runner] worker.1 took 120.104406ms with stages: golint: 120.096599ms

INFO [runner] worker.2 took 204.48169ms with stages: govet: 204.471908ms

INFO [runner] Workers idle times: #1: 84.514968ms, #3: 86.547645ms, #4: 203.167851ms, #5: 202.957443ms, #6: 203.09743ms, #7: 201.160969ms, #8: 202.973757ms

INFO [runner] processing took 18.697µs with stages: max_same_issues: 14.808µs, skip_dirs: 737ns, cgo: 498ns, nolint: 420ns, filename_unadjuster: 398ns, max_from_linter: 281ns, autogenerated_exclude: 172ns, path_prettifier: 170ns, identifier_marker: 167ns, diff: 164ns, skip_files: 161ns, replacement_builder: 158ns, exclude: 156ns, source_code: 90ns, max_per_file_from_linter: 81ns, path_shortener: 79ns, uniq_by_line: 79ns, exclude-rules: 78ns

INFO File cache stats: 0 entries of total size 0B

INFO Memory: 24 samples, avg is 248.1MB, max is 671.8MB

INFO Execution took 2.277787079s
Test Static Code
Another good practice is to test static code with linters analysis. For that, we use golang-ci tool (a fast linter in Go, better than gometalinter).
Thanks to our Makefile, you just need to get the tools I listed here, like golang-ci:
$ make get.toolsA good practice is to set-up a .golangci.yml file in order to define linter properties we want. Here is an example of golang-ci properties:
run:

modules-download-mode: vendor

deadline: 10m

issues-exit-code: 1

tests: true


skip-files:

- ".*\\.pb\\.go$"

- ".*\\.gen\\.go$"

- "mock_.*\\.go"


linters:

enable:

- govet # check standard vet rules

- golint # check standard linting rules

- staticcheck# comprehensive checks

- errcheck # find unchecked errors

- ineffassign# find ineffective assignments

- varcheck # find unused global variables and constants

- structcheck# check for unused struct parameters

- deadcode # find code that is not used

- nakedret # check for naked returns

- goimports # fix import order

- misspell # check spelling

- unconvert # remove unnecessary conversions

- maligned # check for better memory usage

disable:

- goconst # check for things that could be replaced by constants

- gocyclo # needs tweaking

- depguard # unused

- gosec # needs tweaking

- dupl # slow

- interfacer # not that useful

- gosimple # part of staticcheck

- unused # part of staticcheck

- megacheck # part of staticcheck

- lll

fast: false


output:

format: colored-line-number

print-issued-lines: true

print-linter-name: true


linters-settings:

errcheck:

# report about not checking of errors in type assetions: `a := b.(MyStruct)`;

# default is false: such cases aren't reported by default.

check-type-assertions: false


# report about assignment of errors to blank identifier: `num, _ := strconv.Atoi(numStr)`;

# default is false: such cases aren't reported by default.

check-blank: false

govet:

# report about shadowed variables

#TODO# check-shadowing: true


# Obtain type information from installed (to $GOPATH/pkg) package files:

# golangci-lint will execute `go install -i` and `go test -i` for analyzed packages

# before analyzing them.

# Enable this option only if all conditions are met:

# 1. you use only "fast" linters (--fast e.g.): no program loading occurs

# 2. you use go >= 1.10

# 3. you do repeated runs (false for CI) or cache $GOPATH/pkg or `go env GOCACHE` dir in CI.

use-installed-packages: false

golint:

min-confidence: 0.8

gofmt:

simplify: true

gocyclo:

min-complexity: 10

maligned:

suggest-new: true

dupl:

threshold: 150

goconst:

min-len: 3

min-occurrences: 3

misspell:

locale: US

lll:

line-length: 140

tab-width: 1

unused:

# treat code as a program (not a library) and report unused exported identifiers; default is false.

# XXX: if you enable this setting, unused will report a lot of false-positives in text editors:

# if it's called for subdir of a project it can't find funcs usages. All text editor integrations

# with golangci-lint call it on a directory with the changed file.

check-exported: false

unparam:

# call graph construction algorithm (cha, rta). In general, use cha for libraries,

# and rta for programs with main packages. Default is cha.

algo: cha


# Inspect exported functions, default is false. Set to true if no external program/library imports your code.

# XXX: if you enable this setting, unparam will report a lot of false-positives in text editors:

# if it's called for subdir of a project it can't find external interfaces. All text editor integrations

# with golangci-lint call it on a directory with the changed file.

check-exported: false

nakedret:

# make an issue if func has more lines of code than this setting and it has naked returns; default is 30

max-func-lines: 30

prealloc:

# Report preallocation suggestions only on simple loops that have no returns/breaks/continues/gotos in them.

# True by default.

simple: true

range-loops: true# Report preallocation suggestions on range loops, true by default

for-loops: false# Report preallocation suggestions on for loops, false by default


issues:

max-per-linter: 0

max-same: 0

new: false

exclude-use-default: false
Now we can check if our code contains lint errors or not:
$ make lint.full
==> linters (slow)
INFO [config_reader] Config search paths: [./ /Users/uidn3817/git/github.com/scraly/http-go-server/internal /Users/uidn3817/git/github.com/scraly/http-go-server /Users/uidn3817/git/github.com/scraly /Users/uidn3817/git/github.com /Users/uidn3817/git /Users/uidn3817 /Users /]
INFO [config_reader] Used config file .golangci.yml
INFO [lintersdb] Active 13 linters: [deadcode errcheck goimports golint govet ineffassign maligned misspell nakedret structcheck typecheck unconvert varcheck]
INFO [loader] Go packages loading at mode load types and syntax took 1.403040989s
INFO [loader] SSA repr building timing: packages building 17.446103ms, total 215.11635ms
INFO [runner] worker.1 took 319.338µs with stages: unconvert: 126.709µs, structcheck: 105.706µs, varcheck: 80.624µs
INFO [runner] worker.8 took 279.76µs with stages: errcheck: 102.203µs, nakedret: 88.6µs, deadcode: 54.547µs, maligned: 22.796µs, typecheck: 2.416µs
INFO [runner] worker.2 took 908ns
INFO [runner] worker.7 took 1.424891ms with stages: ineffassign: 1.419068ms
INFO [runner] worker.4 took 2.395856ms with stages: goimports: 2.39105ms
INFO [runner] worker.6 took 75.843872ms with stages: golint: 75.832987ms
INFO [runner] worker.5 took 77.126536ms with stages: misspell: 77.092913ms
INFO [runner] worker.3 took 124.506172ms with stages: govet: 124.498137ms
INFO [runner] Workers idle times: #1: 124.053298ms, #2: 123.973576ms, #4: 122.078696ms, #5: 47.339761ms, #6: 48.693713ms, #7: 122.946009ms, #8: 124.035904ms
INFO [runner] processing took 19.597µs with stages: max_same_issues: 16.123µs, cgo: 541ns, skip_dirs: 493ns, nolint: 398ns, max_from_linter: 280ns, path_prettifier: 179ns, filename_unadjuster: 172ns, replacement_builder: 170ns, autogenerated_exclude: 170ns, exclude: 164ns, diff: 162ns, skip_files: 161ns, identifier_marker: 150ns, source_code: 97ns, path_shortener: 97ns, max_per_file_from_linter: 82ns, exclude-rules: 80ns, uniq_by_line: 78ns
INFO File cache stats: 0 entries of total size 0B
INFO Memory: 23 samples, avg is 255.8MB, max is 672.0MB
INFO Execution took 2.119246564s
Good, everything is fine.
If you want to edit the .golangci.yml file, please take a look to golang-ci supported linters.
Check Licenses
Another good practice to see it’s the license checking.
You need to check licenses (licenses used by your dependencies), for example, when you want to open-source your application or in your company in order to not use forbidden license.
In Go, a tool exists called wwhrd.
First of all, we will create a file named .wwhrd.yml in order to define options:
---

blacklist:

- AGPL-3.0

- GPL-2.0

- GPL-3.0

- CDDL-1.0


whitelist:

- Apache-2.0

- MIT

- NewBSD

- FreeBSD

- LGPL-2.1

- LGPL-3.0

- ISC

- MPL-2.0

- EPL-1.0

- Unlicense


# exceptions:

# - github.com/davecgh/go-spew/spew/... # ISC License misrecognized

# - github.com/dchest/uniuri # https://creativecommons.org/publicdomain/zero/1.0/
In this properties file for wwhrd, you can add exceptions, blacklists, and whitelists repositories.
A target for licenses checking exists in the Makefile so you just need to execute it:
$ make license
==> license check
wwhrd check
INFO[0000] Found Approved license                        license=Apache-2.0 package=go.mongodb.org/mongo-driver/bson/primitive
INFO[0000] Found Approved license                        license=Apache-2.0 package=github.com/go-openapi/swag
INFO[0000] Found Approved license                        license=NewBSD package=github.com/PuerkitoBio/purell
INFO[0000] Found Approved license                        license=Apache-2.0 package=github.com/go-openapi/jsonreference
INFO[0000] Found Approved license                        license=Apache-2.0 package=go.mongodb.org/mongo-driver/bson/bsoncodec
INFO[0000] Found Approved license                        license=Apache-2.0 package=github.com/go-openapi/loads
…
Great, no license problems.
Build Our App
And now we can build our app in an executable binary file and test the binary.
$ make build

go build -o bin/http-go-server internal/main.go


$ ./bin/http-go-server

2019/10/28 21:47:38 Serving hello at http://[::]:8080
Cool ?
Conclusion
As you saw in the first part of this article, it’s possible to create an HTTP server in minutes or seconds, with net/http package and Gorilla/mux for router, but I wanted to show you, step-by-step, how to go further with best practices in the code organization. The use of Swagger in order to be compliant with OpenAPI standard and the use of several useful tools.
At the end, our little HTTP server app grew up a little bit, as you can see in the code organization:
.
├── Makefile
├── README.md
├── bin
│   └── http-go-server
├── doc
│   └── index.html
├── go.mod
├── go.sum
├── internal
│   └── main.go
├── pkg
│   └── swagger
│       ├── gen.go
│       ├── server
│       │   └── restapi
│       │       ├── configure_hello.go
│       │       ├── doc.go
│       │       ├── embedded_spec.go
│       │       ├── operations
│       │       │   ├── check_health.go
│       │       │   ├── check_health_parameters.go
│       │       │   ├── check_health_responses.go
│       │       │   ├── check_health_urlbuilder.go
│       │       │   ├── get_hello_user.go
│       │       │   ├── get_hello_user_parameters.go
│       │       │   ├── get_hello_user_responses.go
│       │       │   ├── get_hello_user_urlbuilder.go
│       │       │   └── hello_api.go
│       │       └── server.go
│       └── swagger.yml
├── scripts
└── vendor
    ├──…
    └── modules.txt
└── .gitignore
└── .golangci.yml
└── .wwhrd.yml
All the code is available in the Github repository: https://github.com/scraly/http-go-server
I hope this kind of article will help you, and if it did, I will create more and more articles in order to discover the Go ecosystem.
Further Reading
REST API: Your Guide to Getting Started Quickly
Create and Publish Your Rest API Using Spring Boot and Heroku