Вы планируете использовать Microsoft Azure для своего следующего приложения или просто перегружены всеми опциями и услугами, предоставляемыми Microsoft Azure? «Будьте уверены с Azure» — это серия технических публикаций, которые помогут вам упорядочить и познакомиться с предложениями Azure. Более того, мы рассмотрим области, которые менее покрыты, подводные камни, которых следует избегать, а также советы, которыми можно воспользоваться.
Я собираюсь начать серию с набора параметров публикации в хранилище Azure, включая хранилище BLOB-объектов, очередей и таблиц, а первая публикация посвящена хранилищу BLOB-объектов. В этом посте мы рассмотрим ряд областей, которые будут важны для использования параметров хранилища Azure, таких как:
- Почему хранилище Azure
- Аккаунты хранения
- Биллинг и цены
- Инструменты разработки
- Хранение BLOB-объектов
- Иерархическая структура
- совпадение
- Безопасность
- Инструменты управления
Почему хранилище Azure
Одна из основных концепций хранилища BLOB-объектов Azure заключалась в том, чтобы обеспечить доступность файловой системы из облака. Хранилище BLOB-объектов Azure должно было предоставлять возможность обрабатывать большие объемы неструктурированных данных из любой точки мира через API RESTful. Хранилище больших двоичных объектов Azure стало очень популярным механизмом хранения ресурсов веб-сайта, таких как изображения, документы и видео. Широкий спектр сценариев, для которых хорошо подходит хранилище BLOB-объектов Azure, не ограничивается веб-сайтами, а является хорошим сторонником потоковой передачи данных, распределенных систем, резервного копирования и восстановления данных, и это лишь некоторые из них. Благодаря простоте SDK Storage Client, который мы вскоре рассмотрим, при работе с хранилищем BLOB-объектов Azure существует множество возможностей.
Итак, давайте начнем с рассмотрения того, что вам нужно в первую очередь, чтобы начать работать с хранилищем BLOB-объектов Azure; учетная запись хранения Azure.
Аккаунт хранения
Во-первых, вам нужен один
Не тратя ни копейки, Microsoft предоставляет полную бесплатную пробную версию всех своих сервисов на 1 месяц на момент написания этой статьи. Для начала вы можете перейти на бесплатную пробную версию, чтобы легко настроить свою учетную запись, чтобы начать.
 http://lockmedown.com/wp-content/uploads/2014/08/trial-portal-signup.png
Ваша учетная запись хранения Azure выполняет ряд задач, и вы можете прочитать все подробности об учетной записи хранения Azure здесь , но она легко сводится к следующему:
- Доступ к 3 сервисам; Хранение BLOB-объектов, Хранение таблиц и Хранение в очереди.
- Предоставляет уникальное пространство имен для работы с вашими BLOB-объектами, очередями и таблицами.
Пространства имен
Очевидно, что мы углубимся в особенности этих служб, начиная с хранилища BLOB-объектов, но давайте рассмотрим эту вторую цель учетной записи хранилища; Пространства имен. Пространство имен хранилища обозначает конкретное адресное пространство, к которому вы можете получить доступ к ресурсам одной из трех служб. Существуют разные уровни пространства имен, но давайте рассмотрим конкретный пример пространства имен хранилища BLOB-объектов. На самом высоком уровне пространства имен у нас есть конечная точка, которая представляет собой URI, который обозначает конкретное адресное пространство для конкретной службы хранения под вашей учетной записью:
http: // mystorageaccount .blob.core.windows.net
Где mystorageaccount будет представлять вашу учетную запись, а .blob представляет тип службы хранения. Это пространство имен может далее разбиваться на более конкретные URI, такие как:
http: // mystorageaccount .blob.core.windows.net / containerName / blobName
Где containerName и blobName могут определять, где могут находиться конкретные ресурсы в службе хранения. Но мы скоро углубимся в эти детали.
Биллинг и цены
Плата за хранение клиента основана на трех факторах:
- Емкость накопителя
- операции
- Исходящие данные (выход данных)
Емкость хранилища можно разделить на 3 части: план подписки (т. Е. Оплата по факту, 6 месяцев и т. Д.), Уровень избыточности и общий объем данных. Как и большинство вещей, чем дольше подписка и чем больше объем хранилища, тем ниже стоимость.
Транзакции довольно недороги, но могут легко и быстро накапливаться, так как некоторые операции в API вызывают несколько транзакций. Транзакции также включают операции чтения и записи. Таким образом, очевидная мотивация заключается в том, чтобы использовать пакетные операции в любое время, на которое мы рассмотрим. Входящие данные бесплатны, но исходящие данные оплачиваются, и вы можете увидеть плату за передачу данных здесь . Пока вы можете увидеть полную разбивку емкости хранилища и цены транзакций здесь .
Теперь, когда вы ознакомились с учетными записями Azure, их выставлением счетов и ценами, давайте приступим к использованию служб хранилища Azure.
Инструменты разработки
Что касается хранилища, сервисы (blob, table и queue) предоставляются через RESTful API. Простой пример этого можно увидеть, когда вы отправляете запрос http GET для ресурса BLOB-объекта, такого как:
http: // mystorageaccount .blob.core.windows.net / Images / 01-08-2014.jpg
Однако сложность может возникнуть с более сложными запросами к API хранилища для публикации данных, обновления или выполнения расширенных запросов. Для этого необходимо предоставить все необходимые компоненты HTTP-запроса, такие как дополнительные заголовки, параметры и информацию о теле HTTP-запроса.
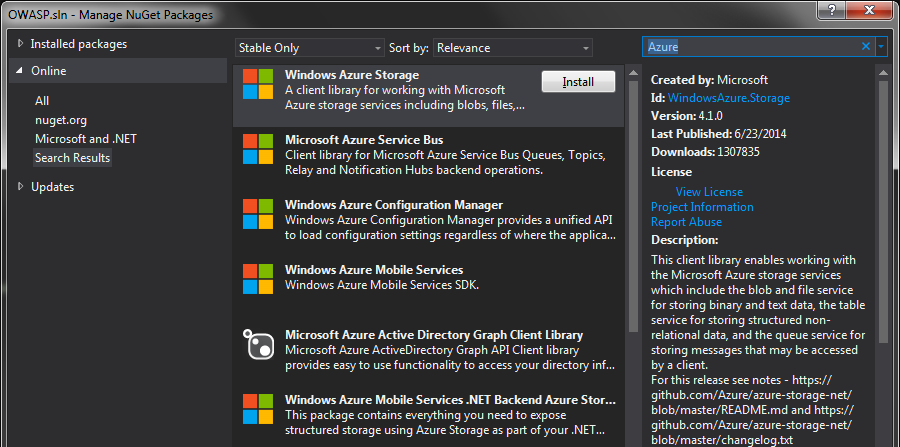
К счастью для нас, Microsoft предоставила Azure .NET Client SDK и инструменты, которые выполняют всю тяжелую работу за вас. Клиентский SDK и различные инструменты можно приобрести на ряде ресурсов, таких как пакеты NuGet, GitHub и сайт Microsoft Azure. Давайте быстро пройдемся по различным ресурсам и рассмотрим различия и что ожидать.
Инструменты Azure Visual Studio
Azure Visual Studio можно загрузить для Visual Studio 2012 и 2013 со страницы загрузки Microsoft Azure . Эта установка включает в себя различные .NET Client SDK и эмулятор хранилища. Он также включает в себя ряд шаблонов, доступных для запуска с нуля. Я бы определенно рекомендовал пойти по этому пути, чтобы приобрести эмулятор хранилища, но вы должны убедиться, что установка (на момент загрузки) включает в себя последнюю версию клиентской библиотеки хранилища.
NuGet
NuGet Package Manager обеспечивает быстрый маршрут для установки всех необходимых зависимостей для различных клиентских библиотек и, как правило, включает в себя самые последние версии клиента хранилища. Вы увидите различные доступные клиентские SDK Azure. Консоль диспетчера пакетов NuGet (которая отличается) предлагает более детальный контроль над тем, какую именно версию клиента Azure SDK вы устанавливаете.
GitHub
Если вы хотите погрузиться в глубины исходного кода, проанализировать основы и запустить набор тестов, поддерживающих клиент хранилища Azure, вы можете загрузить исходный код клиента хранилища из их репозитория на GitHub . Никогда не помешает увидеть, как работают инструменты, на которые мы опираемся, и, эй, вы можете просто чему-то научиться.
Теперь, когда у нас есть необходимые инструменты для работы со службой хранилища Azure, давайте включим ее и посмотрим, что мы можем с ней сделать.
Типы BLOB-объектов
Есть несколько важных фактов, которые нам необходимо представить в отношении хранилища BLOB-объектов, прежде чем углубляться в их использование. Во-первых, есть два основных типа блочных BLOB-объектов и Page BLOB-объектов. Их различия в основном включают доступ для чтения / записи, оптимизацию производительности и ограничения по размеру. Существуют и другие меньшие различия, но они составляют большинство причин, по которым вы будете определять, с каким типом BLOB-объектов работать.
Page Blob
Капли страниц разбиты на 512-байтовые страницы размером не более 1 ТБ. Они оптимизированы для произвольного доступа для чтения / записи, что позволяет обновлять или использовать отдельные или несколько страниц в пределах одного блочного страниц и лучше всего подходит, если у вас есть диапазон байтов в часто меняемом блоке страниц. Главное, что нужно сделать с блоками страниц, это то, что они почти всегда ассоциируются с хранилищем для виртуальных жестких дисков, поддерживающих виртуальные машины Azure. Вы найдете в подавляющем большинстве однобокое количество документации, доступной для блочных блобов, чем для блочных страниц.
Блок Blob
Блочные блобы сохраняют свое название из-за того, что отдельный блочный блоб состоит из блоков по 4 Мб. Блочный блок может иметь до 50 000 блоков с общим максимальным размером 200 ГБ. Поскольку они состоят из отдельных меньших блоков, они обеспечивают уровень детализации записи, который мы увидим, как использовать преимущества при загрузке больших файлов. Блочные объекты оптимизированы для записи больших двоичных данных и потоковых рабочих нагрузок. Из-за этого вы найдете блочные блоги в качестве предпочтительного хранилища для ресурсов веб-сайтов и приложений, таких как файлы, изображения, видео и другие подобные ресурсы, которые меняются не часто. Это будет тип BLOB-объектов, которые мы будем использовать в этой статье.
Учетные записи хранилища Azure имеют емкость 500 ТБ, но могут быть расширены за счет возможности иметь несколько учетных записей хранения в рамках подписки (не более 50 учетных записей). Не увязывая эту статью с метриками, Microsoft предоставляет документацию по масштабируемости хранилища и целевым показателям производительности.
Большая картинка
Концептуальное представление о структуре хранилища BLOB-объектов можно увидеть ниже.

Как вы можете видеть наверху, мы работаем в рамках учетной записи хранения, за которой следует концепция контейнера и, наконец, отдельные большие двоичные объекты в контейнере. Эта иерархическая структура также дает нам хорошую техническую дорожную карту, чтобы посмотреть, как мы можем работать с хранилищем BLOB-объектов.
Итак, вы настроили бесплатную пробную учетную запись, приобрели SDK Client Storage и готовы его использовать. Наша цель — читать и записывать двоичные данные в хранилище BLOB-объектов под собственной учетной записью. Первая задача, которая потребуется для этого, — найти определенное место в нашей учетной записи хранения, чтобы сохранить или получить доступ к определенному BLOB-объекту. BLOB-объекты имеют двухуровневую иерархию
- Контейнер, который является родителем блоба
- и сам блоб
Вскоре мы увидим, как мы можем подделать более детальную структуру папок.
Минимальные требования
Существует конечный уровень структуры для контейнеров с каплями. Это очень просто и содержит только два отдельных уровня; контейнер и немедленная капля. Это можно рассматривать как единую структуру каталогов, такую как /images/photo1.jpg .
Сам контейнер связан с определенной учетной записью хранилища Azure. Поэтому, если мы хотим выполнить операции чтения и записи для определенного большого двоичного объекта под нашей учетной записью хранения, примерно нам потребуется создать объекты, представляющие нашу учетную запись хранения, определенный контейнер в нашей учетной записи хранения и, наконец, сам объект большого двоичного объекта.
Учитывая это, минимальные требования для работы с BLOB-объектами будут выглядеть примерно так:
- Сначала вы создаете объект учетной записи хранения, который представляет вашу учетную запись хранения Azure.
- Во-вторых, через объект учетной записи хранения вы можете создать объект клиента Blob.
- В-третьих, с помощью объекта Blob Client получите объект, который ссылается на контейнер BLOB-объектов в вашей учетной записи хранения.
- Наконец, с помощью ссылки на конкретный контейнер BLOB-объектов вы можете получить ссылку на конкретный BLOB-объект.
CloudStorageAccount account = new CloudStorageAccount(new StorageCredentials("your-storage-account-name", "your-storage-account-access-key"), true);
CloudBlobClient blobClient = account.CreateCloudBlobClient();
CloudBlobContainer blobContainer = blobClient.GetContainerReference("images");
CloudBlockBlob blob = blobContainer.GetBlockBlobReference("photo1.jpg");
Вы можете видеть, что для объекта CloudStorageAccount мы создаем объект StorageCredentials и передаем две строки, имя учетной записи хранения и ключ доступа к учетной записи хранения (подробнее об этом чуть позже). По сути, мы создаем каждый требуемый родительский объект, пока в конце концов не получим ссылку на BLOB-объект.
Ключи хранения
Как упоминалось ранее, при создании объекта учетных данных хранилища вам необходимо предоставить ему имя учетной записи хранения и первичный или вторичный ключ base64. Вы можете получить эту информацию на портале Azure, выбрав «Управление ключами доступа» в разделе «Хранилище», в котором будут перечислены созданные вами учетные записи хранения. Да, я восстановил ключи, показанные ниже.
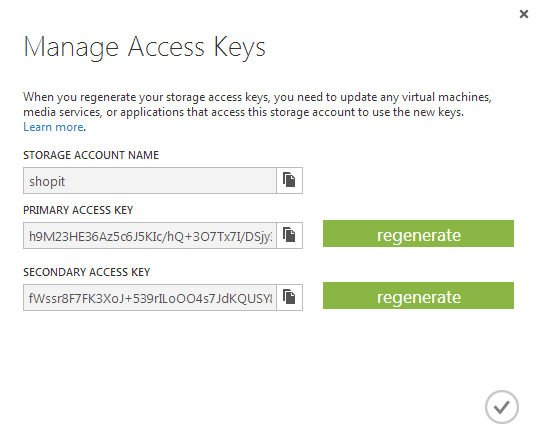
Да, как вы уже догадались, ключи доступа — это ключи от королевства, поэтому вы не захотите передавать эту информацию. Однако для простоты я демонстрирую основы того, что нам нужно для доступа к определенной учетной записи для хранения больших двоичных объектов. Мы подробнее рассмотрим безопасность позже в этой статье.
Лучшим подходом к приобретению CloudStorageAccount было бы использование пакета NuGet «Windows Azure Configuration Manager» , который может помочь в абстрагировании некоторых накладных расходов при создании учетной записи.
Тем не менее, приведенный выше экземпляр контейнера предполагает, что контейнер существует. Сейчас самое время посмотреть на контейнеры и какие у нас есть варианты.
Контейнеры
Контейнеры обеспечивают логическую группировку наших BLOB-объектов. В нашей двухуровневой иерархии контейнеры — это наш первый уровень. В дополнение к стандартному набору операций crud, который предоставляет нам клиентские инструменты, у нас также есть возможность установить контроль доступа на уровне контейнера, задать метаданные для конкретного контейнера и получить аренду для операций удаления, и это лишь некоторые из них. Мы рассмотрим безопасность позже в этой статье.
Создание контейнеров
CloudBlobClient blobClient = account.CreateCloudBlobClient();
CloudBlobContainer blobContainer = blobClient.GetContainerReference("images");

blobContainer.CreateIfNotExists();
Совет: что-то, что в конечном итоге укусит вас, если вы не будете осторожны, это ограничения именования контейнеров. Обязательно следуйте правилам именования, которые Microsoft предоставляет при именовании ваших контейнеров, иначе вы увидите ошибки с кодом состояния HTTP 400 (неправильный запрос).
Удалить
CloudBlobContainer containerToDelete = _client.GetContainerReference(container);
containerToDelete.Delete();
Или, если не уверены:
containerToDelete.DeleteIfExists();
Совет: Вы можете найти код, который постоянно вызывает вызовы методов CreateIfNotExists или DeleteIfExists в любое время, когда они хотят взаимодействовать с контейнерами. Напомним, одним из аспектов биллинга является то, что он основан на транзакциях. Приведенные выше примеры создания и удаления проводят несколько транзакций для проверки существования контейнера. Следовательно, вы можете легко получить ненужные транзакционные издержки, особенно если вы делаете это при каждой попытке работать с контейнером (да, есть код, который это делает). Для создания контейнеров я бы посоветовал вам создавать контейнеры заранее, когда вы можете
Метаданные
Метаданные позволяют нам предоставлять описательную информацию о конкретных контейнерах. Это просто предоставление пары имя / значение данных, которые мы хотим установить в контейнере.
CloudBlobContainer container = _client.GetContainerReference(containerName);
container.Metadata.Add("Creator", "Max McCarty");
container.Metadata.Add("Title", "Storage Demo");

container.SetMetadata();
Получение метаданных в контейнере так же просто, как:
container.FetchAttributes();
Это, однако, также приобретает свойства контейнера. Свойства в области действия контейнеров — это системные свойства или свойства, которые соответствуют стандартным заголовкам HTTP.
Совет: метаданные о контейнерах и BLOB-объектах нелегко запрашивать. Если вам необходимо сделать акцент на важности данных (метаданных), описывающих контейнер или большой двоичный объект, рассмотрите возможность их хранения в базе данных.
Работа с содержимым контейнера
Depending on the set access policy of the container, we can retrieve a list of contents of the container. The contents are not the blobs themselves, but metadata about the blobs (not to be confused with blob Metadata).
CloudBlobContainer blobContainer = _client.GetContainerReference(containerName);
IEnumerable<IListBlobItem> items = blobContainer.ListBlobs();
The final operations we are going to look at, deal with the contents of blob containers; blobs. To do anything with blobs, we have to obtain a reference to a blob. We can obtain a reference to an existing or new block blob through the container:
CloudBlobContainer blobContainer = _client.GetContainerReference(containerName);
CloudBlockBlob blob = blobContainer.GetBlockBlobReference(blobName);
However, there we can use GetPageBlobReference for referencing a page blob, or GetBlobReferenceFromServer for referencing a ICloudBlob without designating a page or block type blob.
This last method is a good point to look at working directly with block blobs.
Blobs
Minimal Requirements
As a refresher, see the previous mentioned Minimal Requirement earlier in the article for working with blobs. This will outline the required steps for working with blobs. As with blob containers, all examples will assume we have acquired a CloudBlobClient.
Read and Writing Data
So we are now at the point we would actually want to do something with our blob reference. The Storage Client provides a number of sources we can use to upload data to our blob such as:
- Byte Arrays
- Streams
- Files
- Text
See below under Asynchronous for more information on the available Asynchronous methods supported by the Storage Client SDK.
Writing
A simple upload procedure to upload a file would be as easy as
CloudBlobContainer blobContainer = blobClient.GetContainerReference("demo");
CloudBlockBlob blob = blobContainer.GetBlockBlobReference("photo1.jpg");
blob.UploadFromFile(@"C:\Azure\Demo\photo1.jpg", FileMode.Open);
But this was a simple upload for a small file. What if it was a substantially large file? What if halfway through the upload the upload failed due to network connectivity or some other unknown?
Looking at the above upload in an application like Fiddler (or your browser development tools), we can see the single request/response for a small file:

By default, the storage client will break apart an upload that exceeds 32mb in size into individual blocks. This max size setting before it breaks out an upload into individual block can be increased up to a max of 64mb by setting the SingleBlobUploadThresholdInBytes. When the size of an upload exceeds the SingleBlobUploadThresholdInBytes setting, parallel upload operations will occur to upload the individual blocks and reassemble them into a single blob. The number of max parallel operations can be set with the ParallelOperationThreadCountproperty. Both of these properties are part of the RequestBlobOptions .
We can update the CloudBlobClient RequestBlobOptions properties and as follows:
CloudBlobContainer blobContainer = blobClient.GetContainerReference("demo");

BlobRequestOptions opt = new BlobRequestOptions
{
  SingleBlobUploadThresholdInBytes = 1048576,
  ParallelOperationThreadCount = 2
};

blobClient.DefaultRequestOptions = opt;
And after performing another upload of a file larger than the above specified SingleBlobUploadThresholdInBytes we can see in Fiddler exactly what this might look like.

You can even see where it has appended the blockid query parameter. In a robust application like Fiddler, you can even see the entire breakdown of the request/response including the bytes associated with the upload.
This would be a good time to point out some of the benefits of utilizing the Azure Storage Client SDK. If we had not, we would be responsible of tracking all the block ID’s generated, managing the completion of all block uploads and finalizing the entire upload by issuing a commit request of the blocks. However, the Storage Client SDK takes care of all of this for us.
Before moving on, we have only seen a simple upload of a file. The Storage Client also provides the following methods to upload additional sources (each with their equivalent Async version not shown here):
- UploadFromByteArray
- UploadFromFile
- UploadFromStream
- UploadText
Delete
Deleting a blob is pretty straight forward. Up until now, we have kept the blob creation and interaction pretty simple. So we can simply delete a blob that already exists:
CloudBlobContainer blobContainer = _client.GetContainerReference(containerName);
CloudBlockBlob blob = blobContainer.GetBlockBlobReference(blobName);
var wasDeleted = blob.Delete();
There are also additional helper methods when we are uncertain of a blob’s existence such as :
bool wasDeletedOrDoesntExist = blob.DeleteIfExists();
The simplicity of deleting blobs can degenerate however, when we have blob leases and/or snapshots of blobs as well as when working with Shared Access signatures – all of which we’ll cover shortly. All of these factors can make the ability to delete blobs a little less straight forward. I will cover these two scenarios under their appropriate sections below.
Tip: As I mentioned with blob containers, some blob methods conduct multiple transactions within their operation. DeleteIfExists is precisely one of those methods that will cause you to incur additional transactional fees. These types of multiple transactional operations might not always be avoidable. But writing financial efficient applications is one way we can put our client’s interests first.
Blob Properties and Metadata
Blob Metadata is data that describes the data that makes up the blob. We can set the blob metadata as we did with the container metadata:
CloudBlobContainer blobContainer = _client.GetContainerReference(containerName);
CloudBlockBlob blob = blobContainer.GetBlockBlobReference(blobName);

foreach (var keyValuePair in metaData)
{
blob.Metadata.Add(keyValuePair);
}

blob.SetMetadata();
We can retrieve metadata about a blob:
blob.FetchAttributes();

string author = blob.Metadata[“Author”];
FetchAttributes also acquires the blob’s properties which are generally HTTP properties and System properties of the blob, but not the blob’s themselves. Some of the more heavily used blob properties are ContentType, ContentMD5, ContentEncoding, ETag just to name a few. But AFTER uploading a MP4 video that might be consumed in a web request, we might want to set its content type:
CloudBlobContainer blobContainer = _client.GetContainerReference(containerName);
CloudBlockBlob blob = blobContainer.GetBlockBlobReference(blobName);
blob.UploadFromFile(path, FileMode.Open);
blob.Properties.ContentType = "video/mp4";
blob.SetProperties();
Structuring Blobs Hierarchical
I hear the question asked “How do I create a hierarchical folder structure with my blobs/containers”. I’ll make this easy, you cannot create hierarchical folder structures for your blobs within a container. But, the Storage Client SDK does provide the mechanism to mimic hierarchy and provide you with the functionality to traverse the blobs in a hierarchical fashion.
The mechanism to do so is made up of 3 requirements:
- A delimiter (in this case the forward slash “/”)
- The blob’s name
- The Storage Client SDK methods to traverse directories and subdirectories
So if we wanted to create a folder structure that mimicked something like “vacation/photos/family/kids” with “kids” being the lowest subdirectory that would contain pictures such as “kids-02.jpg”, along with a second folder at the same level as kids for “relatives” with it’s own relative photo’s, we would upload it like so:
CloudBlobContainer blobContainer = _client.GetContainerReference(“vacation”);
CloudBlockBlob kidBlob = blobContainer.GetBlockBlobReference("photos/family/kids/kids-02.jpg");

CloudBlockBlob auntBlob = blobContainer.GetBlockBlobReference("photos/family/relatives/aunt-velma-01.jpg");
blob.UploadFromFile(path, FileMode.Open);
Then we can traverse the folder structure:
CloudBlobDirectory photoDirectory = BlobContainer.GetDirectoryReference("photos");
CloudBlobDirectory familyKidsSubDirectory = photoDirectory.GetDirectoryReference("family/kids"); //combination
CloudBlockBlob blob = familyKidsSubDirectory.GetBlockBlobReference("kids-02.jpg");
I should point out that you can either step through the superficial structure one hierarchy at a time or combine them as in “family/kids”. Using the container ListBlobs method on say a CloudBlobDirectory for just “family” would show us both the “kids” and “relatives”.
This would be a good time to point out that utilizing a a method such as ListBlobs on a CloudBlobDirectory is going to be showing an IEnumerable<IListBlobItem>, but in this case is not providing a list of individual metadata about actual blobs, but about the folder structure.
Tip: It is important to note that Azure Blob Storage was not created with a hierarchical structure in mind. That being said, we generally will find ourselves in trouble when we attempt to make something do something that was not its original purpose. I would advise making use of containers as that hard boundary for grouping blobs by their relativity. Because at the end of the day, the superficial hierarchical folder structure is simply in the naming of the blob.
Blob Snapshots (Backups)
Azure Blob Storage provides the means for creating backups of blobs in the form of taking a snapshot. Snapshots are read-only copies of a blob at a specific time.
CloudBlobContainer blobContainer = _client.GetContainerReference(containerName);
CloudBlockBlob blob = blobContainer.GetBlockBlobReference(blobName);
blob.CreateSnapshot();
It’s a good time to point out that in allot of these Storage Client SDK methods that we have looked at in this article, allow for providing optional parameters. I have opted to keep this simple and look at the default use cases for most of them. Take for example, CreateSnapshot which also takes a collection object of string key/value pair, such as a dictionary for specifying metadata for a blob snapshot at the time of creation.
As pointed out as before, creating snapshots creates a small overhead to the act of deleting a blob if snapshots exists. Attempting to delete the above blob
blob.Delete()
Would throw an HTTP 409 Conflict status code. Therefore, in order to delete the snapshot we would need to use the DeleteSnapshotsOption enumeration, IncludeSnapshots or None in order to delete the blob (None will throw an error if a snapshot does exists):
//will delete the blob and any associated snapshots
blob.Delete(DeleteSnapshotsOption.IncludeSnapshots);
We can delete only the snapshots by using the DeleteSnapshots options. The CreateSnapshot returns a blob reference to the snapshot. This snapshot has a property Time that will return when the snapshot was taken. Using this Time as well as a reference to the snapshot, you can replace the actual blob.
Where Am I?
Working with the Azure Storage Client SDK we have been working with containers and blobs by acquiring references and interfacing with container and blob objects. But you have to remember that the provided Azure API is a REST API and under the covers, the Storage Client SDK is handling making those HTTP/HTTPS requests to Azure. With that being said, the one aspect of all storage resources that we have been shield from by the Storage Client SDK is it’s resource location.
One of the most important aspects of the container and blob is its associated storage URI. Containers and Blobs have both a primary and secondary storage URI that defines where the blob or container resource can be found and retrieved. In addition, both containers and blobs have a URI property that only returns the primary location URI.
At the beginning of this article we talked about the concept of namespaces and primarily focused on the primary namespace involving the storage account. The container and blob primary and secondary URI is made up of the storage account namespace and its own relative address.
While we have mainly been setting up containers, uploading, downloading and manipulating blobs, the use of their URI really comes into play when a consumer, consumes the storage resource outside the scope of the Storage Client SDK such as displaying an image on a webpage or an interoperation by a third party application just to name a couple of the infinite scenarios.
Asynchronous Operations
When looking through the CloudBlobContainer and CloudBlockBlob available methods, you will be inundated with a slew of different options for the same operation. However, a vast majority are to support the older asynchronous programming model (APM) with their Begin… and End…operation for every operation that supports asynchronous execution.
In regards to utilizing the Asynchronous operations that the Storage Client SDK provides, the newer task-based asynchronous pattern (TAP) based methods are going to be the asynchronous methods you will want to leverage. Following the TAP convention, these will be methods ending in …Async such as UploadFromFileAsync. The swath of asynchronous methods that you see that support other asynchronous patterns are to support backward compatibility for the most part.
Since this is not an article on Asynchronous programming, I will leave you with a couple resources for working with Tasks such as the MSDN page on TAP and working with aysnc and await keywords.
Concurrency
When we are dealing with multi-tenant applications that paint a high probability scenario where the same data could be updated simultaneously by different users, we need a way to manage those concurrent updates. Azure Blob Storage provides two concurrency control mechanisms for doing just that:
- Optimistic Concurrency (via the ETag property)
- Pessimistic Concurrency (via leases)
Optimistic Concurrency
In an optimistic concurrency model, resources are not locked and inaccessible to the clients. The system will assume that though conflicts are possible, they will be rare. Instead of locking a resource ever time it is in use, the system will look for indicators that multiple tenants actually did attempt to update the same resource at the same time. Azure Blob Storage provides a optimistic concurrency control through the ETag property. This is available on both the blob as well as the container.
Every time an update is made to a blob or container you can see this value increase. Essentially, if an update is attempted against a container or blob that is out of order it will be rejected and an exception will be thrown.
We can utilize this concurrency control by providing an AccessCondition object on our update attempt. You will find a vast majority of update operations in the Storage Client SDK has an optional AccessCondition parameter.
CloudBlockBlob blob = BlobContainer.GetBlockBlobReference("etag-example.jpg");
AccessCondition accessConditiion = new AccessCondition
{
  IfMatchETag = blob.Properties.ETag
};

blob.UploadFromFile(@"C:\Azure\Demo\new-etag-example.jpg",
FileMode.Open, accessConditiion);
We are setting the condition in which a successful update can occur. There are other AccessCondition properties that allow you to further control a success update as well. If a failed attempt has occurred, a 314 Not Modified HTTP Status code will be returned.
Pessimistic Concurrency
Pessimistic Concurrency is called pessimistic because it assumes the worst case. It assumes that two tenants will attempt to update the same resource at the same time. Therefore it will allow a lock to be placed on the resource by the first tenant, barring all further updates by other tenants.
Azure Storage’s form of Pessimistic Concurrency is through the form of Leases. Both containers and blobs offer lease options. There is a difference between both leases where container leases are restricted to delete operations while blob leases are for both write and delete operations.
Container Leases
These container leases are strictly delete leases to ensure that the container is not deleted until either the specified length of time designated when the lease was obtained has expired or the lease has been released (not just broken). The time span that can be set for a lease is either infinitely or 15-60 seconds. The only caveat is if the lease ID is provided with the delete request.
Guid leaseId = Guid.NewGuid();
blobContainer.AcquireLease(new TimeSpan(0, 0, 0, 60), leaseId.ToString());

//will throw an StorageException with a 412 error
blobContainer.Delete();
But you can either pass in an AccessCondition object with the specified Lease ID or release the lease before calling delete
blobContainer.Release();
OR
AccessCondition accessCondition = new AccessCondition { LeaseId = leaseId.ToString()};

blobContainer.Delete(accessCondition);
We have seen how to Acquire and Release leases, but you can also Change, Renew and Break container leases. As a quick explanation:
- ChangeLease – will allow you to change the ID of the lease in question. This is useful when you want to transfer a lease to another party but maintain control over the lease
- RenewLease – does exactly as you would expect and allows you to renew a current lease. In previous versions, this was able to be conducted on expired leases.
- ReleaseLease – This allows the containers current lease to be released and the container to be free for another client to acquire an exclusive lease. It is important to know the difference between ReleaseLease and BreakLease. Where BreakLease ends the lease, but ensures that another lease cannot be acquired by another client on the container until the current lease time period has expired.
Blob Leases
Blob leases establish a lock on blobs for both write and delete operations. The time span that can be set for a lease is either infinitely or 15-60 seconds just as with Container leases. This is the primary difference between container and blob leases where container leases are for locks strictly on delete operations. Because of the additional write lock that blob leases manage, an overhead is put on a number of write related operations requiring the Lease ID. These operations include:
- blob upload operations
- Setting blob Metadata
- Setting blob properties
- deleting blobs
- copying blobs
Therefore, acquiring a lease on an existing blob and attempting to update will result in a returned 412 HTTP status code:
CloudBlockBlob blob = BlobContainer.GetBlockBlobReference(blobName);
Guid leaseId = Guid.NewGuid();

//Specifying a 45 second lease time before the lease is released for another consumer
blob.AcquireLease(new TimeSpan(0, 0, 45), leaseId.ToString());

//Returns a 412 HTTP status code: No lease ID was specified in the request nor has the time period expired.
blob.UploadFromFile(path-to-file, FileMode.Open);
You will need to provide an AccessCondition object specifying the current lease ID:
blob.UploadFromFile(path-to-file, FileMode.Open, new AccessCondition{LeaseId = leaseId.ToString()});
This same procedure would apply to all the above listed write operations when a lease exists on a blob. As far as delete locks by the blob lease, you can reference the «Container Leases” section under Concurrency for deleting blobs that have an active lease as the same mechanisms apply, but only within the context of a blob.
Tip: A gotcha that you need to be aware of regarding leases for both blobs and containers, they have a limited range of time that you can set for the lease as specified earlier and if an attempt to set a timespan that is outside of the 15 – 60 seconds (other than infinite), the service will return a 400 Bad Request HTTP status code. Although, the status code makes sense it still can be a bit vague as to “what” part of the request was bad (incorrect).
Security
Azure Storage security comes in a few different forms. But at the end of the day most of it would boil down to access control. The first form of security which is the least complex is the simplicity of setting the Blob Container public access permissions.
Container Permissions
You will have noticed that in the CreateIfNotExists operation for containers,we are passing a BlobContainerPublicAccessType enumeration. This is the public access setting for the container itself.
var blobContainer = _client.GetContainerReference(containerName);
blobContainer.CreateIfNotExists(BlobContainerPublicAccessType.Container);
The different types breaks down as follows:
- Off – No public access and only the owner (someone with access keys) can read resources from the container
- Blob – Public access to a specific blob if a anonymous client knows the direct Blob URI
- Container – Specifies anonymous clients can retrieve information on the resources of the container, utilizing container methods such as ListBlobs to retrieve the containers resources.
That’s all there is to it. The only other piece of information would be to use the Principle of Least Privilege and provide the minimal access to your container as possible for consumers to be able to operate.
Shared Access Signatures
We have already discussed that in order to access blob storage resources we need to have access to the Storage Access Keys. So if we were to provide additional clients direct access to blob storage resources, they would also need access to our Storage Access Keys. Yes, the same Storage Access Keys we defined earlier as “Keys to the Kingdom”. So why on earth would we want to do that? We don’t give the keys to our house when someone asks for our home Address do we? This is where Shared Access Signatures can make it possible to provide clients access to blob storage resources without giving out our Storage Access Keys.
A Shared Access Signature (SAS) provide a granular level of access control to specific resources. Shared Access Signatures allow you to specify what access rights a consumer has for a specific resource for a given amount time. They can be created for containers, blobs, tables and queues. But, in this article we are going to strictly look at SAS’s for Blob Storage. In the next up coming “Be Sure with Azure” on Table Storage, we’ll look at how to utilize Shared Access Signatures for tables.
So what is a Shared Access Signature? Simply put, a SAS is a query string with a set of parameters that specifies the access rights and length of access. This query string accompanies a blob storage resource’s URI. As we have already discussed, all blob storage resources (containers and blobs) have an associated primary and secondary URI for directly accessing that resources. Therefore, when the generated SAS is appended to the URI of a specific resources and together provided to a requesting consumer, the consumer will only have those access rights for the specified time that is specified by the SAS.
A Blob Storage Shared Access Signature has 4 constraints:
- The Storage Resource – the type of resource (container, blob, table, queue)
- Start Time – the start time of SAS
- Expiry Time – how long is the SAS good for
- Permissions – the allowed operations (read, write, delete, list)
How It Works
Before getting into how do we create one, lets start by breaking down a generated SAS into its components. Then we’ll look at what is required for generating our own SAS, blob storage SAS limitations and what problems we need to be aware of.
Example of a URI with a Shared Access Signature:
|
blob URI |
https://MyAccount.blob.core.windows.net/demo/photo1.jpg | The address to the blob resource. |
| sv | sv=2014-02-14 | Storage Version (required): that specifies what version to use of the service. |
| sr | sr=b | Signed Resource (required): specifies what type of resource – in this case b for blob. |
| st | st=2014-08-26T13%3A58%3A15Z | Start Time (optional): ISO 8061 Format: The date time the SAS begins based on UTC time. Recommended to be avoided if possible due to problems with time synchronization of remote clients. |
| se | se=2014-08-26T13%3A58%3A25Z | Signed Expiry (required): ISO 8061 Format: The date the SAS expires based on UTC time – when combined with the start date OR implied when not specified, defines the valid time period. |
| sp | sp=rw | Signed Permissions: (required) The defined access control permissions for this resource. In this case, read and write permissions are granted |
| sig | sig=E0YB9qQBwtDGzX0KGgrrJf%2F2QM7cHgx7heoTtQ55Cwo%3D | Signature: The signature is an HMAC computed over the string-to-sign and key using the SHA256 algorithm, and then encoded using Base64 encoding.This signature is what Azure uses to authenticate the provide SAS. |
When a request to a blob storage resources comes in with an accompanied Shared Access Signature, the first thing that Azure will do is validate the authenticity of the supplied query parameters to ensure they have not been tampered with. This is done by computing the HMAC-SHA256 hash that is generated using the Azure Storage Access Key with the supplied parameters as the message and verify it matches the provided sig parameter. Upon success, it will then validate the start time (if provided) and that the SAS has not expired as well as the permissions. If all validations check out, the requestor will be granted access to the specified resource in the URI assuming the requested operation matches the supplied permissions.
Note: In order to take advantage of the security imposed by the Shared Access Signature, we have to limit/restrict the access given to the storage access resource whether that is a container or blob. In other words, don’t set the Container’s BlobContainerPublicAccessType to Container or Blob or any consumer will be able to access a blob resource. See Shared Access Signatures Best Practices below for more information.
Generating a SAS
There is allot more to be said about working with Shared Access Signatures and we’ll get to that, but for now lets look at creating our own for use through the Storage Client SDK. We’ll do two things here, generate a Shared Access Policy to specify the access rights and expiry time and generate the SAS by providing the policy:
SharedAccessBlobPolicy policy = new SharedAccessBlobPolicy()
{
  Permissions = SharedAccessBlobPermissions.Read | SharedAccessBlobPermissions.Write,
  SharedAccessStartTime = DateTime.UtcNow.AddDays(1),
  SharedAccessExpiryTime = DateTime.UtcNow.AddDays(1).AddMinutes(10),
};

string sas = blob.GetSharedAccessSignature(policy);
In this specific example, we are generating a SAS on a specific Blob resource, by creating a policy that specifies read and write only permissions with a start time of 1 day in the future, lasting for 10 minutes. This returned SAS string can then be appended to the Blob URI that when supplied to a consumer can govern their access to the resource.
Tip: Don’t specify a start time unless it is absolutely required due to problems with clients and time clock synchronization issues. This example wanted to provide the possible available policy settings. See Shared Access Signatures Best Practices for more information.
For Containers and Blobs, the following are the available access rights that can be defined:
Containers:
- Read
- Write
- List
- *Delete – note, this is allowing for any blob to be deleted. You can’t provide access rights to delete the container.
Blobs:
- Read
- Write
- Delete
This is a simple example of how to utilize the Storage Client SDK operations to generate a SAS. But there is allot more to think about when using SAS such as how do we revoke a generated SDK and managing the lifetime of a SAS.
Managing Shared Access Signatures Lifetime and Revocation
Up until now, we have been using what is called ad hoc Shared Access Signatures. This is when we define the policy at the time we generate the SAS. With ad hoc Shared Access Signatures, we have managed to provide access to blob storage resources without having to provide the Storage Access Keys.
You might have observed that the HMAC-SHA256 hashed signature (query parameter: sig) that is generated to validated the authenticity of the provided query parameters uses the Azure Storage Access Key? So, you might be asking, what if we decided that we need to invalidate a SAS that had been handed out? You guessed it, we would need to regenerate the Storage Access Key that was used. Which also means that anything else that relies on that Access Key would also be invalidated immediately and need updating. With the exception of regenerating the Storage Access Key, our only other means of managing the SAS is by specifying very short expiration times.
Tip: It is always recommended to use short expiration periods for any generated Shared Access Signatures. This is one of the handful of Best Practice tips.
To prevent this from having to occur, Azure has the concept of a Stored Access Policies which the Shared Access Signatures are derived from when they are specified.
Stored Access Policies
In the previous ad hoc SAS, we generated the policy along with the SAS. Stored Access Policies are policies generated separate from any SAS and stored on the server. In regards to Azure Storage, it is the containers where the Stored Access Policies are associated and only a maximum of 5 policies can be stored at any given time. These policies can be viewed as templates which contain specific access rights and expiry times. Shared Access Signatures that are generated from specifying an existing policy, provide two noticeable benefits:
- Ease of revoking a generated Shared Access Signature without the need to regenerate Storage Access Keys
- Easily setup predefined access rights and expiry time periods
Once Stored Access Policies are in place, we can associated them with a Shared Access Signature by specifying the additional signedidentifier (si) query parameter:
| si | si=policy1 | (Optional) A unique value up to 64 characters in length that correlates to an access policy specified for the container. |
We can add Stored Access Policies through the Storage Client SDK by setting the Permissions on a container which contains a collection of SharedAccessBlobPolicies:
CloudBlobContainer container = _client.GetContainerReference(containerName);

BlobContainerPermissions permissions = new BlobContainerPermissions();

permissions.SharedAccessPolicies.Add("policy1", new SharedAccessBlobPolicy
{
  Permissions = SharedAccessBlobPermissions.Read,
  SharedAccessExpiryTime = DateTime.UtcNow.AddDays(1)
});

container.GetPermissions();
container.SetPermissions(permissions);
We can then incorporate this policy into a SAS generation
//Notice we are ommitting the details of the SharedAccessBlobPolicy
blob.GetSharedAccessSignature(new SharedAccessBlobPolicy(), "policy");
Notice that we have omitted the SharedAccessBlobPolicy as this is required when specifying a Stored Access Policy. Then, in the situation where we might need to revoke the generated Shared Access Signature, we only need to do one of the following in order to revoke any issued Shared Access Signature:
- Change the identifier (name) of the policy
- Remove the Stored Access Policy (in this case Policy1) from the container
- Provide a new list of Stored Access Policies that retains a policy with the same name but different parameters.
So, based on everything we have seen, when a consumer attempts to obtain a blob resource with a valid SAS they can proceed with operations that align with whatever rights have been granted by the SAS. But, in the case where a SAS is no longer valid due to expiration we can see an example of what this might look like attempting to acquire the resource.

Shared Access Signatures Best Practices
The following are is a list of what I deemed the most important and security related Shared Access Signatures best practices documented by Microsoft Azure.
- HTTPSOnly! You might have noticed that in the creation of the Stored Access Policies or the Shared Access Signatures did we once mention an association with any client, user or application. This is because they allow any consumer that possess the Shared Access Signature to have access to the resource. Therefore, the #1 or at least top 3 most important best practice would be the importance of using HTTPS for any creation and communication of the SAS.
- Adhere to the Principle of Least Privilege! This is only hinted at in the documentation, so I thought I would put it at the forefront. What I would consider probably the 2nd most important security best practices for using SAS, only issue the minimal credentials for the least amount of resources to a client that is required for them to perform the necessary operations.
- Use Policies! If at all possible use Stored Access Policies. Policies allow for the creation of revocable Shared Access Signatures and avoid the undesirable need to regenerate Storage Access Keys as a way to revoke ad hoc Shared Access Signatures.
- Issue short termed (near-term) policies! In either the case where you are issuing ad-hoc SAS or a revocable SAS has been compromised, policies with short term expirations minimize the exposed data’s vulnerability.
- Validate data written using SAS. When a client application writes data to your storage account, keep in mind that there can be problems with that data. If your application requires that that data be validated or authorized before it is ready to use, you should perform this validation after the data is written and before it is used by your application. This practice also protects against corrupt or malicious data being written to your account, either by a user who properly acquired the SAS, or by a user exploiting a leaked SAS.
- Don’t always use SAS. Not all operations against your Blob Storage account carry the same weight of importance. Therefore, don’t always assume that a SAS is the perfect fit for all situations. If the risks of an operation outweighs any of the SAS benefits its time to rethink the situation. Use a middle tier of your application to perform the necessary business rule validations, authentication, auditing and any further management processes. Finally, sometimes we tend to choose the harder path for no good reason, maybe a SAS is just adding unneeded overhead. Only you can judge the situation.
Managing/Access Tools
Finally, coming to the last part of what I feel is important to be aware of when working with Azure Blob Storage is utilizing one of the handful of Blob Storage Management tools. Some are free while others are not. These are not product reviews, but simply a way for you to be familiar with a few different Blob Storage management tools that are available. MSDN blog site posted a Windows Azure Storage Explorers (2014)page for listing out a number of management tools available that you can also use for seeing what is available out in the wild!
Azure Storage Explorer
This is a free open-source application for viewing and performing various operations on your Blob Storage resources. This will provide some of the basic operations such as read, delete and uploading and downloading of storage resources and creation of ad hoc Stored Access Policies.
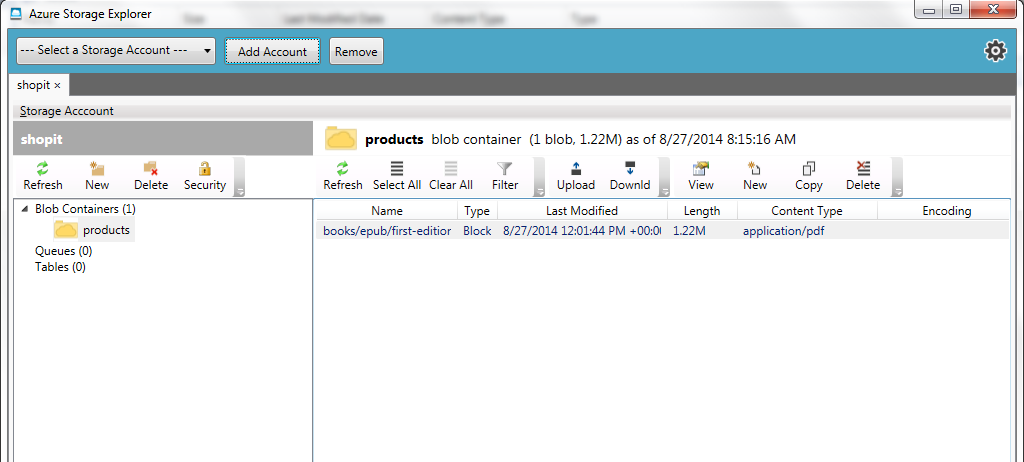
Azure Explorer
This is a very limited, free application by Cerebrata who provides Azure Explorer for performing some very rudimentary operations against your Azure Storage Account. Most of the limited operations include uploading, deleting, renaming and viewing containers and blobs. It is basically a teaser to their paid version Azure Management Studio.
Below you can see how Azure Explorer is displaying the hieratical structure like the blob we uploaded earlier using the “/” delimiter.

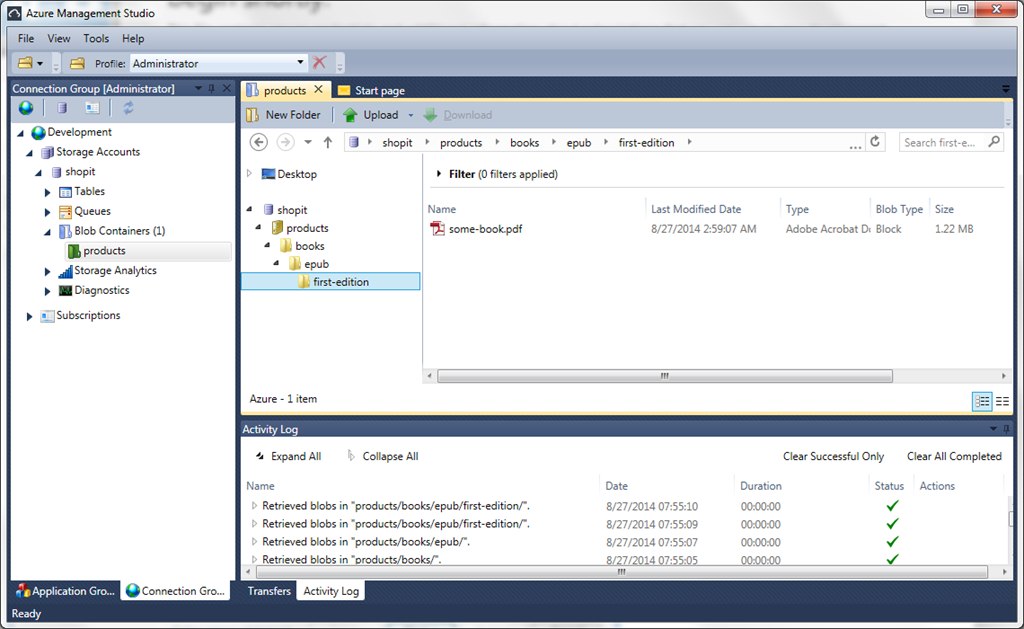
Azure Management Studio
Azure Management Studio and the Azure Explorer both are by Cerebrata. The Azure Management Studio is what Cerebrata rolled their paid version of Azure Explorer (Cloud Storage Studio) into. It comes with your full list of features for operating on your Azure Storage Account. These features include read, write, delete blob storage resources, creating and managing Stored Access Policies, managing properties and metadata on resources just to name a few.
Conclusion
We covered allot, from working with Blob Containers to Blob resources themselves to concurrency and asynchronous operations and a healthy dose of different security options that Azure provides out of the box. The intent was to provide more than just a quick how-to of Azure Blob Storage, but cover some of the areas less talked about, understand some of the gotchas and provide tips that might help working with Azure Blob Storage. That being said, it would take more than just a lengthy article to cover all the features and their variations. So, as you get underway with working with Azure Blob storage, take advantage of their documentation for all the available features. Stay tuned for the up coming next installment of “Be Sure with Azure” where we will look closely at a similar topic; Azure Table Storage.
«Be Sure With Azure (.NET): Blob Storage» first appeared on LockMeDown.com
References:
Blob Storage http://azure.microsoft.com/en-us/documentation/articles/storage-dotnet-how-to-use-blobs/?rnd=1
Azure Subscriptions & Service Limits/Quotas http://azure.microsoft.com/en-us/documentation/articles/azure-subscription-service-limits/?rnd=1
Shared Access Signatures:
http://msdn.microsoft.com/en-us/library/azure/jj721951.aspx
Storage Client Repository: https://github.com/Azure/azure-storage-net