Это пошаговое руководство основано на учебниках « Начало работы с аутентификацией в мобильных сервисах » и « Авторизация пользователей с помощью сценариев » с расширенными и обновленными снимками экрана для первых трех операций. Шаг 4 опирается на учебник Microsoft. Предварительные условия включают завершение приложения oakleaf-todo C # и установку Live SDK для Windows и Windows Phone , которая предоставляет набор элементов управления и API, которые позволяют приложениям интегрировать единый вход (SSO) с учетными записями Microsoft и получать доступ к информации из SkyDrive. , Hotmail и Windows Live Messenger для Windows Phone и Windows 8.
1) Регистрация приложения для Windows 8 в Центре разработчиков Live Connect
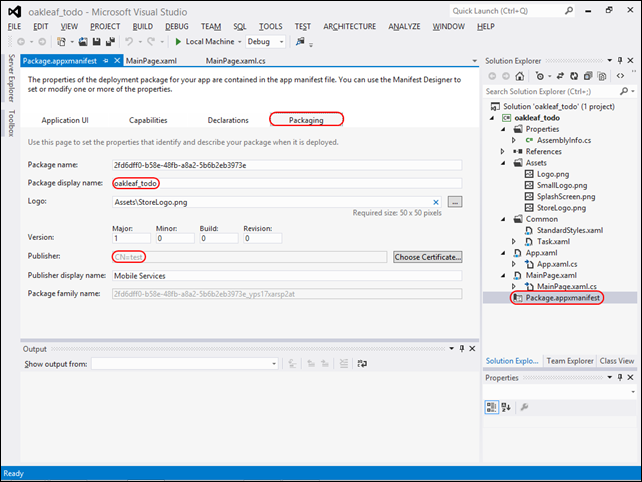
1-1. Откройте приложение TodoList в Visual Studio 2012 под управлением Windows 8, откройте обозреватель решений, выберите узел Package.appsmanifest и перейдите на вкладку «Упаковка»:
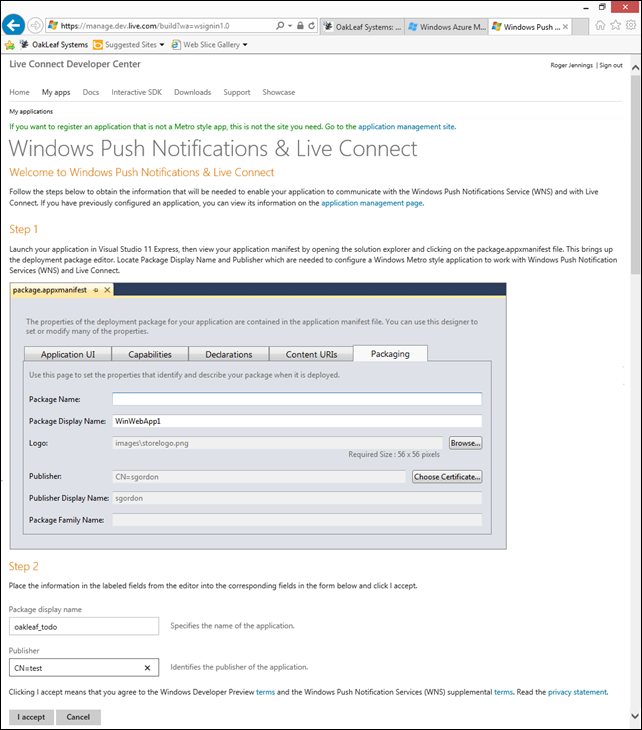
1-2. Запишите отображаемое имя пакета и значения издателя для регистрации приложения и перейдите на страницу Windows Push-уведомления и Live Connect , войдите в систему с идентификатором Windows Live, который вы использовали для создания приложения, и введите отображаемое имя пакета и издатель значения в текстовых полях:
Примечание . Предыдущий снимок экрана был отредактирован для уменьшения пробелов, но устаревший снимок из Video Studio не обновлялся.
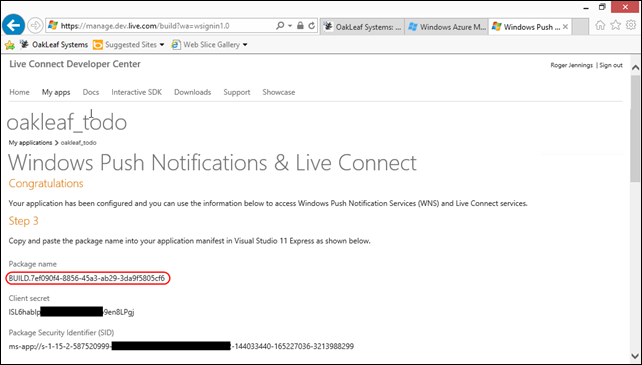
1-3. Нажмите кнопку «Я принимаю», чтобы настроить манифест приложения и сгенерировать значения «Имя пакета», «Секрет клиента» и «Идентификатор пакета»:
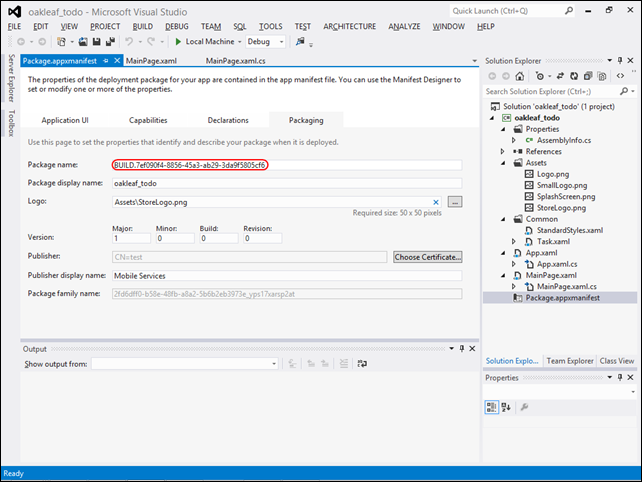
1-4. Скопируйте значение имени пакета в буфер обмена, вернитесь в Visual Studio и вставьте значение имени пакета в одноименное текстовое поле:
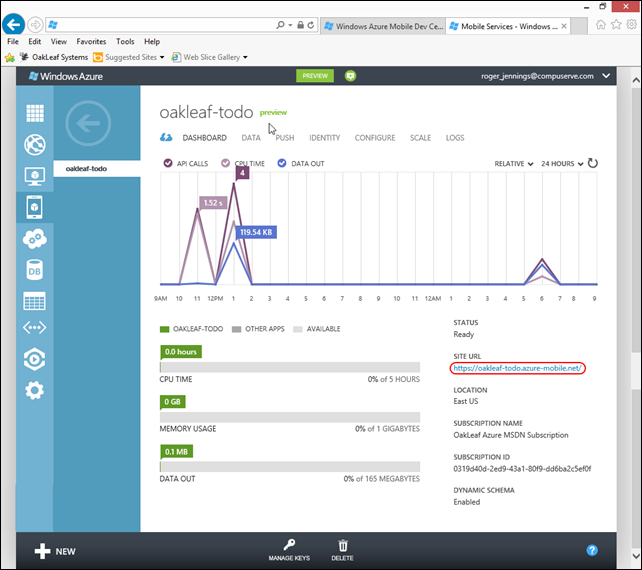
1-5. Нажмите Ctrl + s, чтобы сохранить значение, войдите в портал управления Windows Azure , щелкните значок «Мобильные службы» в рамке навигации, щелкните свое приложение, чтобы открыть страницу управления, и нажмите кнопку «Панель инструментов»:
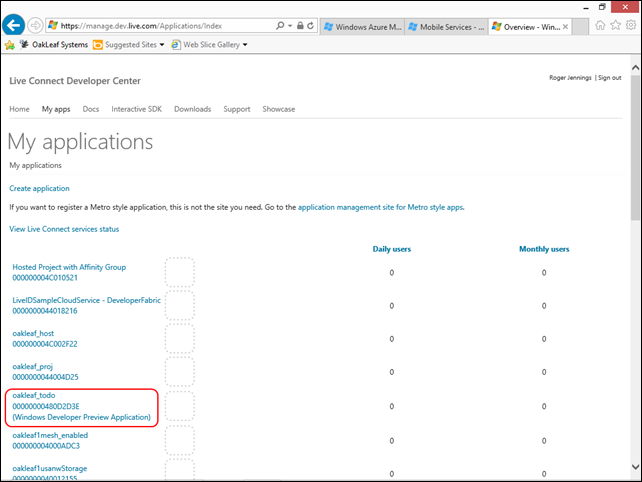
1-6. Запишите URL-адрес сайта и перейдите на панель « Мои приложения» Центра разработки Live Connect :
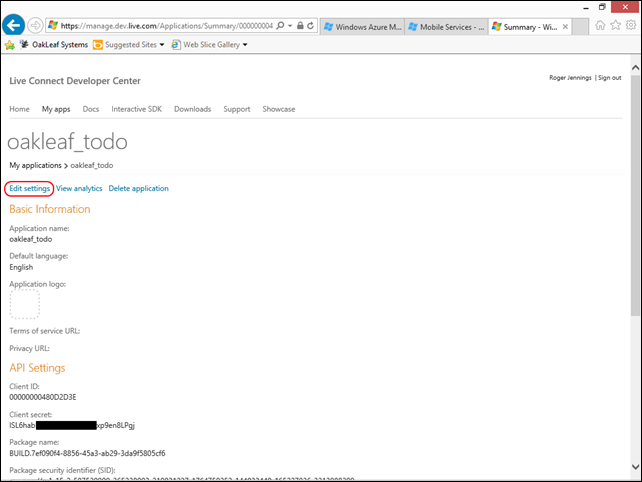
1-7. Щелкните по элементу приложения ( для этого примера oakleaf_todo ), чтобы отобразить его страницу сведений
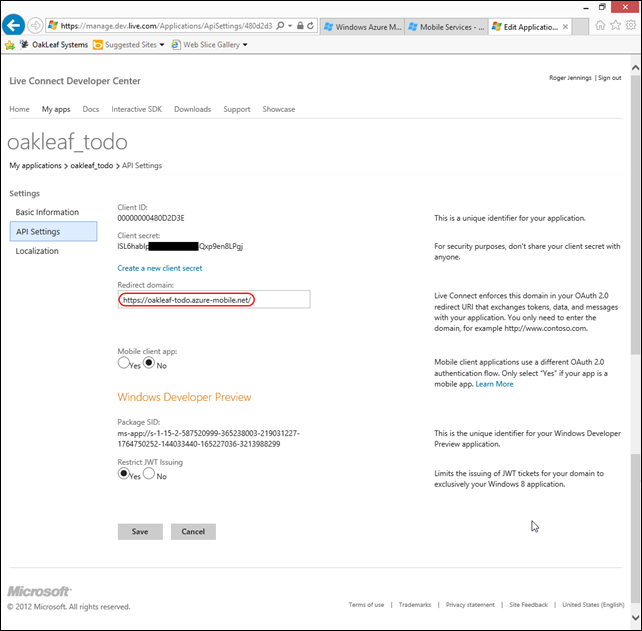
1-8. Нажмите кнопки «Изменить параметры» и «Параметры API», чтобы открыть страницу «Изменить параметры API» и вставить значение URL-адреса сайта, начиная с шага 5, в текстовом поле «Перенаправить домен»:
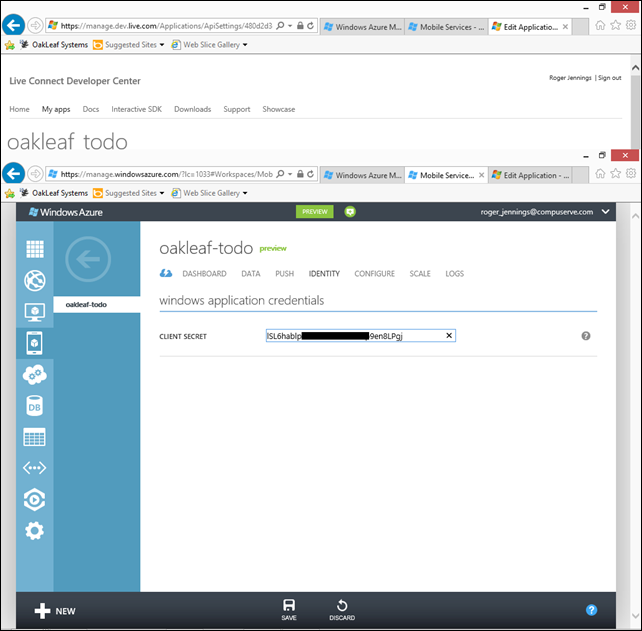
1-9. Примите оставшиеся значения по умолчанию и нажмите кнопку Сохранить, чтобы сохранить изменения, вернитесь на портал управления, нажмите кнопку Identity и вставьте значение Client Secret в текстовое поле:
1-10. Нажмите «Сохранить» и «Да», чтобы сохранить и подтвердить изменение и завершить настройку мобильной службы и клиентского приложения для Live Connect.
2) Ограничение разрешений для аутентифицированных пользователей
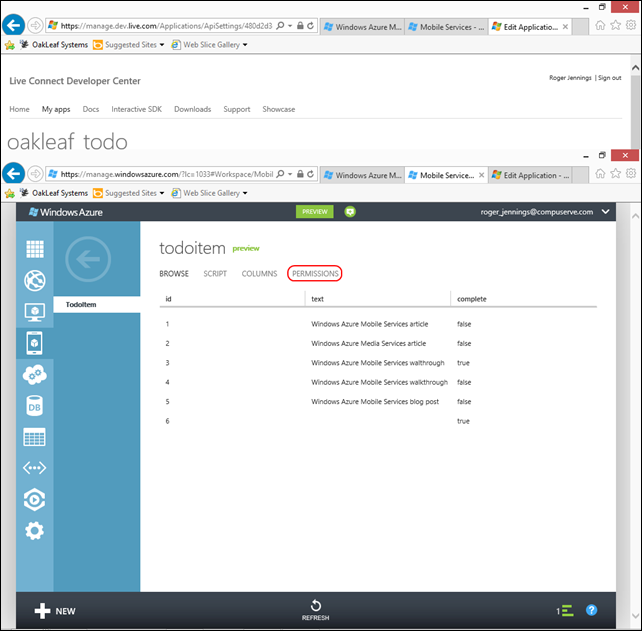
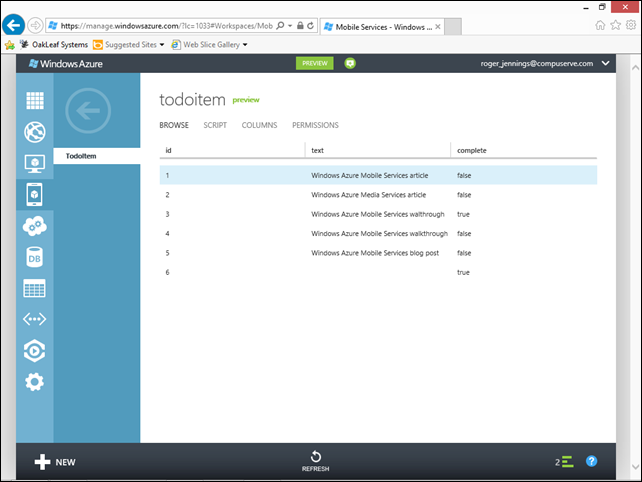
2-1. Вернитесь на портал управления с выбранным приложением, перейдите на вкладку «Данные» и выберите таблицу ToDoItem, в которой отображаются сохраненные данные задачи:
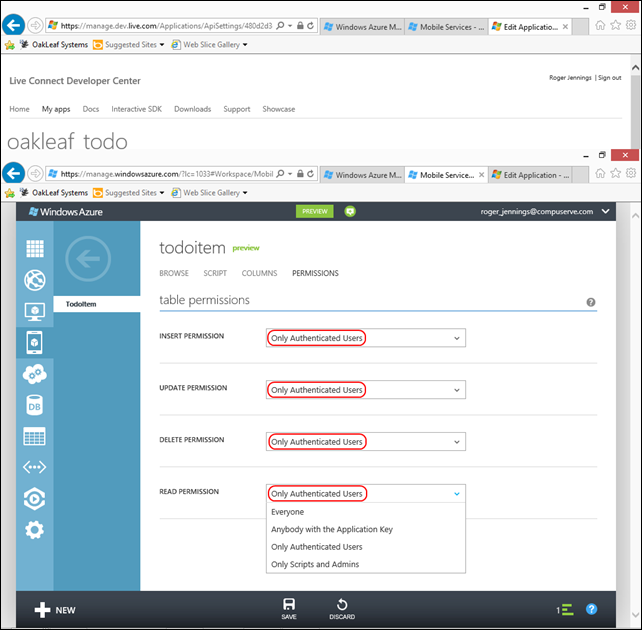
2-2. Перейдите на вкладку «Полномочия», чтобы открыть страницу «Полномочия таблицы», и измените все четыре разрешения с «Любой пользователь по умолчанию с ключом приложения» на «Только аутентифицированные пользователи»:
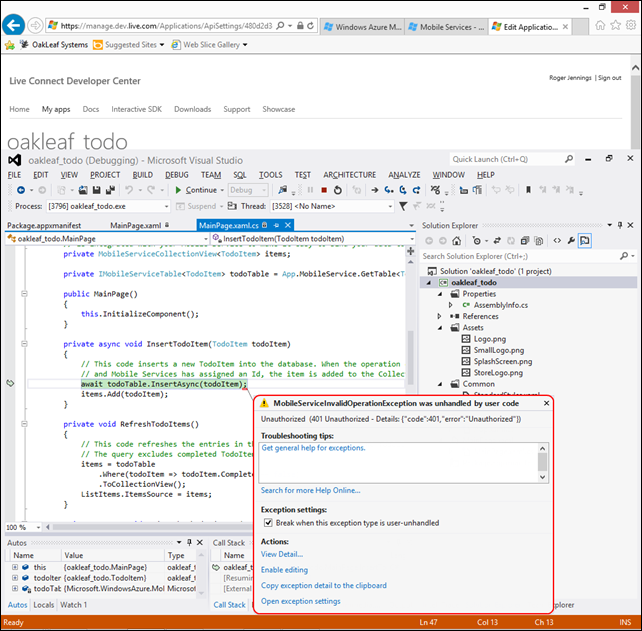
2-3. Нажмите кнопку «Сохранить», чтобы сохранить измененные разрешения, вернитесь в Visual Studio, нажмите клавишу F5, чтобы создать и запустить приложение, и нажмите кнопку «Сохранить», чтобы попытаться добавить пустой элемент todo, который генерирует необработанный HTTP 401 Unauthorized runtime error:
Примечание . Исключение 201 Unauthorized подтверждает, что аутентификация пользователя на внутреннем сервере работает.
2-4. Нажмите Shift + F5, чтобы закрыть приложение.
3) Добавление кода аутентификации во внешнее приложение
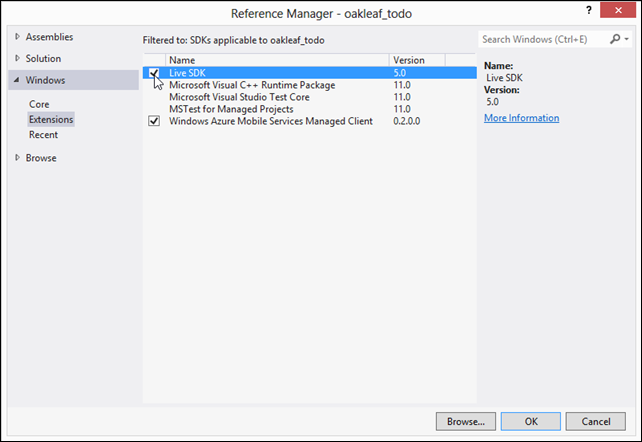
3-1. После загрузки и установки Live SDK для Windows и Windows Phone выберите «Проект», «Добавить ссылку», чтобы открыть диалоговое окно «Менеджер ссылок», выберите элемент Live SDK и отметьте его флажок:
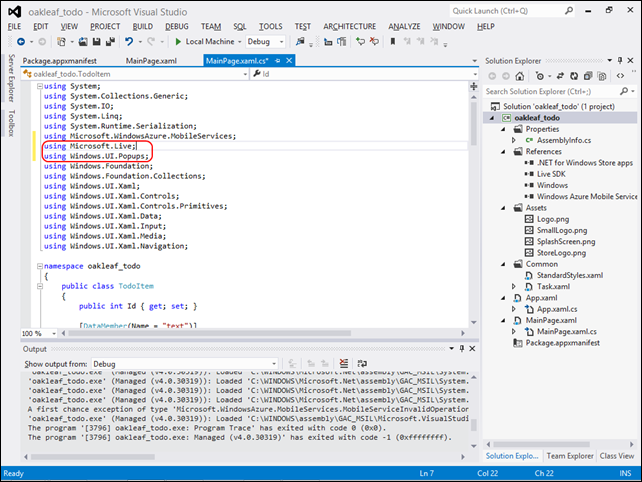
3-2. Нажмите кнопку ОК, чтобы добавить ссылку, откройте файл mainpage.xaml.cs и добавьте следующие два оператора using в верхней части страницы:
using Microsoft.Live;
using Windows.UI.Popups;
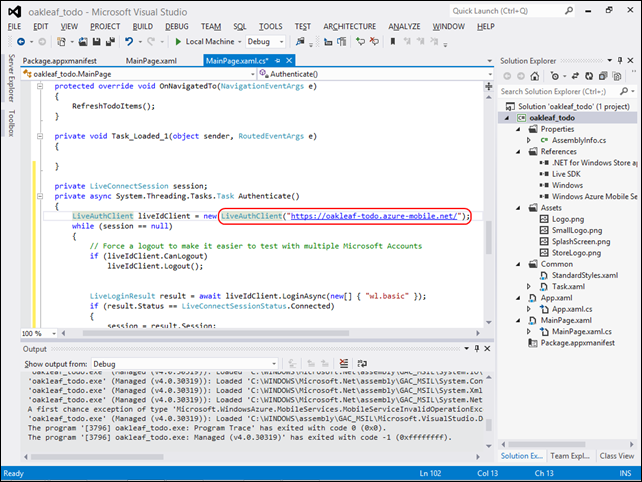
3-3. Добавьте следующий код в конец класса Main Page, чтобы создать переменную-член для хранения текущего сеанса Live Connect и метод для обработки процесса аутентификации:
private LiveConnectSession session;
private async System.Threading.Tasks.Task Authenticate()
{
    LiveAuthClient liveIdClient = new LiveAuthClient("<< INSERT REDIRECT DOMAIN HERE >>");


while (session == null)
{
    // Force a logout to make it easier to test with multiple Microsoft Accounts
    if (liveIdClient.CanLogout)
        liveIdClient.Logout();


    LiveLoginResult result = await liveIdClient.LoginAsync(new[] { "wl.basic" });
    if (result.Status == LiveConnectSessionStatus.Connected)
    {
        session = result.Session;
        LiveConnectClient client = new LiveConnectClient(result.Session);
        LiveOperationResult meResult = await client.GetAsync("me");
        MobileServiceUser loginResult = await App.MobileService.LoginAsync(result.Session.AuthenticationToken);


        string title = string.Format("Welcome {0}!", meResult.Result["first_name"]);
        var message = string.Format("You are now logged in - {0}", loginResult.UserId);
        var dialog = new MessageDialog(message, title);
        dialog.Commands.Add(new UICommand("OK"));
        await dialog.ShowAsync();
    }
    else
    {
        session = null;
        var dialog = new MessageDialog("You must log in.", "Login Required");
        dialog.Commands.Add(new UICommand("OK"));
        await dialog.ShowAsync();
    }
}
}
Note: The preceding code forces a logout, when possible, to make sure that the user is prompted for credentials each time the application runs. This makes it easier to test the application with different Microsoft Accounts to ensure that the authentication is working correctly. This mechanism will only work if the logged in user does not have a connected Microsoft account.
Replace the << INSERT REDIRECT DOMAIN HERE >> string from the previous step with the redirect domain that was specified when setting up the app in Live Connect, in the format https://service-name.azure-mobile.net/:
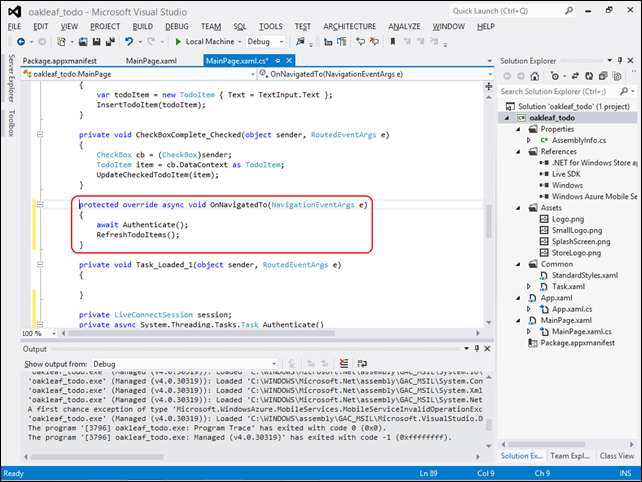
3-4. Replace the existing OnNavigatedTo event handler with the handler that calls the new Authenticate method:
protected override async void OnNavigatedTo(NavigationEventArgs e)
{
    await Authenticate();
    RefreshTodoItems();
}
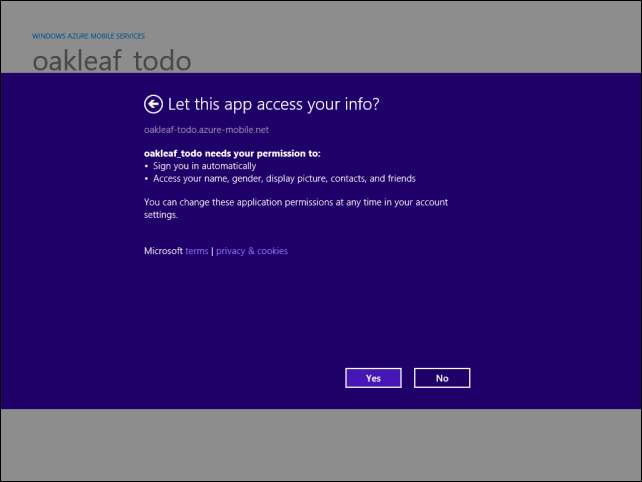
3-5. Press the F5 key to run the app and request permission to use your current credentials:
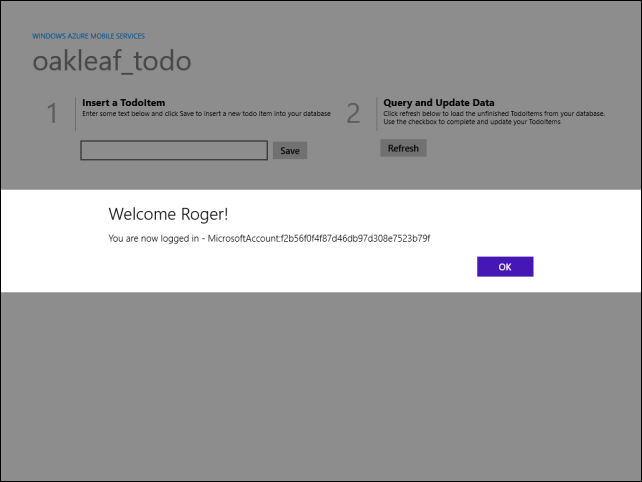
3-6. Click yes to sign into Live Connect with your Microsoft Account and receive this welcome message:
3-7. Click OK to dismiss the popup message. At this point, you are authenticated and can add and query todo items.
4) Authorizing Users with Scripts
The Todo sample app reads and inserts data, so you must register scripts for these operations against the TodoItem table.
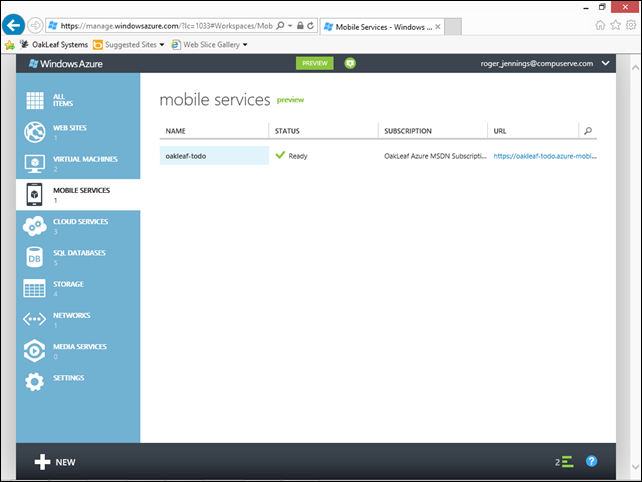
4-1. Log on to the Windows Azure Management Portal, click the Mobile Services node in the navigation pane, and click your app.
4-2 Click the Data tab and click the TodoItem table:
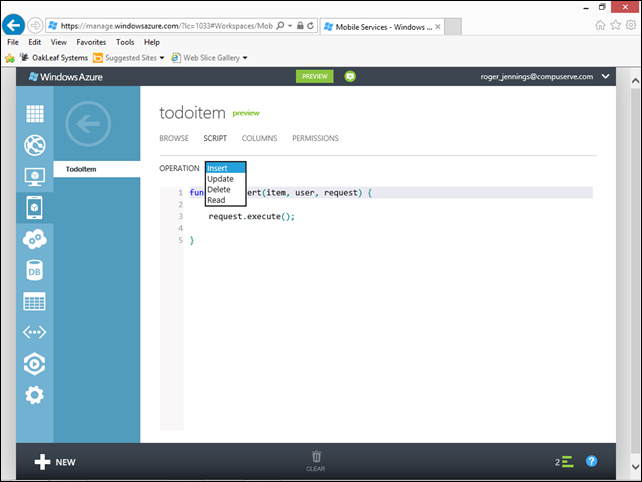
4-3. Click the Script tab and accept the default Insert operation:
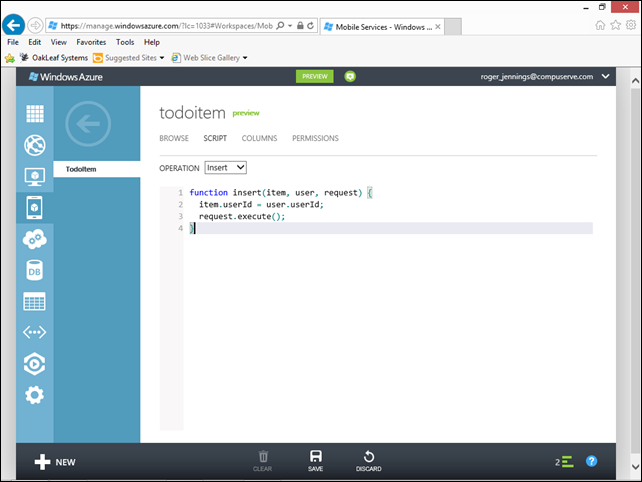
4-4. Replace the default script with the following function:
function insert(item, user, request) {
  item.userId = user.userId;
  request.execute();
}
This script adds a userId value to the item, which is the user ID of the authenticated user, before it is inserted into the TodoItem table.
Note: Dynamic Schema must be enabled the first time that this insert script runs. With dynamic schema enabled, Mobile Services automatically adds the userId column to the TodoItem table on the first execution. Dynamic schema is enabled by default for a new mobile service, and it should be disabled before the app is published to the Windows Store.
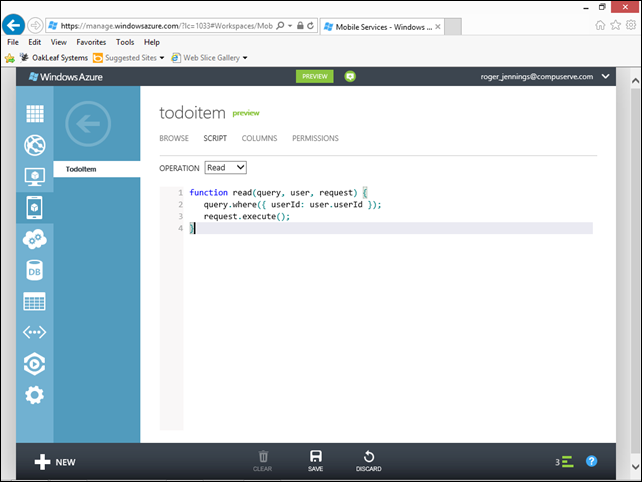
4-5. Click save and repeat steps 4-3 and 4-4 to replace the existing Read operation with the following function:
function read(query, user, request) {
   query.where({ userId: user.userId });
   request.execute();
}
This script filters the returned TodoItem objects so that each user only receives the items that they inserted.
4-6. Click Save to save the changes to the Read function.
Test the app
4-7. In Visual Studio 2012 Express or higher, open the project that you modified earlier in this walkthrough.
4-8. Press the F5 key to build and run the app, sign into Live Connect with your Live ID or click OK to acknowledge the Welcome page, and click the Refresh button:
Notice that this time, although there are items already in the TodoItem table from preview tutorials, no items are returned. This happens because previous items were inserted without the userId column and now have null userId values.
4-9. In the app, enter text in the Insert a TodoItem text box and click Save.
This inserts both the text and the userId in the TodoItem table in the mobile service. Because the new item has the correct userId value, it is returned by the mobile service and displayed in the second column.
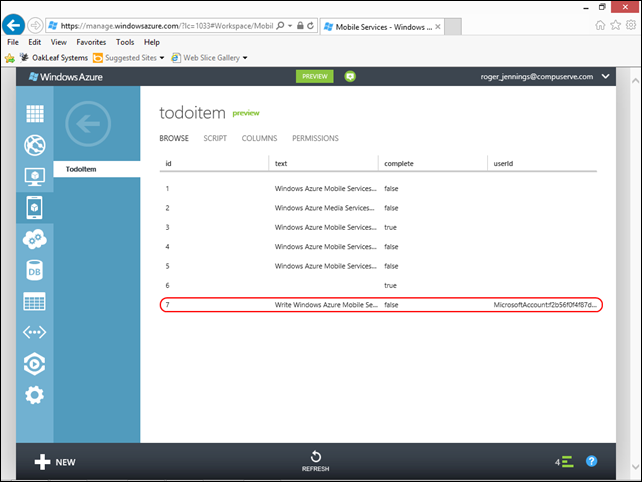
4-10. Back in the todoitem table in the Management Portal, click Browse and verify that the newly added item how has an associated userId value:
4-11. (Optional) If you have an additional Live ID, you can verify that users can only see their own data by closing the app (Alt+F4), logging out of your current Live ID and then running it again. When the login credentials dialog is displayed, enter a different Microsoft account, and then verify that the items entered under the previous account are not displayed.
