В этой главе мы узнаем об обработке дерева в RichFaces. RichFaces предоставляет все необходимые компоненты для создания и управления деревом.
<Богатые: TreeNode>
Этот тег используется для создания иерархического дерева. Каждый узел внутри <treeNode> будет дочерним узлом дерева. Этот тег будет использоваться с другим тегом с именем <rich: tree>. Все переменные экземпляра, которые мы используем для создания дерева, должны реализовывать любой из этих трех интерфейсов — org.richfaces.model.TreeNode, org.richfaces.model.TreeDataModel и javax.swing.tree.TreeNode .
В следующем примере мы будем заполнять дерево с помощью тега <rich: treeNode> из серверной части.
<?xml version = "1.0" encoding = "UTF-8"?>
<!DOCTYPE html>
<html xmlns = "http://www.w3.org/1999/xhtml"
   xmlns:h = "http://java.sun.com/jsf/html"
   xmlns:f = "http://java.sun.com/jsf/core"
   xmlns:ui = "http://java.sun.com/jsf/facelets"
   xmlns:a4j = "http://richfaces.org/a4j"
   xmlns:rich = "http://richfaces.org/rich">

   <h:head>
      <title>TreeNode Example</title>
      <meta name = "viewport" content = "width = device-width, initial-scale = 1.0"/>
   </h:head>

   <h:body>
      <h:form>
         <rich:tree value = "#{tree.populateNode}" var = "tree">
            <rich:treeNode>
               <rich:treeModelRecursiveAdaptor>
               </rich:treeModelRecursiveAdaptor>
               <h:outputText value = "#{tree.data}" />
            </rich:treeNode>
         </rich:tree>
      </h:form>
   </h:body>

</html>
Ниже приведен связанный Java-класс, который реализует интерфейс TreeNodeImpl .
import javax.faces.bean.ManagedBean;
import javax.faces.bean.RequestScoped;
import org.richfaces.model.TreeNodeImpl;

@ManagedBean
@RequestScoped

public class Tree extends TreeNodeImpl {
   private Tree stationRoot;
   private Tree populateNode;
   private Object data;

   public Tree() {
      super();
   }
   public Tree(boolean leaf, Object data) {
      super(leaf);
      this.data = data;
   }
   public Object getData() {
      return data;
   }
   public Tree getPopulateNode() {
      if (populateNode == null) {
         String[] List_OF_Node = {
            "Frist Node", "Second Node", "Third Node", "Fourth Node", "Fifth Node"};
         stationRoot = new Tree(false, "Example Of Tree");

         for (int i = 0; i < List_OF_Node.length; i++) {
            Tree child = new Tree(true, List_OF_Node[i]);
            stationRoot.addChild(i, child);
         }
         populateNode = new Tree();
         populateNode.addChild(0, stationRoot);
      }
      return populateNode;
   }
}
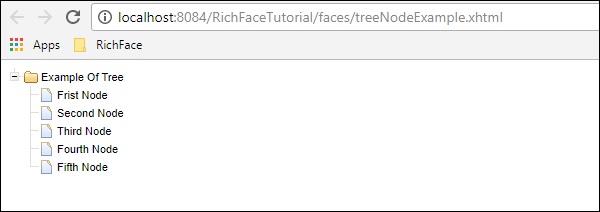
Приведенный выше фрагмент кода произведет следующий вывод в браузере.
<Богатые: treeModelAdaptor>
Этот компонент принимает карту в качестве входных данных, выполняет итерацию по ней и создает требуемый вывод в браузере. Всякий раз, когда нам нужно заполнить рекурсивную карту, мы можем использовать другой тег с именем <rich: recursiveTreeModelAdaptor> .
В следующем примере показано, как отобразить структуру проекта в браузере. В RichFaces 3 эти два тега используются <rich: treeNodeAdaptor> и <rich: recursiveTreeNodeAdaptor>.
<?xml version = "1.0" encoding = "UTF-8"?>
<!DOCTYPE html>
<html xmlns = "http://www.w3.org/1999/xhtml"
   xmlns:h = "http://java.sun.com/jsf/html"
   xmlns:f = "http://java.sun.com/jsf/core"
   xmlns:ui = "http://java.sun.com/jsf/facelets"
   xmlns:a4j = "http://richfaces.org/a4j"
   xmlns:rich = "http://richfaces.org/rich">

   <h:head>
      <title>Tree Model and Recursive Model Example</title>
   </h:head>

   <h:body>
      <h:form id = "form">
         <rich:tree toggleType = "AJAX" var = "item" style = "max-width: 400px">
            <rich:treeModelRecursiveAdaptor roots = "#{fileSystemBean.sourceRoots}"
               nodes = "#{item.directories}">

               <rich:treeNode>
                  #{item.shortPath}
               </rich:treeNode>

               <rich:treeModelAdaptor nodes = "#{item.files}">
                  <rich:treeNode>#{item}</rich:treeNode>
               </rich:treeModelAdaptor>
            </rich:treeModelRecursiveAdaptor>

         </rich:tree>
      </h:form>
   </h:body>

</html>
Нам нужно создать два новых Java-бина для этого примера. Ниже приведен фрагмент кода для класса bean-компонента «FileSystemBean.java», который содержит требуемое имя папки.
import java.util.List;
import javax.faces.bean.ManagedBean;
import javax.faces.bean.RequestScoped;

@ManagedBean
@RequestScoped

public class FileSystemBean {
   private static final String SRC_PATH = "/WEB-INF";
   private List<FileSystemNode> srcRoots;

   public synchronized List<FileSystemNode> getSourceRoots() {
      if (srcRoots == null) {
         srcRoots = new FileSystemNode(SRC_PATH).getDirectories();
      }
      return srcRoots;
   }
}
Ниже приведен фрагмент кода для bean-класса «FileSystemNode.java», в котором содержится требуемый конечный узел проекта.
import static com.google.common.base.Predicates.containsPattern;
import static com.google.common.base.Predicates.not;
import static com.google.common.collect.Iterables.filter;
import static com.google.common.collect.Iterables.transform;

import java.util.ArrayList;
import java.util.Collections;
import java.util.List;
import java.util.Set;

import javax.faces.context.ExternalContext;
import javax.faces.context.FacesContext;

import com.google.common.base.Function;
import com.google.common.collect.Iterables;
import com.google.common.collect.Lists;

public class FileSystemNode {
   private static final Function<String, FileSystemNode>
      FACTORY = new Function<String, FileSystemNode>() {

      public FileSystemNode apply(String from) {
         return new FileSystemNode(from.substring(0, from.length() - 1));
      };
   };
   private static final Function<String, String>
      TO_SHORT_PATH = new Function<String, String>() {

      public String apply(String from) {
         int idx = from.lastIndexOf('/');
         if (idx < 0) {
            return from;
         }
         return from.substring(idx + 1);
      };
   };
   private String path;
   private List<FileSystemNode> directories;
   private List<String> files;
   private String shortPath;

   public FileSystemNode(String path) {
      this.path = path;
      int idx = path.lastIndexOf('/');

      if (idx != -1) {
         shortPath = path.substring(idx + 1);
      } else {
         shortPath = path;
      }
   }
   public synchronized List<FileSystemNode> getDirectories() {
      if (directories == null) {
         directories = Lists.newArrayList();

         Iterables.addAll(directories, transform(filter(
            getResourcePaths(), containsPattern("/$")), FACTORY));
      }
      return directories;
   }
   public synchronized List<String> getFiles() {
      if (files == null) {
         files = new ArrayList<String>();

         Iterables.addAll(files, transform(filter(
            getResourcePaths(), not(containsPattern("/$"))), TO_SHORT_PATH));
      }
      return files;
   }
   private Iterable<String> getResourcePaths() {
      FacesContext facesContext = FacesContext.getCurrentInstance();
      ExternalContext externalContext = facesContext.getExternalContext();
      Set<String> resourcePaths = externalContext.getResourcePaths(this.path);

      if (resourcePaths == null) {
         resourcePaths = Collections.emptySet();
      }
      return resourcePaths;
   }
   public String getShortPath() {
      return shortPath;
   }
}
Приведенный выше пример выдаст следующий вывод в браузере.